I M E
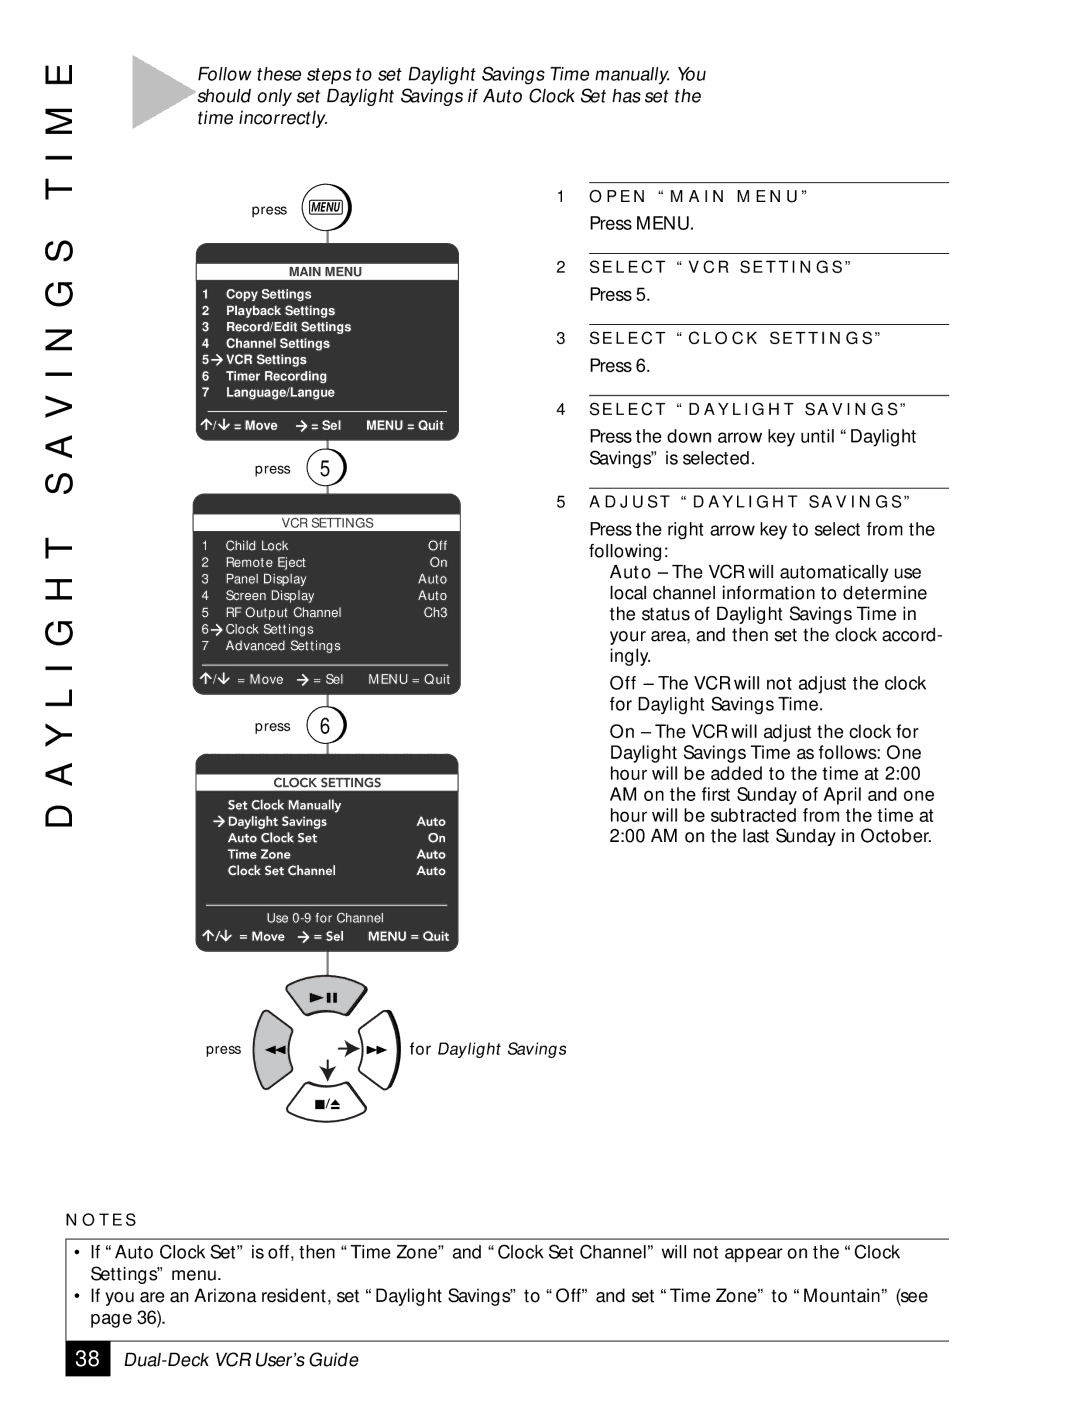
Follow these steps to set Daylight Savings Time manually. You should only set Daylight Savings if Auto Clock Set has set the time incorrectly.
D A Y L I G H T S A V I N G S T
press MENU
MAIN MENU
1 | Copy Settings |
| |
2 | Playback Settings |
| |
3 | Record/Edit Settings |
| |
4 | Channel Settings |
| |
5 | VCR Settings |
|
|
6 | Timer Recording |
| |
7 | Language/Langue |
| |
/ | = Move | = Sel | MENU = Quit |
| press | 5 |
|
VCR SETTINGS
1 | Child Lock |
| Off |
2 | Remote Eject |
| On |
3 | Panel Display |
| Auto |
4 | Screen Display | Auto | |
5 | RF Output Channel | Ch3 | |
6 | Clock Settings |
|
|
7 | Advanced Settings |
| |
/ | = Move | = Sel | MENU = Quit |
| press | 6 |
|
1O P E N “ M A I N M E N U ”
Press MENU.
2S E L E C T “ V C R S E T T I N G S ”
Press 5.
3S E L E C T “ C L O C K S E T T I N G S ”
Press 6.
4S E L E C T “ D AY L I G H T S AV I N G S ”
Press the down arrow key until “Daylight Savings” is selected.
5A D J U S T “ D AY L I G H T S AV I N G S ”
Press the right arrow key to select from the following:
Auto – The VCR will automatically use local channel information to determine the status of Daylight Savings Time in your area, and then set the clock accord- ingly.
Off – The VCR will not adjust the clock for Daylight Savings Time.
On – The VCR will adjust the clock for Daylight Savings Time as follows: One hour will be added to the time at 2:00 AM on the first Sunday of April and one hour will be subtracted from the time at 2:00 AM on the last Sunday in October.
Use
press | for Daylight Savings |
N O T E S
•If “Auto Clock Set” is off, then “Time Zone” and “Clock Set Channel” will not appear on the “Clock Settings” menu.
•If you are an Arizona resident, set “Daylight Savings” to “Off” and set “Time Zone” to “Mountain” (see page 36).
38
