Service
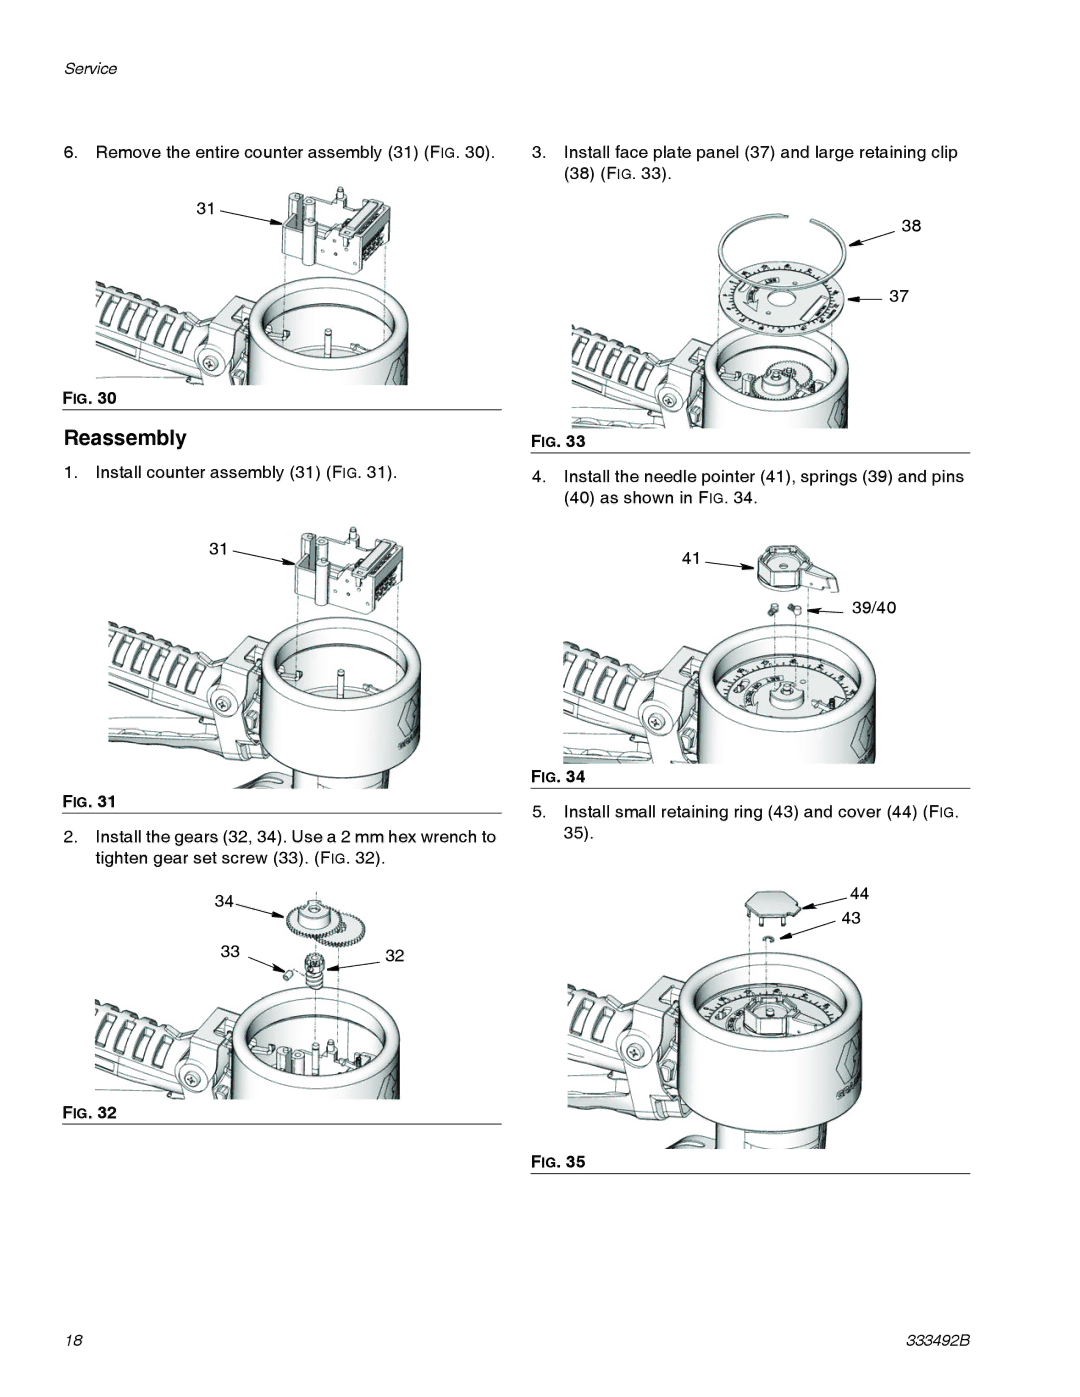
6.Remove the entire counter assembly (31) (FIG. 30). 31
FIG. 30
Reassembly
1.Install counter assembly (31) (FIG. 31).
31
FIG. 31
2.Install the gears (32, 34). Use a 2 mm hex wrench to tighten gear set screw (33). (FIG. 32).
34
3332
FIG. 32
3.Install face plate panel (37) and large retaining clip (38) (FIG. 33).
38
![]() 37
37
FIG. 33
4.Install the needle pointer (41), springs (39) and pins (40) as shown in FIG. 34.
41
![]() 39/40
39/40
FIG. 34
5.Install small retaining ring (43) and cover (44) (FIG. 35).
44
43
FIG. 35
18 | 333492B |
