Inlet Valve Fitting Removal/Service
Inlet Valve Fitting Removal/Service
5.Use a thin wire less than 1/16 in. (such as a paper clip) to check that the outlet valve fitting moves freely. If valve does not move freely, perform Outlet Valve Fitting Repair, page 26.
This equipment stays pressurized until pressure is manually relieved. To help prevent serious injury from pressurized fluid, such as skin injection, splashing fluid and moving parts, follow the Pressure Relief Procedure when you stop spraying and before cleaning, checking, or servicing the equipment.
Move sprayer to a
1.Engage trigger lock and pull prime/spray valve UP to release pressure.
ti18898a
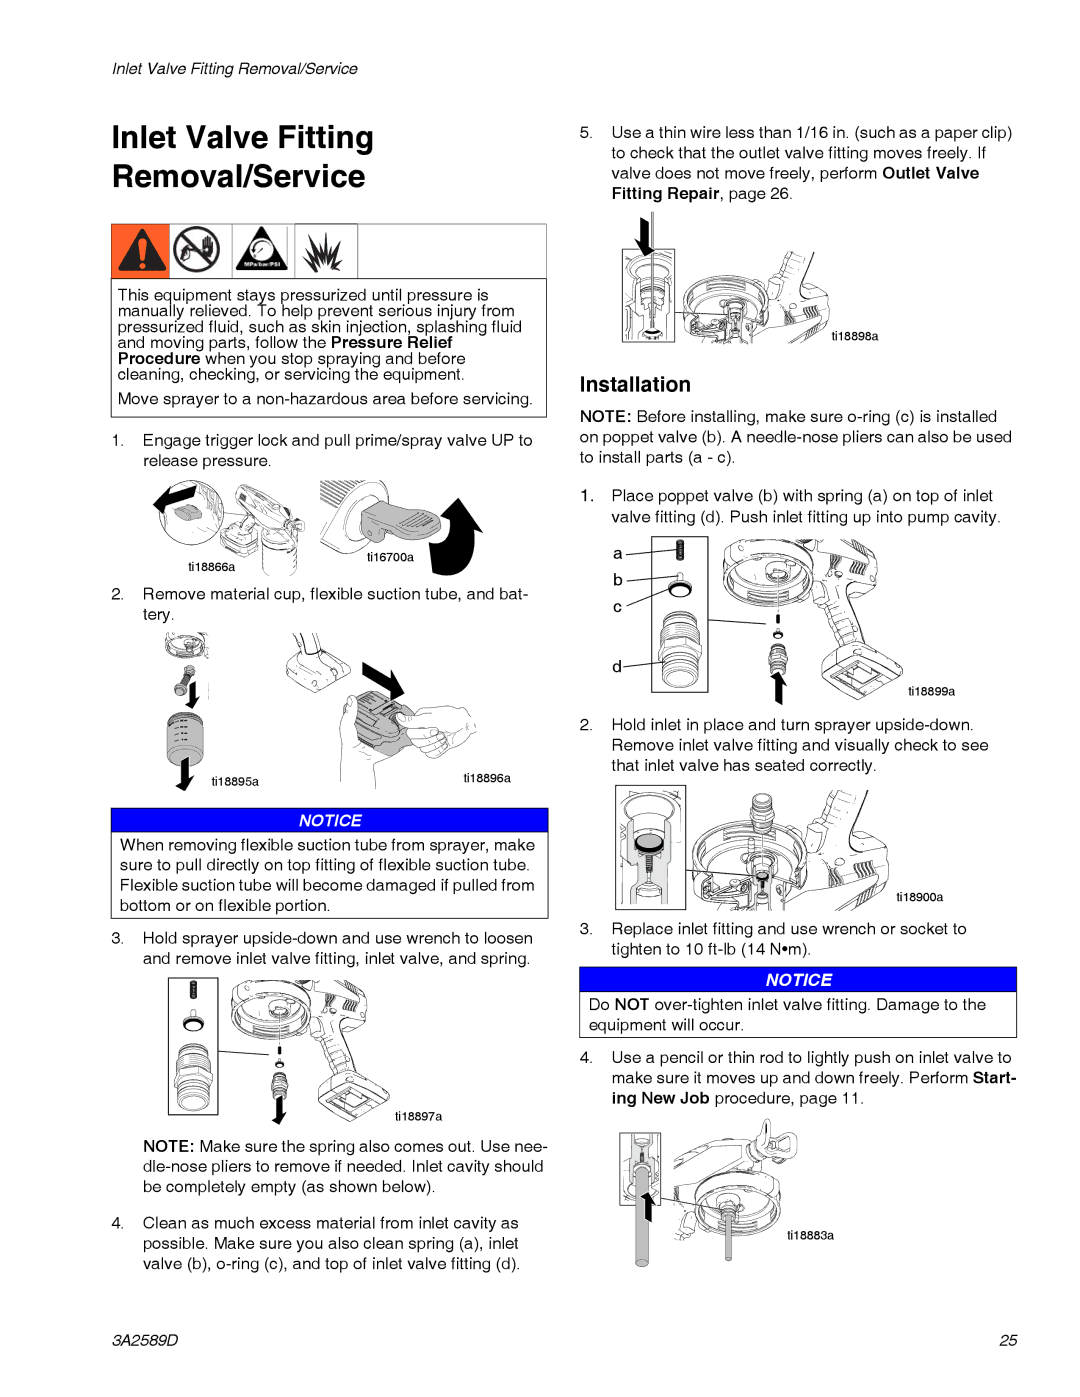
Installation
NOTE: Before installing, make sure
1.Place poppet valve (b) with spring (a) on top of inlet valve fitting (d). Push inlet fitting up into pump cavity.
ti18866a
ti16700a
a ![]()
![]() b
b ![]()
![]()
![]()
2.Remove material cup, flexible suction tube, and bat- tery.
ti18895a | ti18896a |
NOTICE
When removing flexible suction tube from sprayer, make sure to pull directly on top fitting of flexible suction tube. Flexible suction tube will become damaged if pulled from bottom or on flexible portion.
3.Hold sprayer
ti18897a
NOTE: Make sure the spring also comes out. Use nee-
4.Clean as much excess material from inlet cavity as possible. Make sure you also clean spring (a), inlet valve (b),
c ![]()
d![]()
![]()
ti15502ati18899a
2.Hold inlet in place and turn sprayer
ti18900a
3.Replace inlet fitting and use wrench or socket to tighten to 10
NOTICE
Do NOT
4.Use a pencil or thin rod to lightly push on inlet valve to make sure it moves up and down freely. Perform Start- ing New Job procedure, page 11.
ti15509a
ti18883a
3A2589D | 25 |