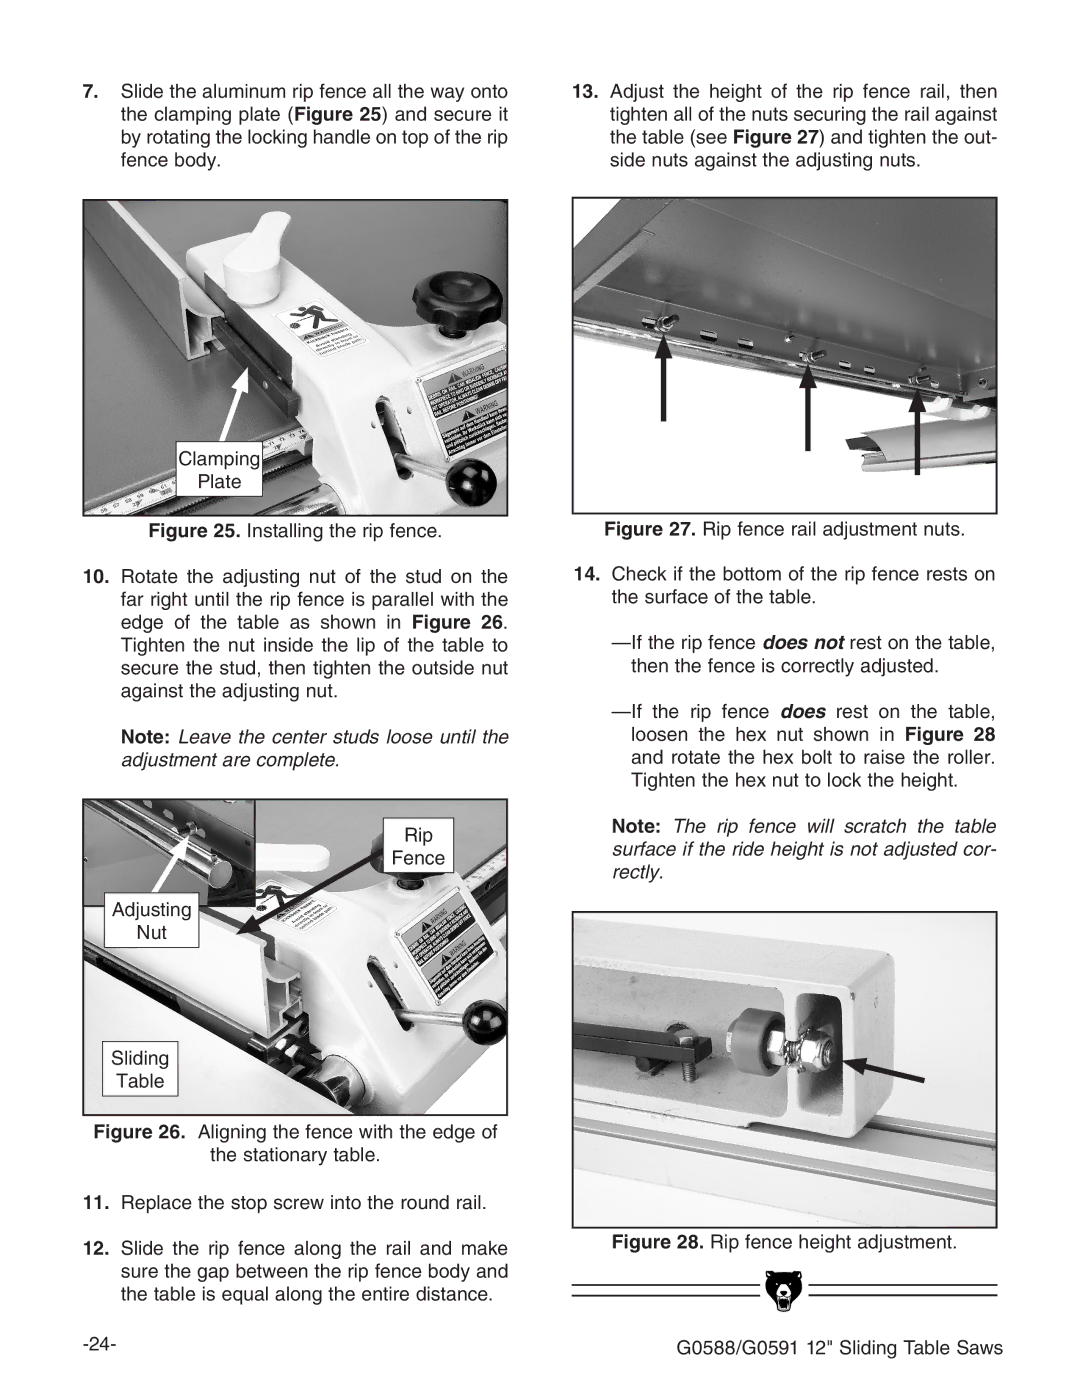
7.Slide the aluminum rip fence all the way onto the clamping plate (Figure 25) and secure it by rotating the locking handle on top of the rip fence body.
13.Adjust the height of the rip fence rail, then tighten all of the nuts securing the rail against the table (see Figure 27) and tighten the out- side nuts against the adjusting nuts.
Clamping
Plate
Figure 25. Installing the rip fence.
10.Rotate the adjusting nut of the stud on the far right until the rip fence is parallel with the edge of the table as shown in Figure 26. Tighten the nut inside the lip of the table to secure the stud, then tighten the outside nut against the adjusting nut.
Note: Leave the center studs loose until the adjustment are complete.
Rip |
Fence |
Adjusting |
Nut |
Sliding |
Table |
Figure 26. Aligning the fence with the edge of
the stationary table.
11.Replace the stop screw into the round rail.
12.Slide the rip fence along the rail and make sure the gap between the rip fence body and the table is equal along the entire distance.
Figure 27. Rip fence rail adjustment nuts.
14.Check if the bottom of the rip fence rests on the surface of the table.
—If the rip fence does not rest on the table, then the fence is correctly adjusted.
—If the rip fence does rest on the table, loosen the hex nut shown in Figure 28 and rotate the hex bolt to raise the roller. Tighten the hex nut to lock the height.
Note: The rip fence will scratch the table surface if the ride height is not adjusted cor- rectly.