Rip cutting using traditional table saw techniques:
1.Remove the crosscut fence.
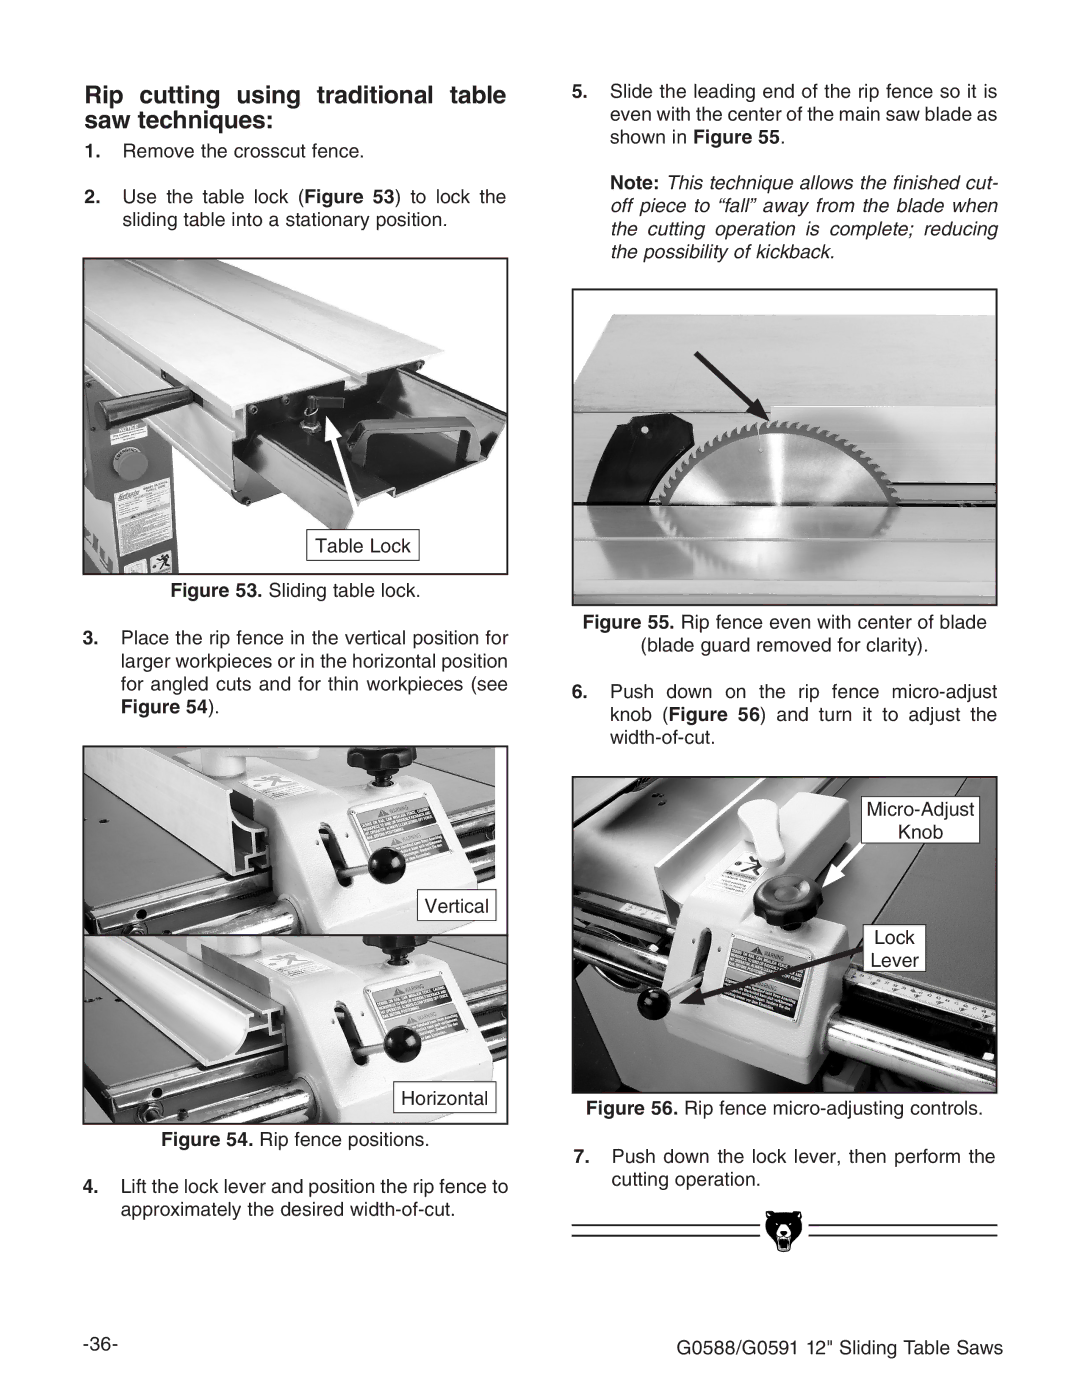
2.Use the table lock (Figure 53) to lock the sliding table into a stationary position.
5.Slide the leading end of the rip fence so it is even with the center of the main saw blade as shown in Figure 55.
Note: This technique allows the finished cut- off piece to “fall” away from the blade when the cutting operation is complete; reducing the possibility of kickback.
Table Lock
Figure 53. Sliding table lock.
3.Place the rip fence in the vertical position for larger workpieces or in the horizontal position for angled cuts and for thin workpieces (see Figure 54).
Vertical
Horizontal
Figure 54. Rip fence positions.
4.Lift the lock lever and position the rip fence to approximately the desired width-of-cut.
Figure 55. Rip fence even with center of blade
(blade guard removed for clarity).
6.Push down on the rip fence micro-adjust knob (Figure 56) and turn it to adjust the width-of-cut.
Micro-Adjust
Knob
Lock
Lever
Figure 56. Rip fence micro-adjusting controls.
7.Push down the lock lever, then perform the cutting operation.
G0588/G0591 12" Sliding Table Saws |
