Fence Angle Stops
You can quickly set the fence angle at 90º (per- pendicular to the tables), 45º inward, and 45º out- ward. This section provides instructions for setting the fence stops precisely at these angles.
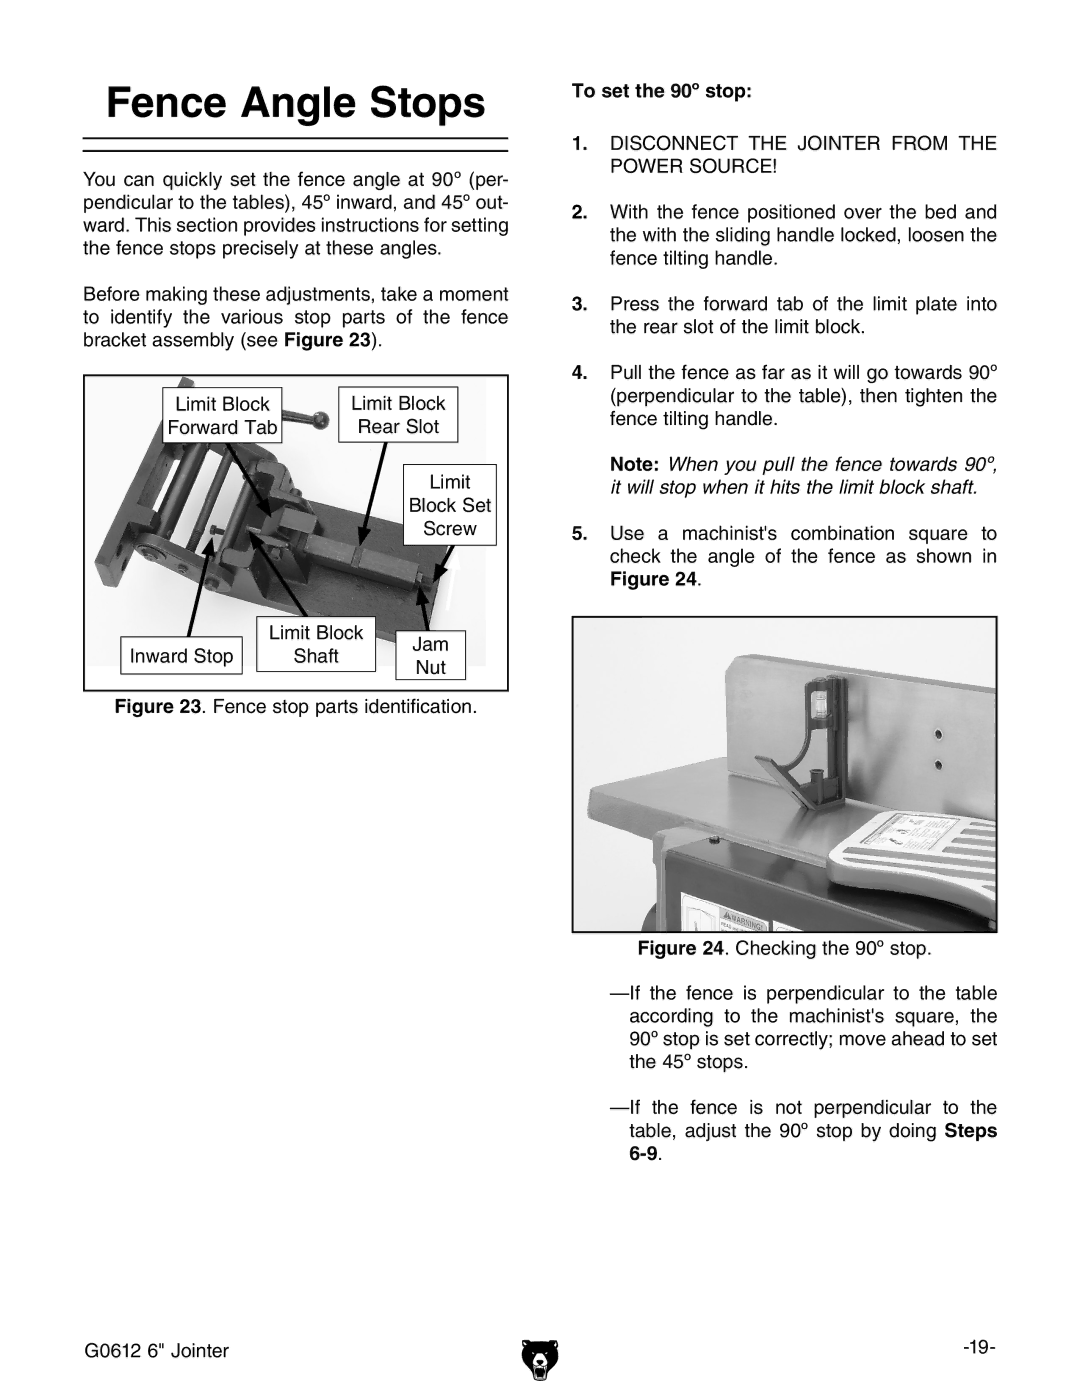
Before making these adjustments, take a moment to identify the various stop parts of the fence bracket assembly (see Figure 23).
Limit Block |
| Limit Block | |
Forward Tab |
| Rear Slot | |
|
|
| Limit |
|
|
| Block Set |
|
|
| Screw |
Limit Block | Jam | ||
Inward Stop | Shaft |
| |
| Nut | ||
|
|
| |
Figure 23. Fence stop parts identification.
To set the 90º stop:
1.DISCONNECT THE JOINTER FROM THE POWER SOURCE!
2.With the fence positioned over the bed and the with the sliding handle locked, loosen the fence tilting handle.
3.Press the forward tab of the limit plate into the rear slot of the limit block.
4.Pull the fence as far as it will go towards 90º (perpendicular to the table), then tighten the fence tilting handle.
Note: When you pull the fence towards 90º, it will stop when it hits the limit block shaft.
5.Use a machinist's combination square to check the angle of the fence as shown in Figure 24.
Figure 24. Checking the 90º stop.
—If the fence is perpendicular to the table according to the machinist's square, the 90º stop is set correctly; move ahead to set the 45º stops.
—If the fence is not perpendicular to the table, adjust the 90º stop by doing Steps 6-9.
G0612 6" Jointer |
