8.Use two 8mm wrenches to tighten the hex nut on the inward stop as you hold the stop in place.
9.Put the limit block back, bring the fence back to 90º and tighten the tilting handle.
To set the outward 45º stop:
1.DISCONNECT THE JOINTER FROM THE POWER SOURCE!
2.Loosen the fence tilting handle, remove the limit block and set it aside.
3.Tip the fence back (away from the table) until it stops.
Note: The fence will stop when the outward stop bolt hits the fence bracket.
4.Use a machinist's combination square to check the angle of the fence, as shown in
Figure 27.
Figure 27. Checking the outward 45º stop.
—If the fence is tilting away from the table at 45º, the outward stop is set correctly. Put the limit block back, bring the fence to 90° and tighten the tilting handle.
—If the fence is not tilting away from the table at 45º, do Steps 5 & 6 to set the outward stop correctly.
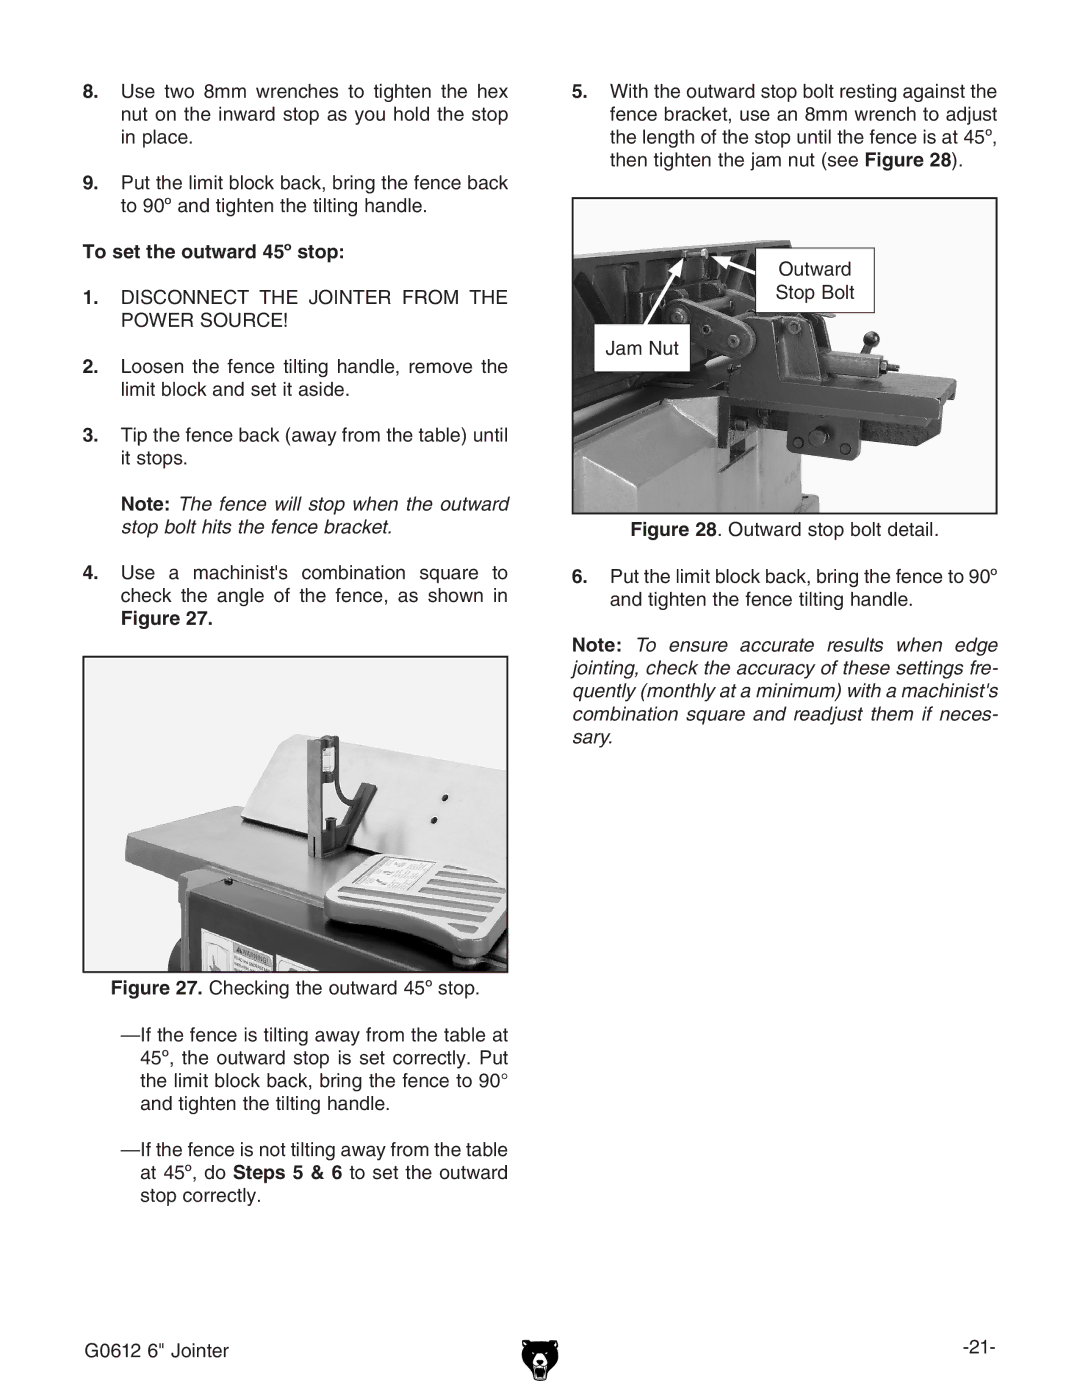
5.With the outward stop bolt resting against the fence bracket, use an 8mm wrench to adjust the length of the stop until the fence is at 45º, then tighten the jam nut (see Figure 28).
Outward
Stop Bolt
Jam Nut
Figure 28. Outward stop bolt detail.
6.Put the limit block back, bring the fence to 90º and tighten the fence tilting handle.
Note: To ensure accurate results when edge jointing, check the accuracy of these settings fre- quently (monthly at a minimum) with a machinist's combination square and readjust them if neces- sary.
G0612 6" Jointer |