Adjusting Saw
Frame Stop
The saw frame stop controls the overall forward movement of the saw frame. The proper setting will ensure that the blade cuts completely through the workpiece without cutting into the table or the vise. Adjust the frame saw stop whenever the blade is changed, fails to cut completely through the workpiece, or contacts the vise.
To adjust the saw frame stop:
1.Make sure the blade tracks properly and is correctly tensioned.
2.DISCONNECT BANDSAW FROM POWER!
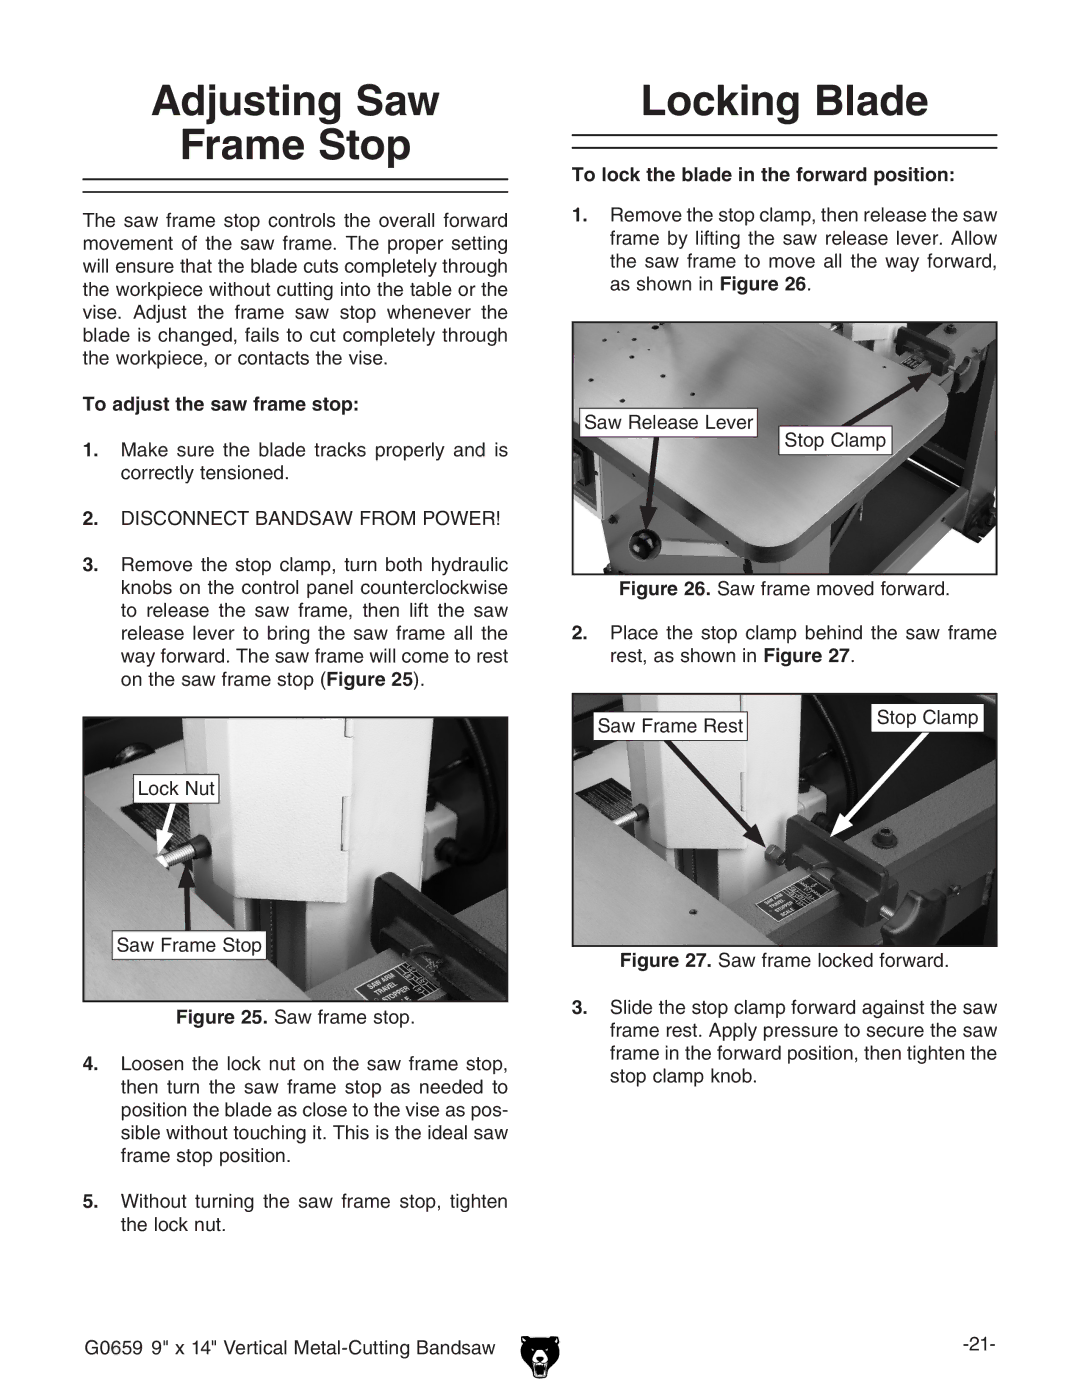
3.Remove the stop clamp, turn both hydraulic knobs on the control panel counterclockwise to release the saw frame, then lift the saw release lever to bring the saw frame all the way forward. The saw frame will come to rest on the saw frame stop (Figure 25).
Lock Nut
Saw Frame Stop
Figure 25. Saw frame stop.
4.Loosen the lock nut on the saw frame stop, then turn the saw frame stop as needed to position the blade as close to the vise as pos- sible without touching it. This is the ideal saw frame stop position.
5.Without turning the saw frame stop, tighten the lock nut.
Locking Blade
To lock the blade in the forward position:
1.Remove the stop clamp, then release the saw frame by lifting the saw release lever. Allow the saw frame to move all the way forward, as shown in Figure 26.
Saw Release Lever |
Stop Clamp |
Figure 26. Saw frame moved forward.
2.Place the stop clamp behind the saw frame rest, as shown in Figure 27.
Saw Frame Rest | Stop Clamp |
|
Figure 27. Saw frame locked forward.
3.Slide the stop clamp forward against the saw frame rest. Apply pressure to secure the saw frame in the forward position, then tighten the stop clamp knob.
G0659 9" x 14" Vertical |
