UL325 SERIES specifications
The GTO UL325 Series is a highly regarded line of gate operators, designed to meet the needs of both residential and commercial applications. With its commitment to safety, durability, and efficiency, the UL325 Series has set a standard in the industry for gate automation solutions.One of the main features of the GTO UL325 Series is its robust safety mechanisms. The operators are designed to comply with the rigorous UL 325 safety standards, which is essential for ensuring user safety and preventing accidents during gate operation. This includes advanced features such as obstacle detection, which allows the system to sense when an object is in the path of the gate and stop or reverse the motion to prevent harm or damage.
The UL325 Series comes with a reliable and efficient motor that provides powerful performance while operating gates of various sizes and weights. This versatility allows it to be used for a range of gate types, including swing gates and sliding gates. The motors are also designed for quiet operation, minimizing noise disturbances in residential areas.
Additionally, the GTO UL325 Series incorporates smart technology features that enhance user experience. The built-in remote control system allows users to open and close their gates with the simple push of a button from a distance. Some models also support compatibility with smartphone apps, providing users with a modern and convenient way to control their gates from anywhere.
Durability is another characteristic of the GTO UL325 Series. Constructed with high-quality materials, these gate operators are built to withstand harsh weather conditions, making them suitable for various climates. This longevity ensures that users receive a reliable product that will serve their needs for years to come.
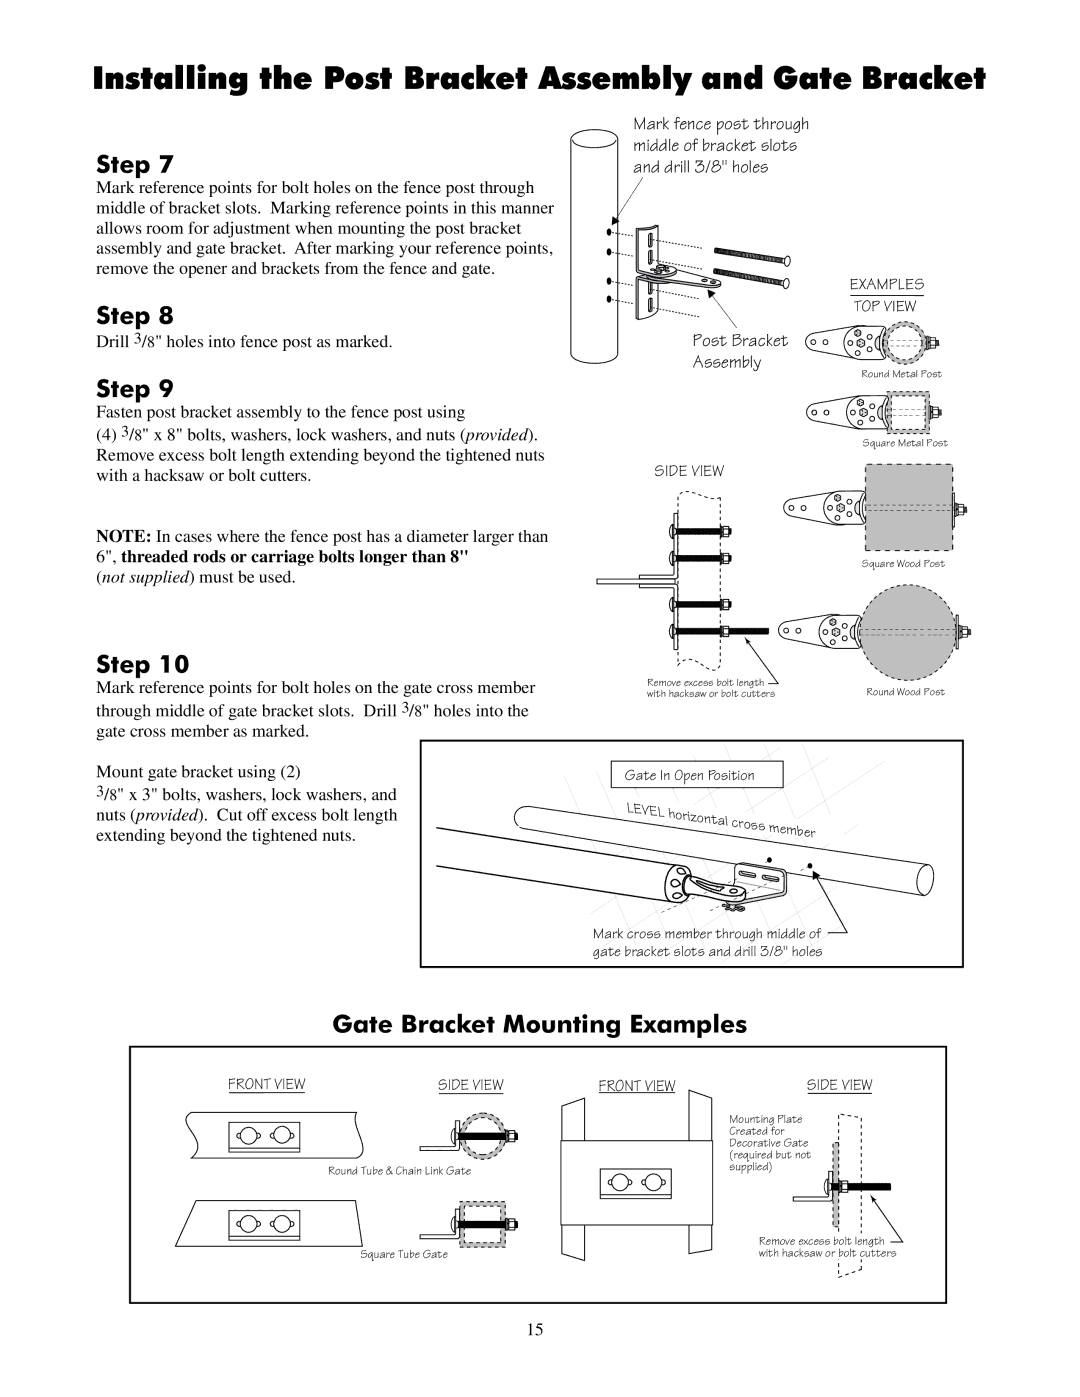
Another noteworthy aspect of the GTO UL325 Series is the ease of installation and maintenance. The operators are designed for straightforward installation, allowing both professionals and DIY enthusiasts to set them up with minimal hassle. Additionally, regular maintenance is simplified, with clear guidelines provided to ensure longevity and reliability.
In conclusion, the GTO UL325 Series is an exemplary choice for those seeking a reliable, safe, and technologically advanced gate operator. With its emphasis on safety, versatility, and user-friendly features, it stands out in the marketplace, making it an ideal solution for both residential and commercial gate automation needs. Investing in a GTO UL325 operator means investing in peace of mind, knowing that one has a dependable and efficient gating solution.

