Installation Steps and Start-Up Procedures, Cont.
Step 13 Complete the Installation
A.Open the inlet valve and turn on the electricity to the water heater. For gas water heaters, return the gas cock to “On.”
B.Open a cold water tap and allow the appliance to flush for 20 minutes or until approximately 72 gallons have passed through the appliance. This procedure is required to meet NSF compliance. Verify the flow rate on the controller, which indicates water flow. See Figure 1.
C.Ensure that the bypass is left in the “Service” position. See Bypass Valve.
D.Adjust the blending valve if it is being used. See Blending Valve.
E.Test the water at the test port to verify soft water.
F.Place the covers on both of the cabinets.
Bypass Valve
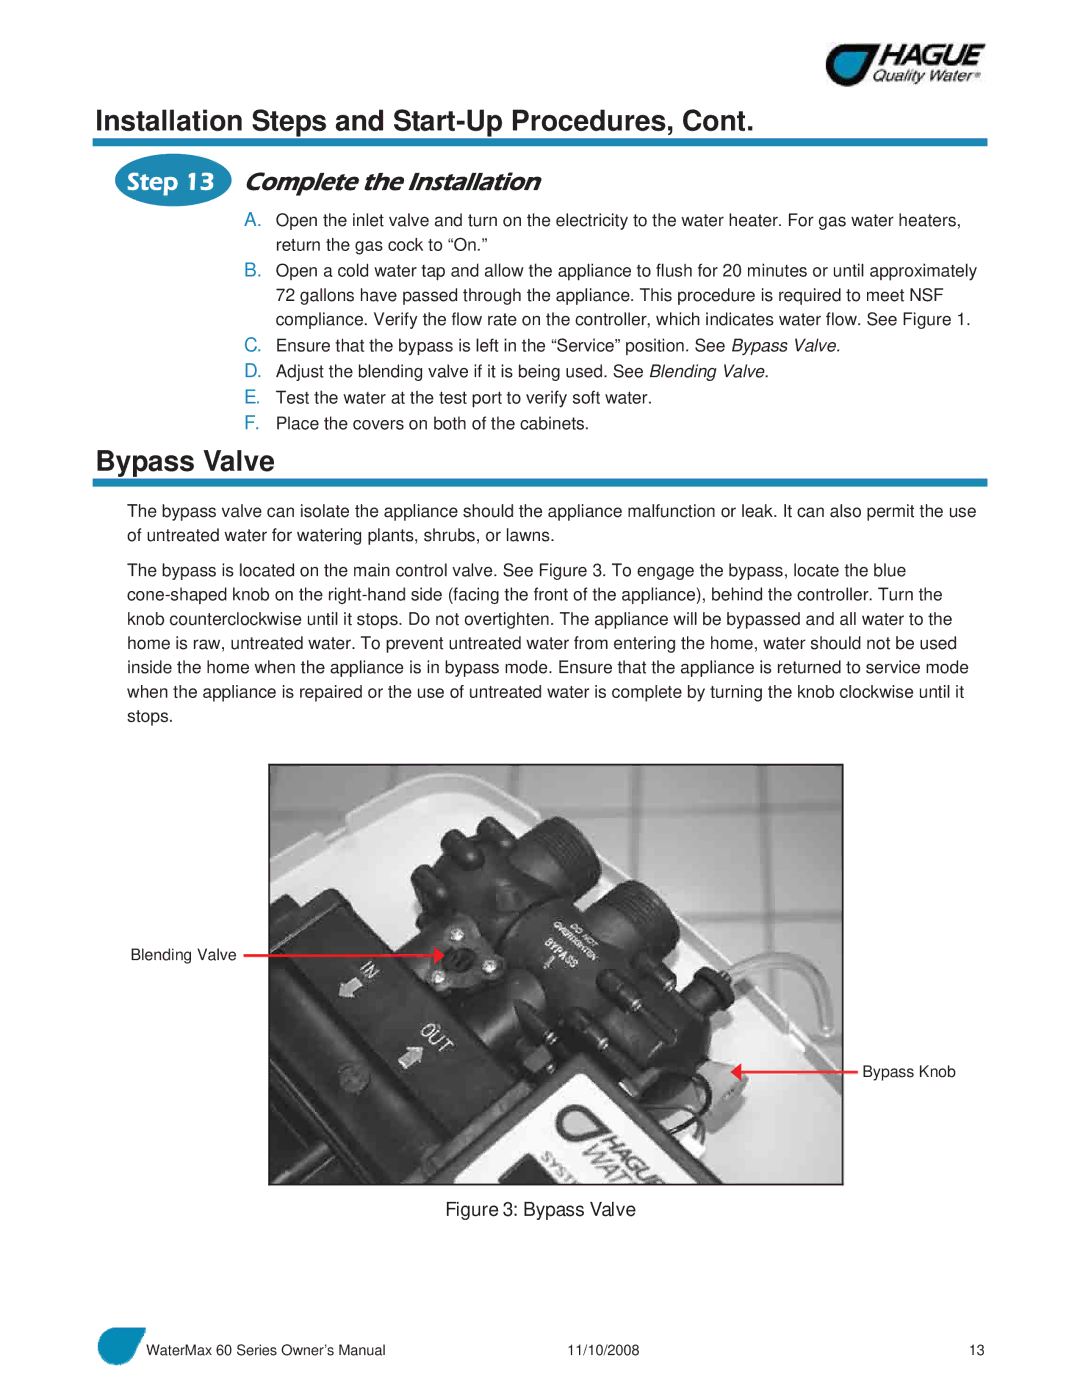
The bypass valve can isolate the appliance should the appliance malfunction or leak. It can also permit the use of untreated water for watering plants, shrubs, or lawns.
The bypass is located on the main control valve. See Figure 3. To engage the bypass, locate the blue
Blending Valve ![]()
Bypass Knob
Figure 3: Bypass Valve
WaterMax 60 Series Owner’s Manual | 11/10/2008 | 13 |