Remove Switch Key (27b)
Miter Gaugeto Lock Shaper/Router Assembly (1)
Slide along channel in this direction
Hold workpiece ![]() against face of gauge
against face of gauge
Table Top (7) channel
Figure 24
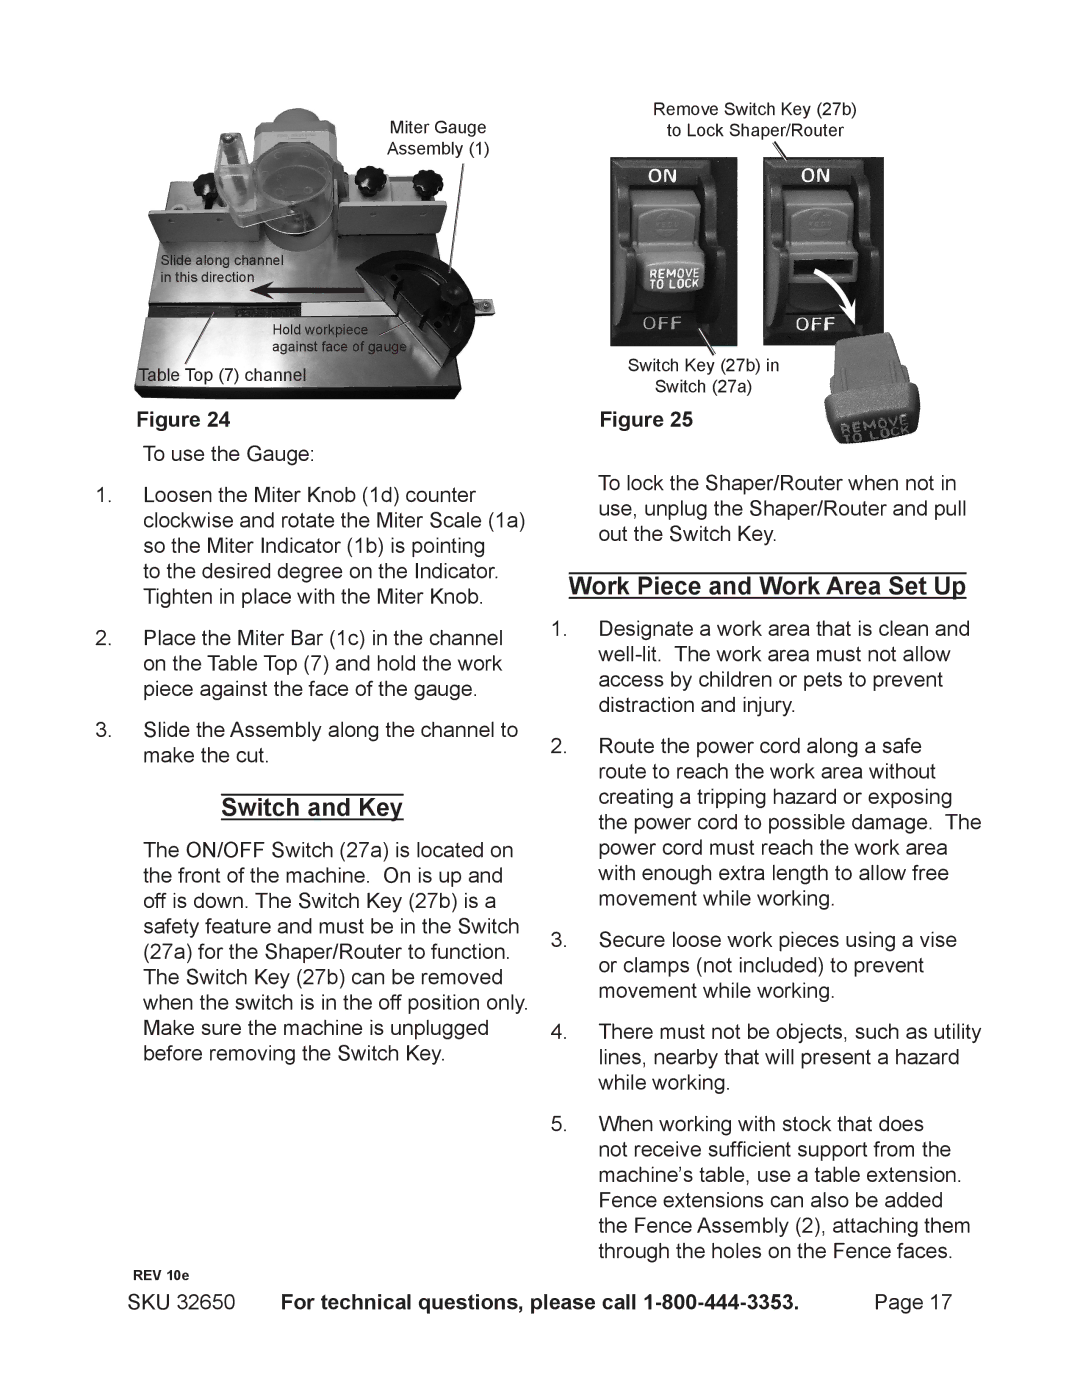
To use the Gauge:
1.Loosen the Miter Knob (1d) counter clockwise and rotate the Miter Scale (1a) so the Miter Indicator (1b) is pointing
to the desired degree on the Indicator. Tighten in place with the Miter Knob.
2.Place the Miter Bar (1c) in the channel on the Table Top (7) and hold the work piece against the face of the gauge.
3.Slide the Assembly along the channel to make the cut.
Switch and Key
The ON/OFF Switch (27a) is located on the front of the machine. On is up and off is down. The Switch Key (27b) is a safety feature and must be in the Switch (27a) for the Shaper/Router to function. The Switch Key (27b) can be removed when the switch is in the off position only. Make sure the machine is unplugged before removing the Switch Key.
REV 10e
Switch Key (27b) in
Switch (27a)
Figure 25
To lock the Shaper/Router when not in use, unplug the Shaper/Router and pull out the Switch Key.
Work Piece and Work Area Set Up
1.Designate a work area that is clean and
2.Route the power cord along a safe route to reach the work area without creating a tripping hazard or exposing the power cord to possible damage. The power cord must reach the work area with enough extra length to allow free movement while working.
3.Secure loose work pieces using a vise or clamps (not included) to prevent movement while working.
4.There must not be objects, such as utility lines, nearby that will present a hazard while working.
5.When working with stock that does not receive sufficient support from the machine’s table, use a table extension. Fence extensions can also be added the Fence Assembly (2), attaching them through the holes on the Fence faces.
SKU 32650 | For technical questions, please call | Page 17 |
