1.27 | OPERATING THE TRACTOR | 1.27 |
ATTACHING/DETACHING THE SWEEPER COLLECTOR
continued.
-Whilst the sweeper collector is in this position fit the drive belt. Fitment of the belt will be easier if the sweeper collector is pushed forwards so that the upper linkage pins engage the recesses immediately below the linkage hooks.
-Remove the tool tray which is situated under the seat. Place the drive belt over the sweeper clutch and engage into the pulley.
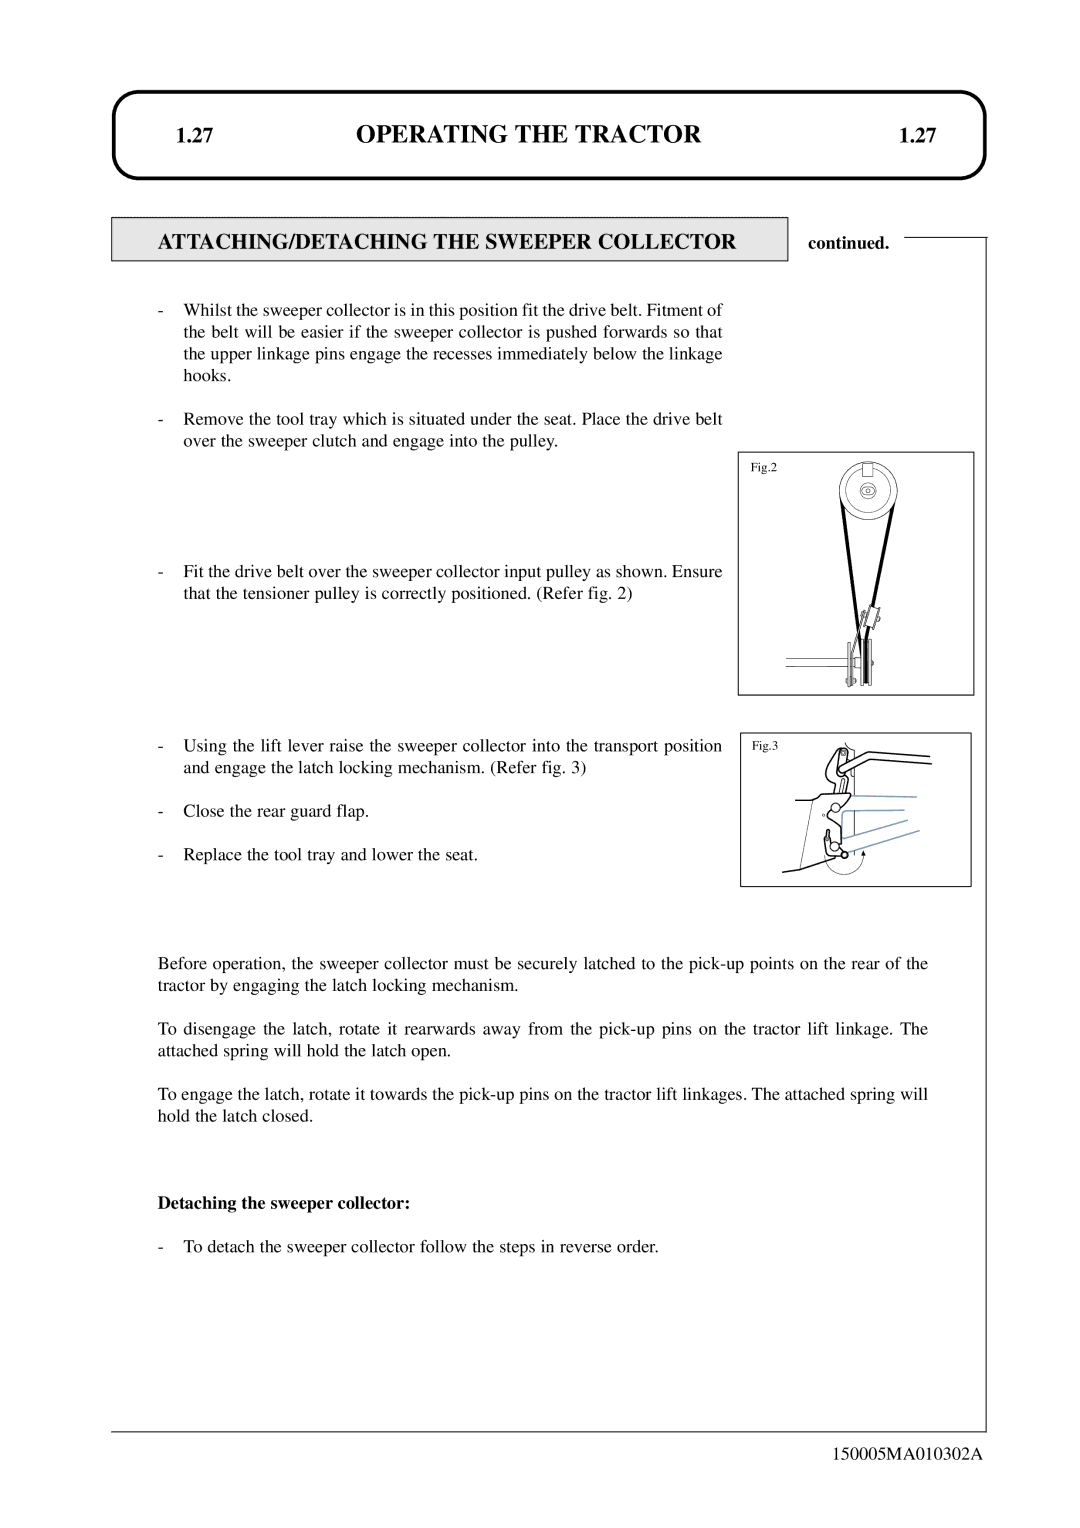
Fig.2
-Fit the drive belt over the sweeper collector input pulley as shown. Ensure that the tensioner pulley is correctly positioned. (Refer fig. 2)
-Using the lift lever raise the sweeper collector into the transport position and engage the latch locking mechanism. (Refer fig. 3)
Fig.3
- Close the rear guard flap.
- Replace the tool tray and lower the seat.
Before operation, the sweeper collector must be securely latched to the
To disengage the latch, rotate it rearwards away from the
To engage the latch, rotate it towards the
Detaching the sweeper collector:
-To detach the sweeper collector follow the steps in reverse order.
150005MA010302A