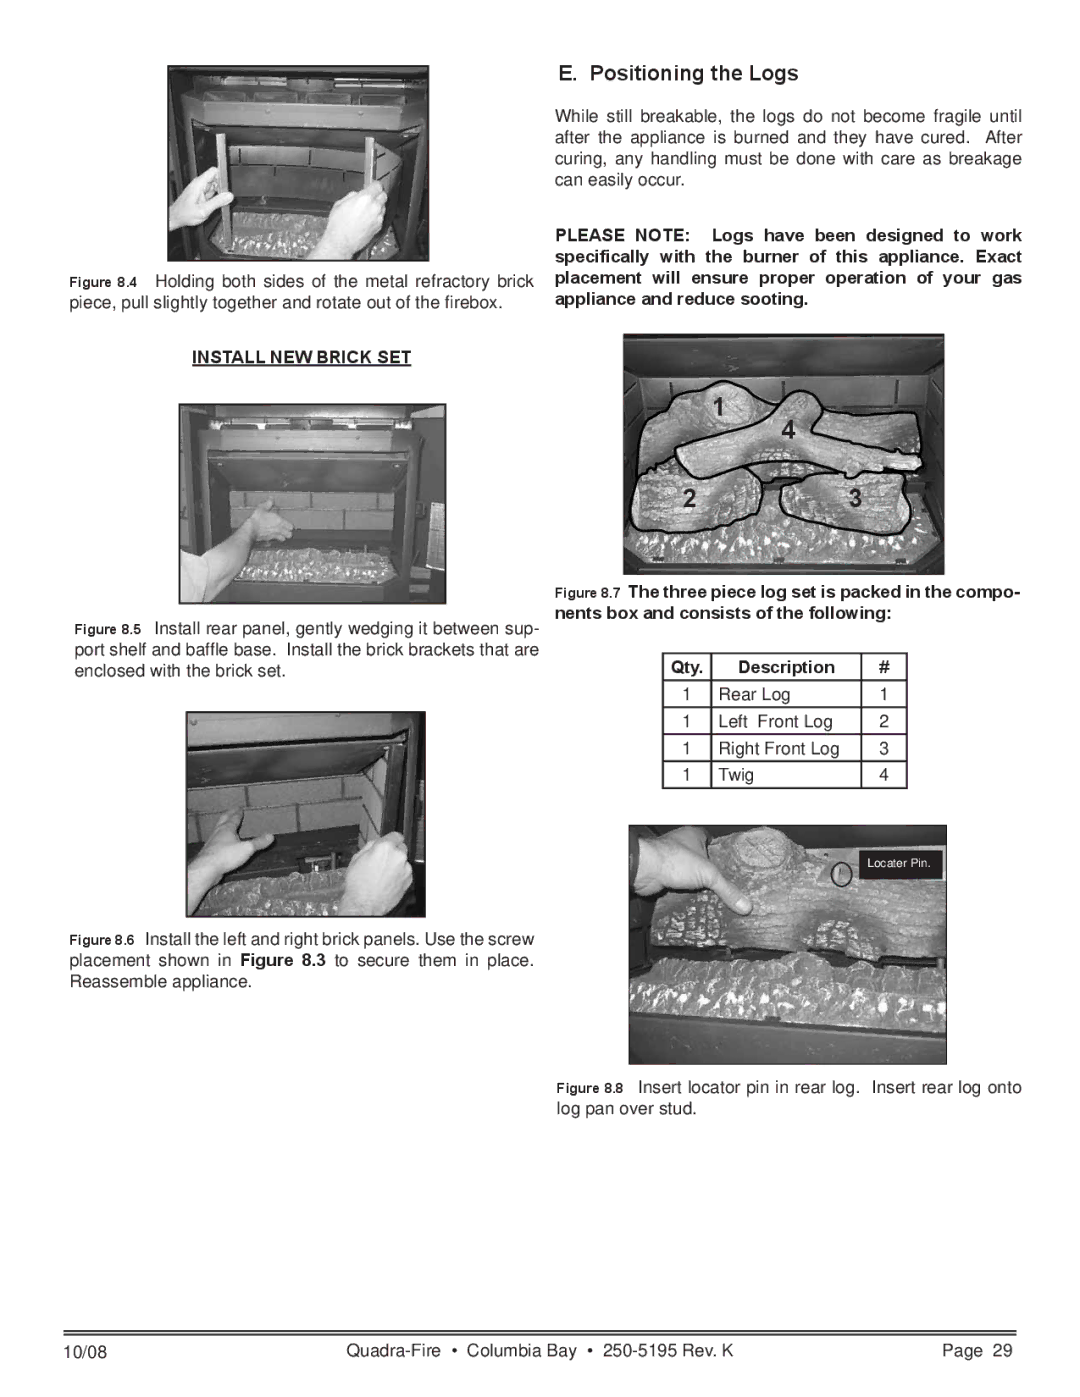
Figure 8.4 Holding both sides of the metal refractory brick piece, pull slightly together and rotate out of the firebox.
E. Positioning the Logs
While still breakable, the logs do not become fragile until after the appliance is burned and they have cured. After curing, any handling must be done with care as breakage can easily occur.
PLEASE NOTE: Logs have been designed to work specifically with the burner of this appliance. Exact placement will ensure proper operation of your gas appliance and reduce sooting.
INSTALL NEW BRICK SET
1
4
23
Figure 8.5 Install rear panel, gently wedging it between sup- port shelf and baffle base. Install the brick brackets that are enclosed with the brick set.
Figure 8.7 The three piece log set is packed in the compo- nents box and consists of the following:
Qty. | Description | # |
1 | Rear Log | 1 |
1 | Left Front Log | 2 |
1 | Right Front Log | 3 |
1 | Twig | 4 |
Figure 8.6 Install the left and right brick panels. Use the screw placement shown in Figure 8.3 to secure them in place. Reassemble appliance.
Locater Pin.
Figure 8.8 Insert locator pin in rear log. Insert rear log onto log pan over stud.
10/08 |
| Page 29 |
