R
Santa Fe Pellet Stove
E.Optional Gold or Nickel Grille & Trim Ring
1.Installing the Grille
Included in Kit: (1) Grille
Tools Required: Phillips head screwdriver
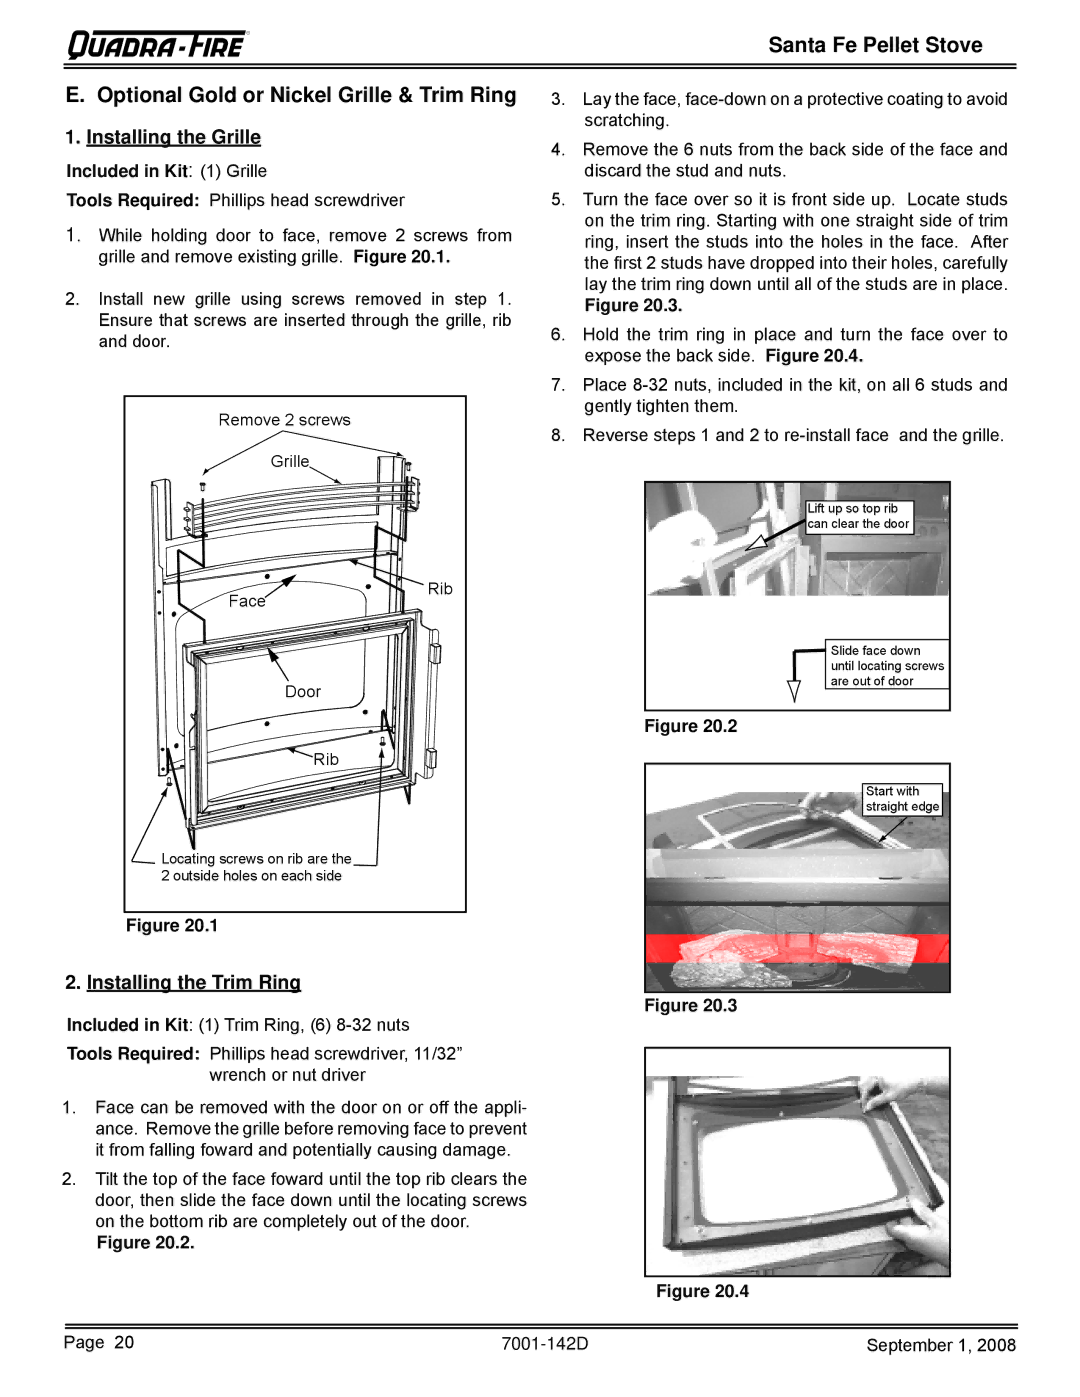
1. While holding door to face, remove 2 screws from grille and remove existing grille. Figure 20.1.
2.Install new grille using screws removed in step 1. Ensure that screws are inserted through the grille, rib and door.
Remove 2 screws
Grille
Face![]()
![]()
![]()
![]() Rib
Rib
Door
![]() Rib
Rib
Locating screws on rib are the 2 outside holes on each side
Figure 20.1
2.Installing the Trim Ring
Included in Kit: (1) Trim Ring, (6)
Tools Required: Phillips head screwdriver, 11/32” wrench or nut driver
1.Face can be removed with the door on or off the appli- ance. Remove the grille before removing face to prevent it from falling foward and potentially causing damage.
2.Tilt the top of the face foward until the top rib clears the door, then slide the face down until the locating screws on the bottom rib are completely out of the door.
Figure 20.2.
3.Lay the face,
4.Remove the 6 nuts from the back side of the face and discard the stud and nuts.
5.Turn the face over so it is front side up. Locate studs on the trim ring. Starting with one straight side of trim ring, insert the studs into the holes in the face. After the first 2 studs have dropped into their holes, carefully lay the trim ring down until all of the studs are in place.
Figure 20.3.
6.Hold the trim ring in place and turn the face over to expose the back side. Figure 20.4.
7.Place
8.Reverse steps 1 and 2 to
Lift up so top rib
![]() can clear the door
can clear the door
![]() Slide face down until locating screws are out of door
Slide face down until locating screws are out of door
Figure 20.2
Start with straight edge
Figure 20.3
Figure 20.4
Page 20 | September 1, 2008 |