I. Front Door Glass Assembly Installation | J. Inner Glass Door Assembly Replacement |
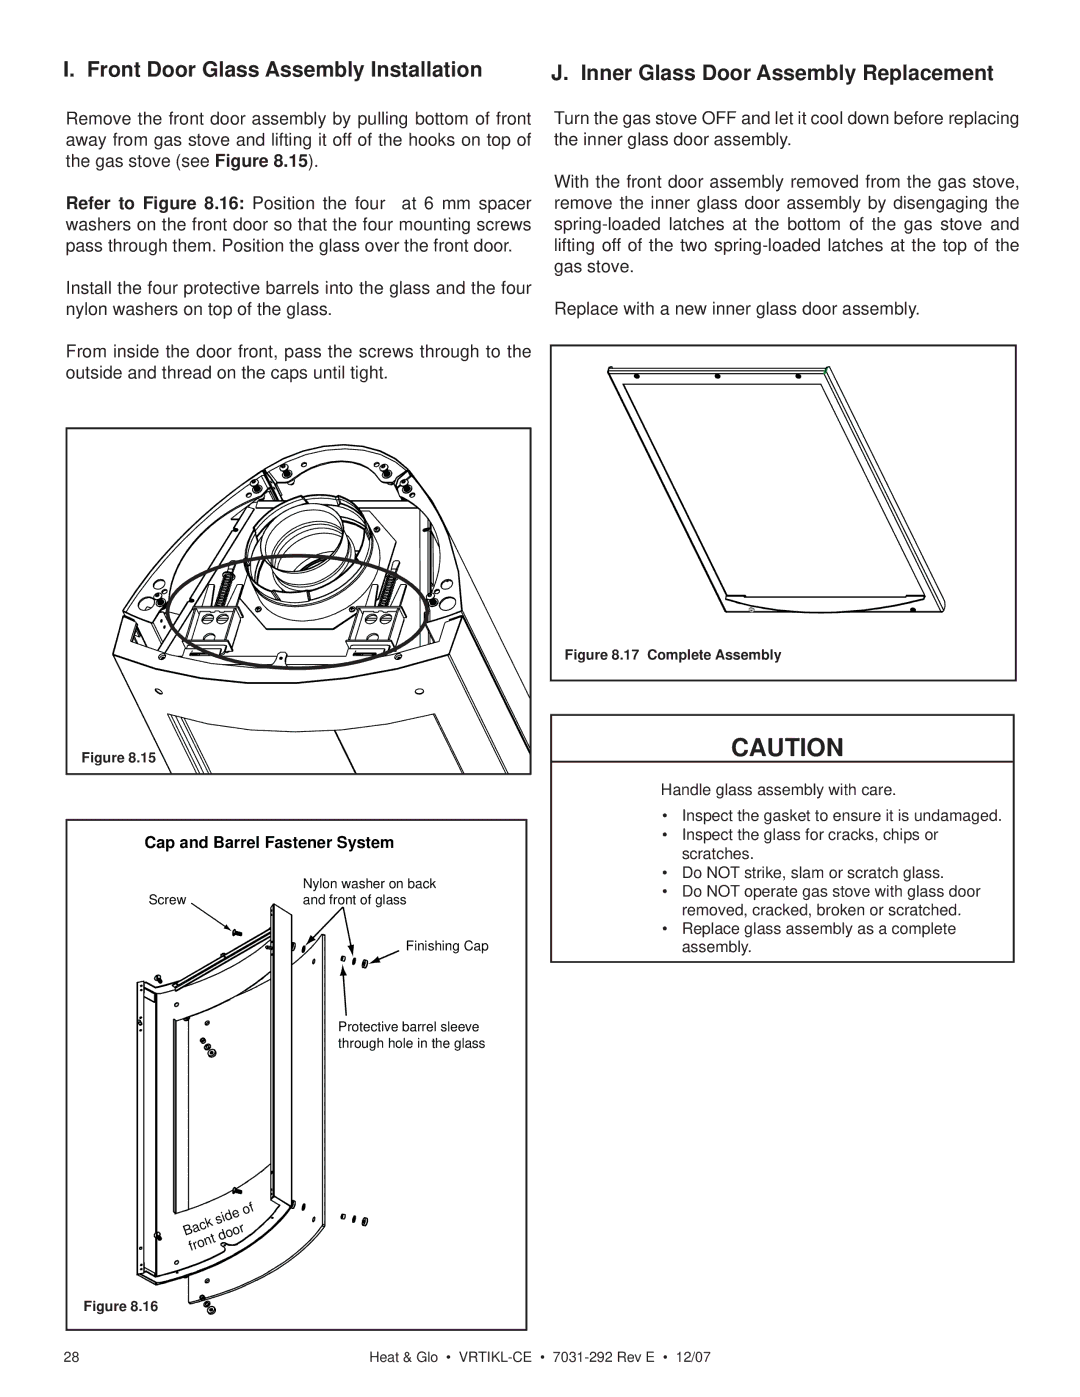
Remove the front door assembly by pulling bottom of front away from gas stove and lifting it off of the hooks on top of the gas stove (see Figure 8.15).
Refer to Figure 8.16: Position the four flat 6 mm spacer washers on the front door so that the four mounting screws pass through them. Position the glass over the front door.
Install the four protective barrels into the glass and the four nylon washers on top of the glass.
From inside the door front, pass the screws through to the outside and thread on the caps until tight.
Figure 8.15
Cap and Barrel Fastener System
| Nylon washer on back |
Screw | and front of glass |
Finishing Cap
Protective barrel sleeve through hole in the glass
of side Back door front
Figure 8.16
Turn the gas stove OFF and let it cool down before replacing the inner glass door assembly.
With the front door assembly removed from the gas stove, remove the inner glass door assembly by disengaging the
Replace with a new inner glass door assembly.
Figure 8.17 Complete Assembly
CAUTION
Handle glass assembly with care.
•Inspect the gasket to ensure it is undamaged.
•Inspect the glass for cracks, chips or scratches.
•Do NOT strike, slam or scratch glass.
•Do NOT operate gas stove with glass door removed, cracked, broken or scratched.
•Replace glass assembly as a complete assembly.
28 | Heat & Glo • |
