14 Appliance Setup |
|
| |
A. Remove Fixed Glass Assembly |
|
| |
See Section 14.I. |
|
| |
B. Remove the Shipping Materials |
|
| |
Remove shipping materials from inside or underneath the |
|
| |
firebox. |
|
|
|
C. Clean the Appliance |
|
| |
Clean/vacuum any sawdust that may have accumulated |
|
| |
inside the firebox or underneath in the control cavity. |
|
| |
D. Accessories |
|
| |
Install approved accessories per instructions included |
|
| |
with accessories. Contact your dealer for a list of ap- |
|
| |
proved accessories. |
|
| |
WARNING! Risk of Fire and Electric Shock! Use ONLY |
|
| |
Hearth & Home |
|
| |
sories with this appliance. Using |
|
| |
could result in a safety hazard and will void the warranty. |
|
| |
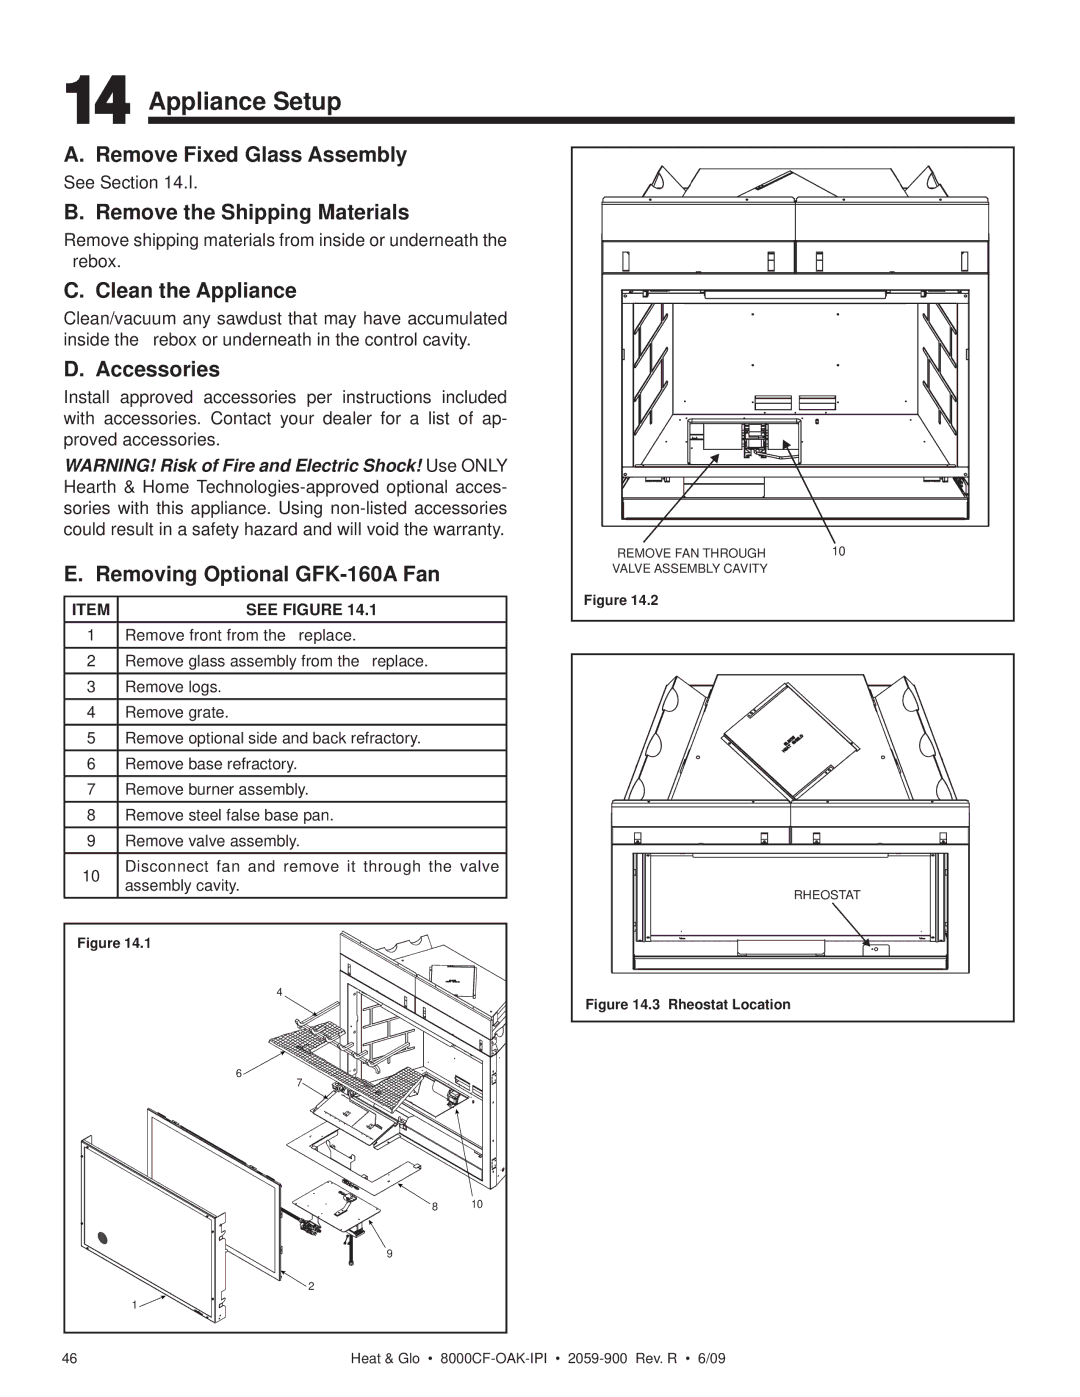
E. Removing Optional | REMOVE FAN THROUGH | 10 | |
VALVE ASSEMBLY CAVITY |
| ||
|
| ||
ITEM | SEE FIGURE 14.1 | Figure 14.2 |
|
|
| ||
1 | Remove front from the fireplace. |
|
|
2 | Remove glass assembly from the fireplace. |
|
|
3 | Remove logs. |
|
|
4 | Remove grate. |
|
|
5 | Remove optional side and back refractory. |
|
|
6 | Remove base refractory. |
|
|
7 | Remove burner assembly. |
|
|
8 | Remove steel false base pan. |
|
|
9 | Remove valve assembly. |
|
|
10 | Disconnect fan and remove it through the valve |
|
|
assembly cavity. |
|
| |
|
| RHEOSTAT | |
|
|
| |
Figure 14.1 |
|
|
| 4 | Figure 14.3 Rheostat Location |
|
| |
| 6 |
|
| 7 |
|
| 8 | 10 |
| 9 |
|
| 2 |
|
1 |
|
|
46 | Heat & Glo • | |