H. Install the Log Assembly
If the gas logs have been factory installed they should not need to be positioned. If the logs have been packaged separately, refer to the following instructions.
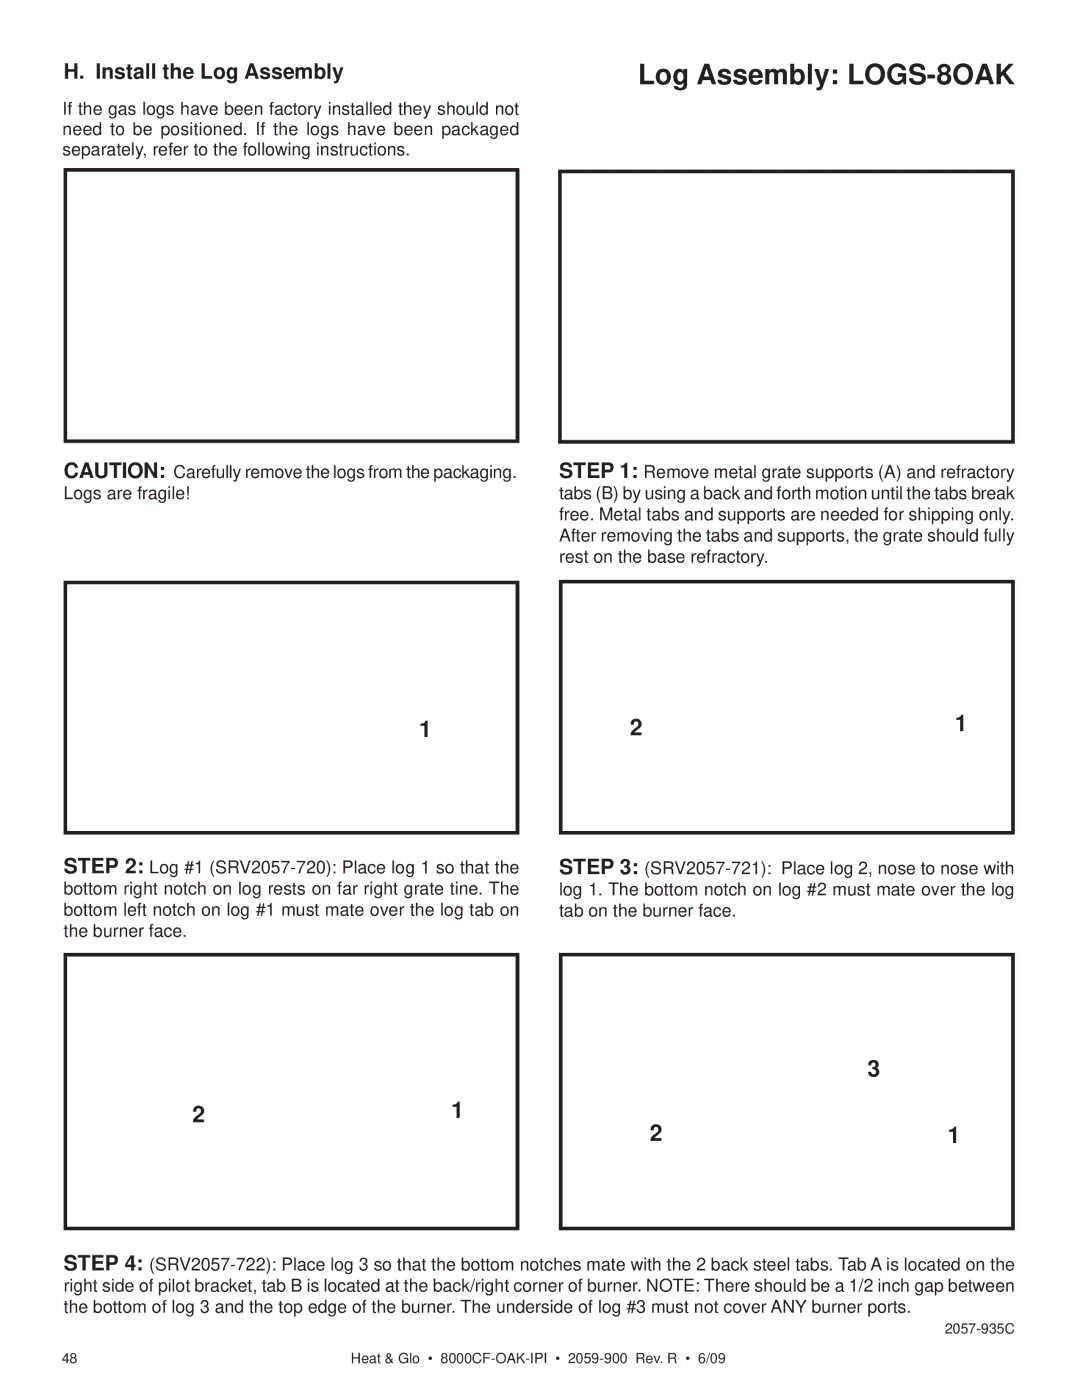
Log Assembly: LOGS-8OAK
LOG TABS
B A  A B
A B
B AB
CAUTION: Carefully remove the logs from the packaging. Logs are fragile!
STEP 1: Remove metal grate supports (A) and refractory tabs (B) by using a back and forth motion until the tabs break free. Metal tabs and supports are needed for shipping only. After removing the tabs and supports, the grate should fully rest on the base refractory.
LOG TAB
1
2 | 1 |
STEP 2: Log #1
STEP 3:
AB
21
3
21
STEP 4:
right side of pilot bracket, tab B is located at the back/right corner of burner. NOTE: There should be a 1/2 inch gap between the bottom of log 3 and the top edge of the burner. The underside of log #3 must not cover ANY burner ports.
48 | Heat & Glo • |