Connection to the control signal terminal
1.Mouse functions
(1)Turn off the main power switches of the projector and computer and connect the two units with the cable provided or an optional suitable commercially available cable. Disconnect the USB cable from the projector.
(2)Turn on the main switch of the projector (the POWER indicator lamp will light green).
(3)Press the INPUT button of the projector or the RGB button of the remote control and select the input where the computer is to be connected.
(4)Turn on the computer power supply.
(5)Start the mouse function.
If the mouse has not been started, reboot the computer (soft reboot or reboot buttons).
(6)Refer to page 10 concerning remote control operation.
(7)Varying the force with which the DISK PAD button is pressed varies the speed of mouse operation.
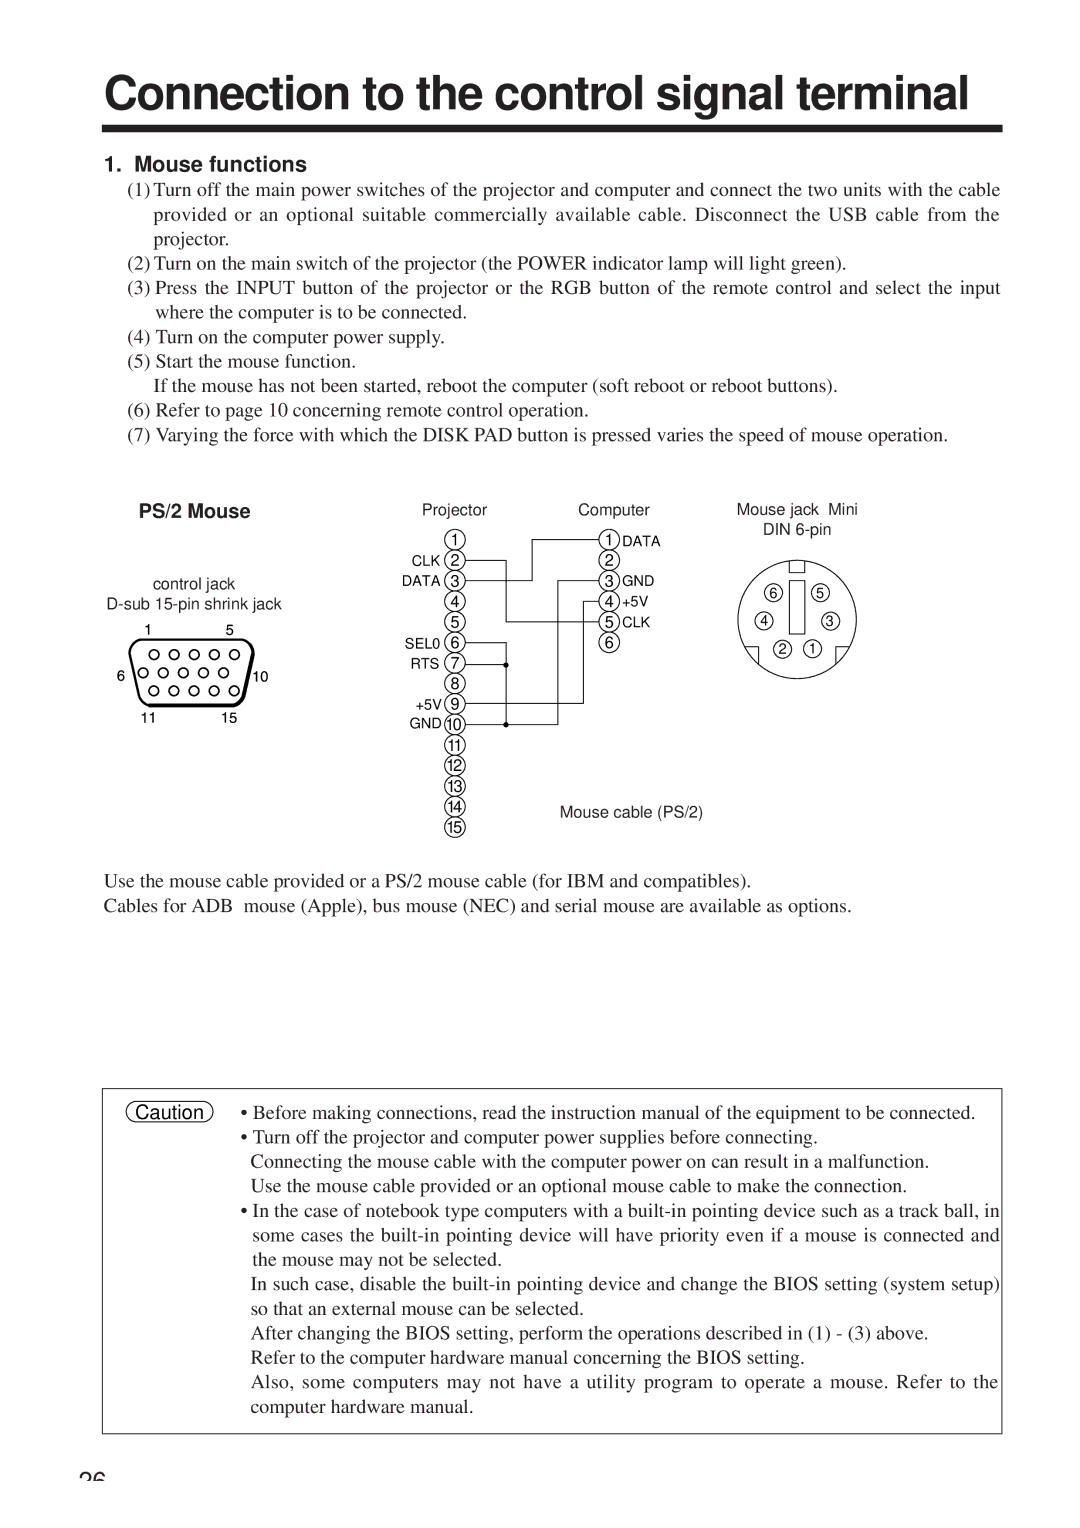
PS/2 Mouse | Projector | Computer | Mouse jack Mini | |||
|
| 1 | 1 | DATA | DIN | |
|
|
|
| |||
| CLK 2 | 2 |
|
|
| |
control jack | DATA 3 | 3 | GND | 6 | 5 | |
| 4 | 4 | +5V | |||
| 4 | 3 | ||||
|
| 5 | 5 | CLK | ||
| SEL0 | 6 | 6 |
| 2 | 1 |
| RTS | 7 |
|
| ||
|
|
|
|
| ||
|
| 8 |
|
|
|
|
+5V | 9 |
GND | 10 |
11
12
13
14Mouse cable (PS/2)
Use the mouse cable provided or a PS/2 mouse cable (for IBM and compatibles).
Cables for ADB mouse (Apple), bus mouse (NEC) and serial mouse are available as options.
Caution • Before making connections, read the instruction manual of the equipment to be connected.
• Turn off the projector and computer power supplies before connecting.
Connecting the mouse cable with the computer power on can result in a malfunction. Use the mouse cable provided or an optional mouse cable to make the connection.
•In the case of notebook type computers with a
In such case, disable the
After changing the BIOS setting, perform the operations described in (1) - (3) above. Refer to the computer hardware manual concerning the BIOS setting.
Also, some computers may not have a utility program to operate a mouse. Refer to the computer hardware manual.
26
