01EN01DVDS253A(AU).book Page 39 Wednesday, June 7, 2006 3:39 PM

Instant Timer Recording

Instant Timer Recording allows you to make a recording easily of a preset length without using the program timer.

1.Follow steps 1-4 as shown left (Basic Recording from a TV).

2.Press z (REC) repeatedly to select the recording time length.

Recording starts after the first press. Each subsequent press increases the recording time within free space (maximum 240 minutes).

The recording time is displayed on the TV screen. At the end of the recording, the recorder will stop recording and shut off.

Checking the Recording Time

Press z (REC) once to check the recording time. The recalled setting will automatically return to the TV screen for a moment.

Also, remaining time of recording is shown in the display window.

To Extend the Recording Time

The recording time can be extended anytime by pressing z (REC).

Each subsequent press increases the recording time within free space (maximum 240 minutes).

Caution

If the recorder is unplugged (or there is a power failure) while the recorder is recording, the program being recorded will be lost from the beginning.

Timer Recording

This recorder can be programmed to record up to 16


programs within a period of 1 month. For unattended


recording, the timer needs to know the channels to be


recorded, the starting and ending time.


Note:

Recording

If you use a completely blank disc for timer recording,


you must format the disc before starting timer


recording. (Refer to “Disc Format” on page 22.)


Turn the recorder off for timer recording.


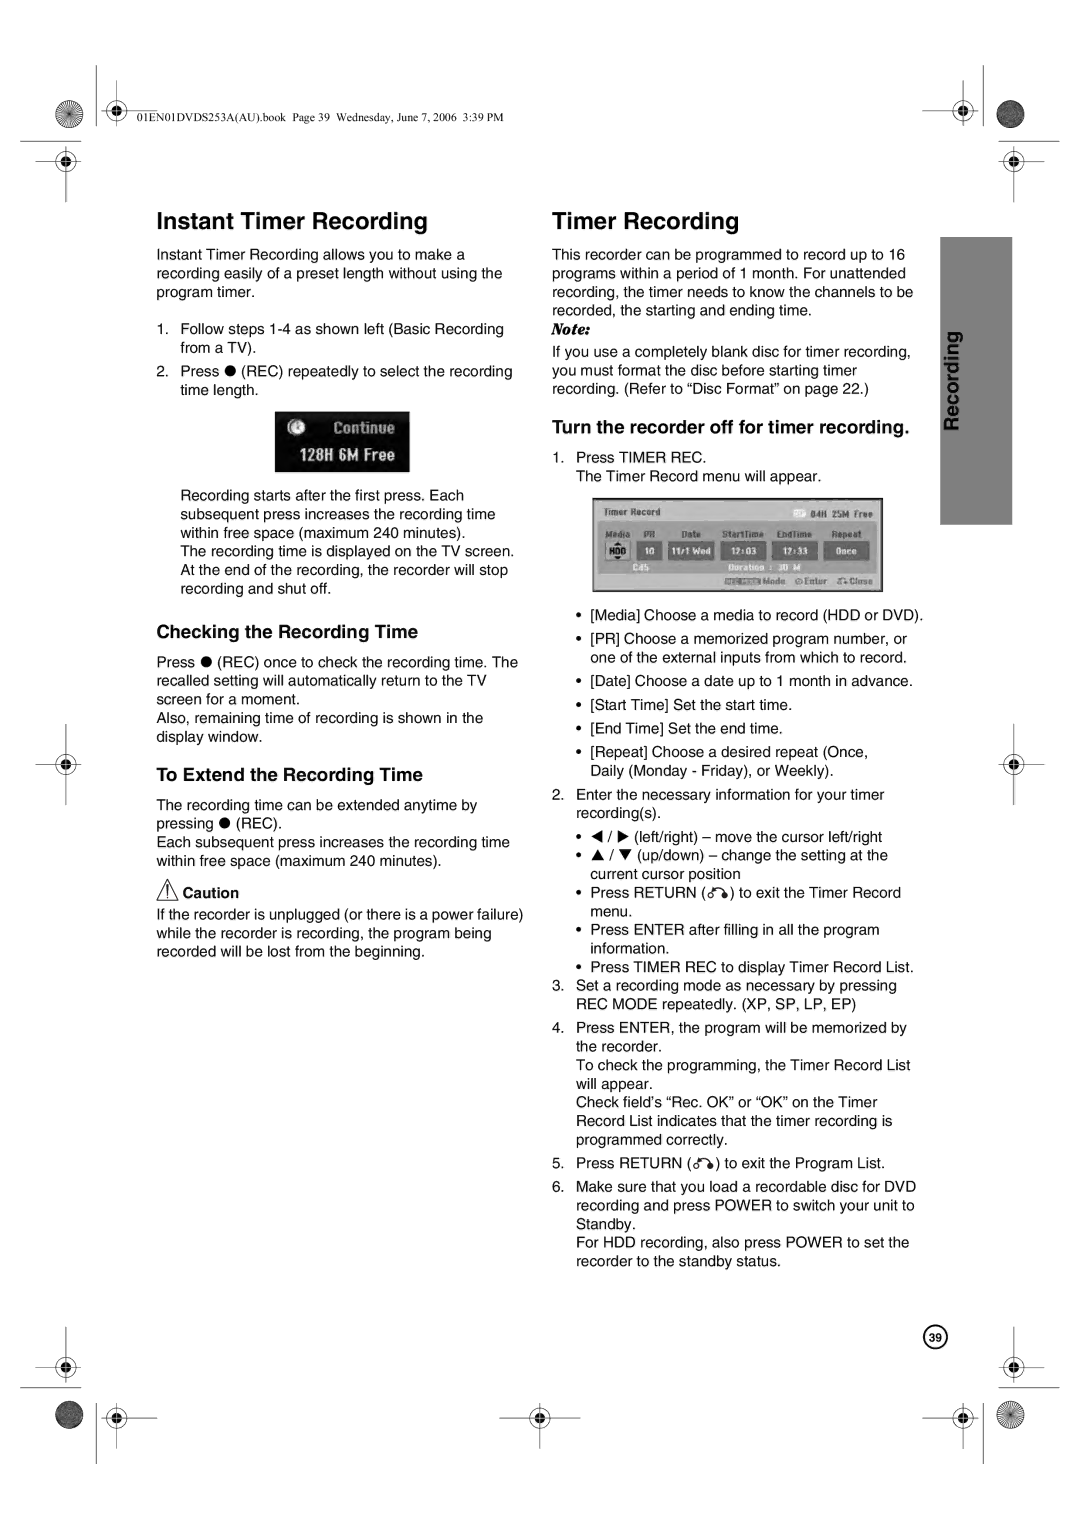
1. Press TIMER REC.


The Timer Record menu will appear.


[Media] Choose a media to record (HDD or DVD).

[PR] Choose a memorized program number, or one of the external inputs from which to record.

[Date] Choose a date up to 1 month in advance.

[Start Time] Set the start time.

[End Time] Set the end time.

[Repeat] Choose a desired repeat (Once, Daily (Monday - Friday), or Weekly).

2.Enter the necessary information for your timer recording(s).

W / X (left/right) – move the cursor left/right

S / T (up/down) – change the setting at the current cursor position

Press RETURN ( ) to exit the Timer Record menu.

Press ENTER after filling in all the program information.

Press TIMER REC to display Timer Record List.

3.Set a recording mode as necessary by pressing REC MODE repeatedly. (XP, SP, LP, EP)

4.Press ENTER, the program will be memorized by the recorder.

To check the programming, the Timer Record List will appear.

Check field’s “Rec. OK” or “OK” on the Timer Record List indicates that the timer recording is programmed correctly.

5.Press RETURN ( ) to exit the Program List.

6.Make sure that you load a recordable disc for DVD recording and press POWER to switch your unit to Standby.

For HDD recording, also press POWER to set the recorder to the standby status.

39

Page 39
Image 39
Hitachi DV-DS163A, DV-DS253A manual Instant Timer Recording, Checking the Recording Time, To Extend the Recording Time

DV-DS253A, DV-DS163A specifications

The Hitachi DV-DS163A and DV-DS253A are two versatile DVD players that deliver an impressive array of features designed to enhance your home entertainment experience. With a focus on quality and convenience, these players cater to a wide range of multimedia needs.

The DV-DS163A is a compact and user-friendly model that supports a variety of disc formats including DVD-Video, DVD-R/RW, and CD. One of its main features is the progressive scan output, ensuring a clearer, sharper picture by reducing motion blur and making it ideal for viewing high-quality video content. This player is equipped with a 3D digital comb filter that improves video quality by reducing unwanted artifacts and enhancing color accuracy, bringing your movies and shows to life.

On the other hand, the DV-DS253A takes the experience a step further by offering additional features such as an integrated USB port that allows users to play media directly from flash drives. This enhances its versatility, enabling users to enjoy not just DVDs, but also digital files containing cherished family videos, photos, or music collections. Further enhancing the audio experience, both players support Dolby Digital and DTS output, ensuring that sound reproduction is as rich and immersive as the visuals.

Built with user convenience in mind, the Hitachi DV-DS163A and DV-DS253A boast straightforward navigation through their on-screen menus. The remote control makes it easy to access features such as the bookmark function, which allows viewers to save specific scenes for quick access later. Additionally, both models support multiple language subtitles and audio tracks, catering to diverse audiences and enhancing the overall viewing experience.

In terms of design, both models feature a sleek, modern look that fits seamlessly into any home theater setup. They are compact enough to be placed in various spaces, whether mounted in an entertainment center or standing alone as part of a media display.

In conclusion, the Hitachi DV-DS163A and DV-DS253A stand out as reliable, feature-rich DVD players that marry performance with convenience. With advanced video technologies, extensive media compatibility, and user-friendly navigation, these models are excellent choices for anyone looking to enhance their home movie experience. Whether enjoying classic films or current releases, Hitachi's offerings live up to the demands of modern entertainment.