! Turn off and disconnect in- put power.
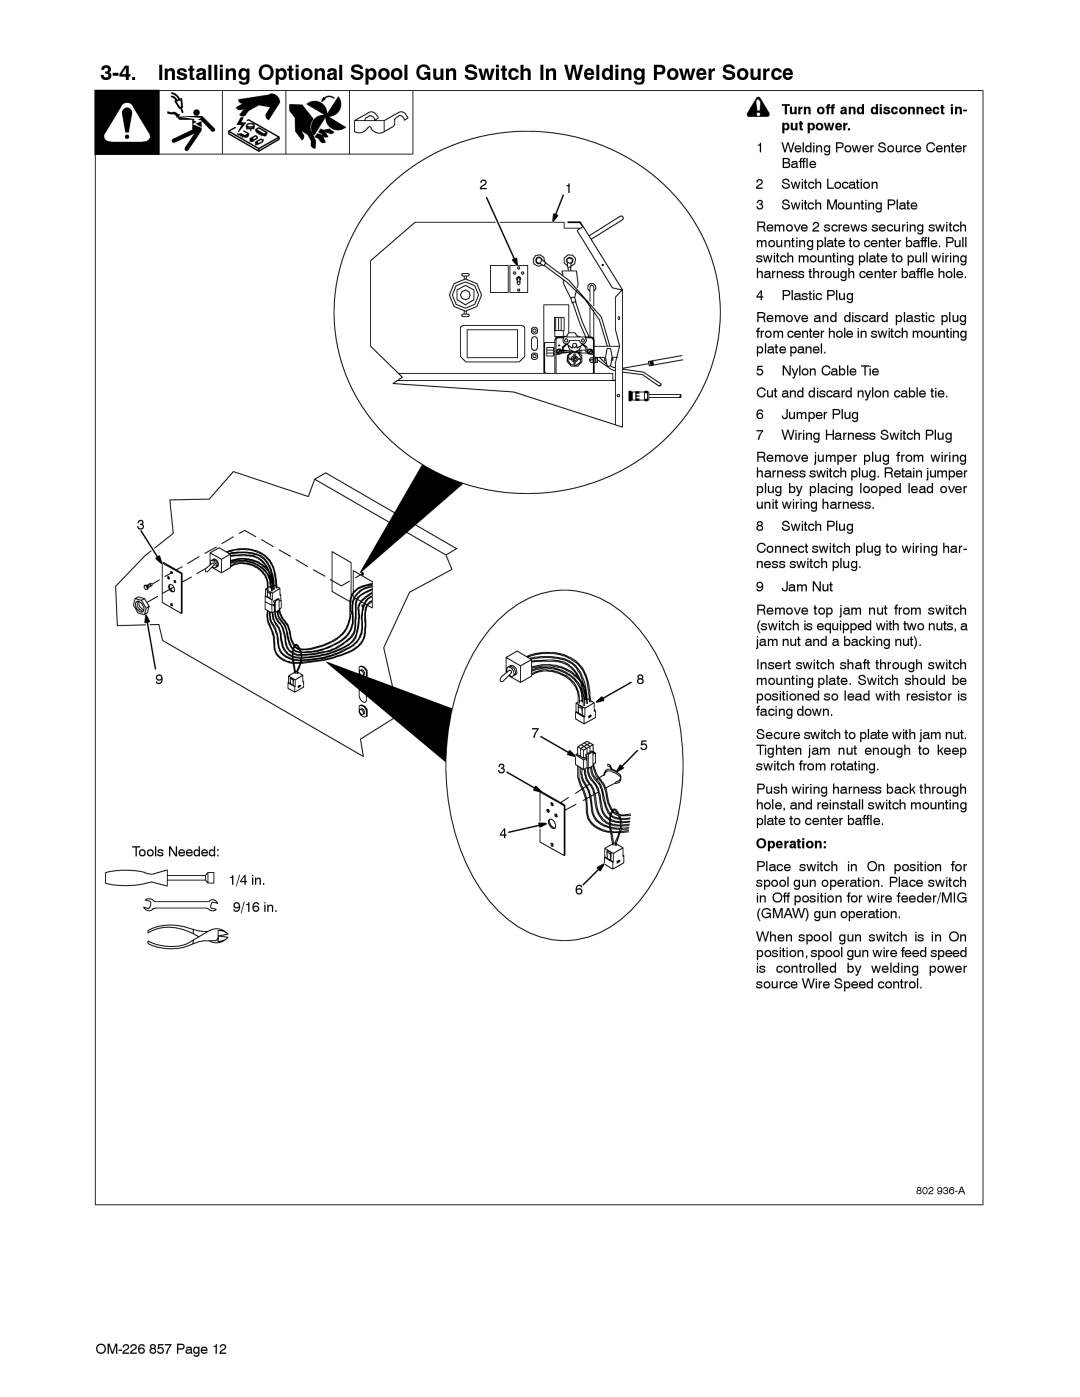
1 Welding Power Source Center
Baffle
2 | 1 | 2 | Switch Location |
|
| 3 | Switch Mounting Plate |
|
| Remove 2 screws securing switch | |
|
| mounting plate to center baffle. Pull | |
|
| switch mounting plate to pull wiring | |
|
| harness through center baffle hole. | |
|
| 4 | Plastic Plug |
|
| Remove and discard plastic plug | |
|
| from center hole in switch mounting | |
|
| plate panel. | |
|
| 5 | Nylon Cable Tie |
|
| Cut and discard nylon cable tie. | |
|
| 6 | Jumper Plug |
|
| 7 Wiring Harness Switch Plug | |
|
| Remove jumper plug from wiring | |
|
| harness switch plug. Retain jumper | |
|
| plug by placing looped lead over | |
|
| unit wiring harness. | |
3 |
| 8 | Switch Plug |
|
| Connect switch plug to wiring har- | |
|
| ness switch plug. | |
|
| 9 | Jam Nut |
|
| Remove top jam nut from switch | |
|
| (switch is equipped with two nuts, a | |
|
| jam nut and a backing nut). | |
9 | 8 | Insert switch shaft through switch | |
mounting plate. Switch should be | |||
|
| positioned so lead with resistor is | |
|
| facing down. | |
| 7 | Secure switch to plate with jam nut. | |
| 5 | Tighten jam nut enough to keep | |
| 3 | switch from rotating. | |
|
| Push wiring harness back through | |
|
| hole, and reinstall switch mounting | |
| 4 | plate to center baffle. | |
| Operation: | ||
Tools Needed: |
| ||
| Place switch in On position for | ||
1/4 in. |
| ||
6 | spool gun operation. Place switch | ||
| in Off position for wire feeder/MIG | ||
9/16 in. | (GMAW) gun operation. |
| |
| When spool gun switch is in On |
| position, spool gun wire feed speed |
| is controlled by welding power |
| source Wire Speed control. |
802
