.A complete Parts List is available at www.HobartWelders.com
5-5. Sequence Of Cutting Using Stand-off Guide
| Y The pilot arc starts immediately |
| when trigger is pressed. |
| . Moisture from the compressor will form in the air line |
EXAMPLE Of Cutting Using | and at the torch. It will be normal to sometimes see |
| moisture come out the end of the torch. |
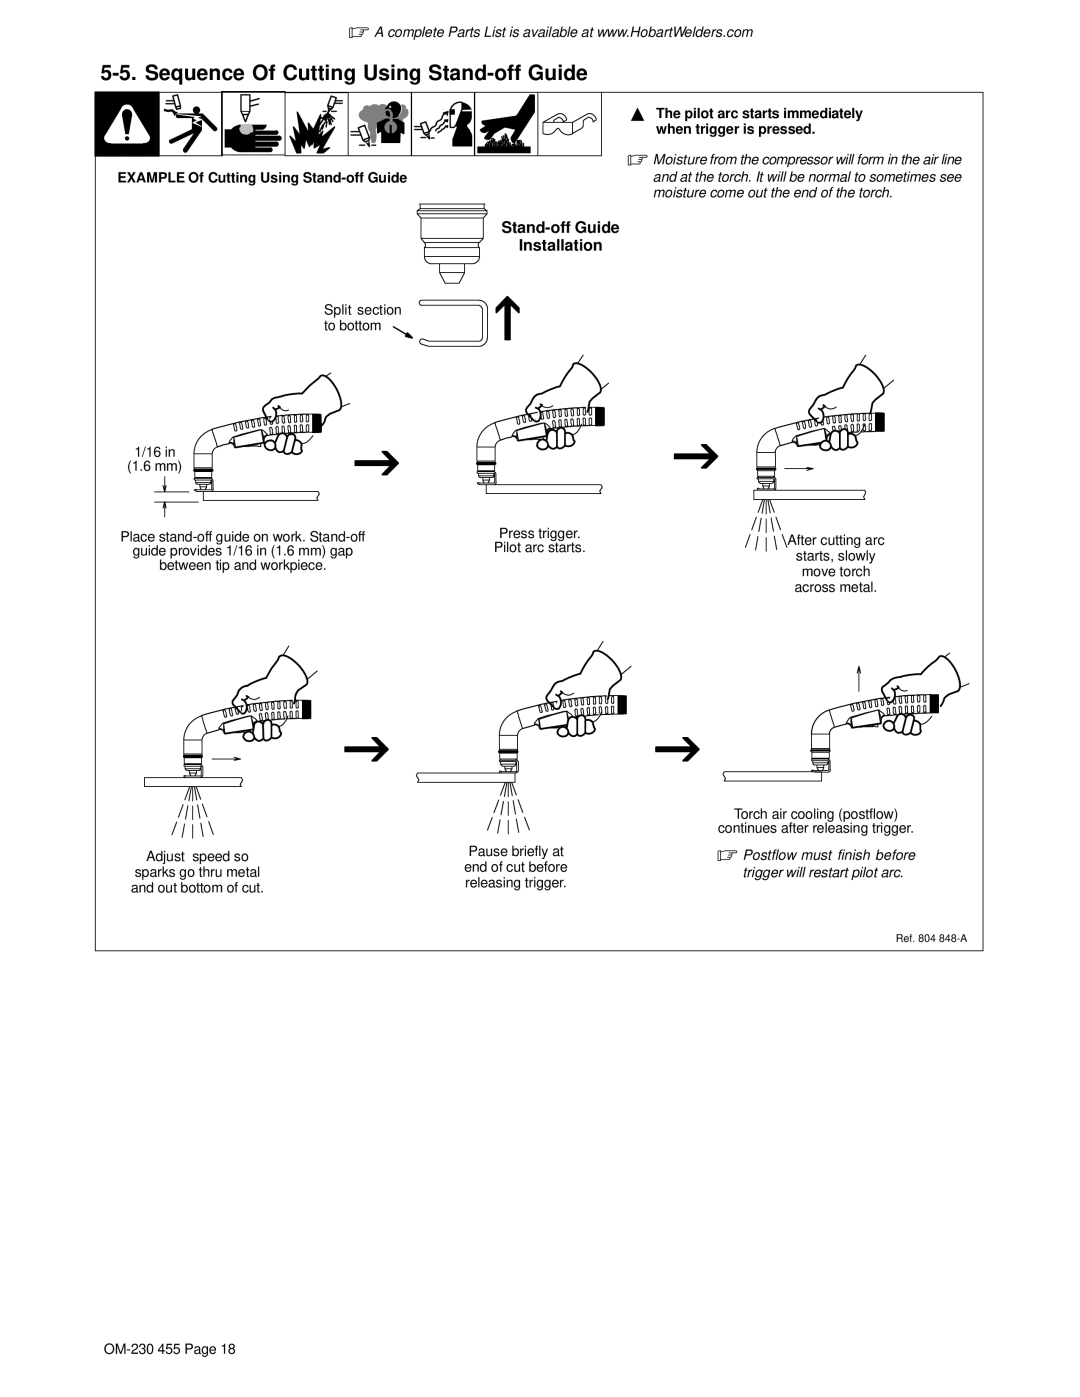
Stand-off Guide
Installation
Split section to bottom
1/16 in (1.6 mm)
Place | Press trigger. | After cutting arc |
guide provides 1/16 in (1.6 mm) gap | Pilot arc starts. | starts, slowly |
between tip and workpiece. |
| |
| move torch | |
|
| |
|
| across metal. |
|
| Torch air cooling (postflow) | |
|
| continues after releasing trigger. | |
Adjust speed so | Pause briefly at | . Postflow must finish before | |
sparks go thru metal | end of cut before | trigger will restart pilot arc. | |
releasing trigger. | |||
and out bottom of cut. |
| ||
|
| ||
|
| Ref. 804 |
