MAINTENANCE
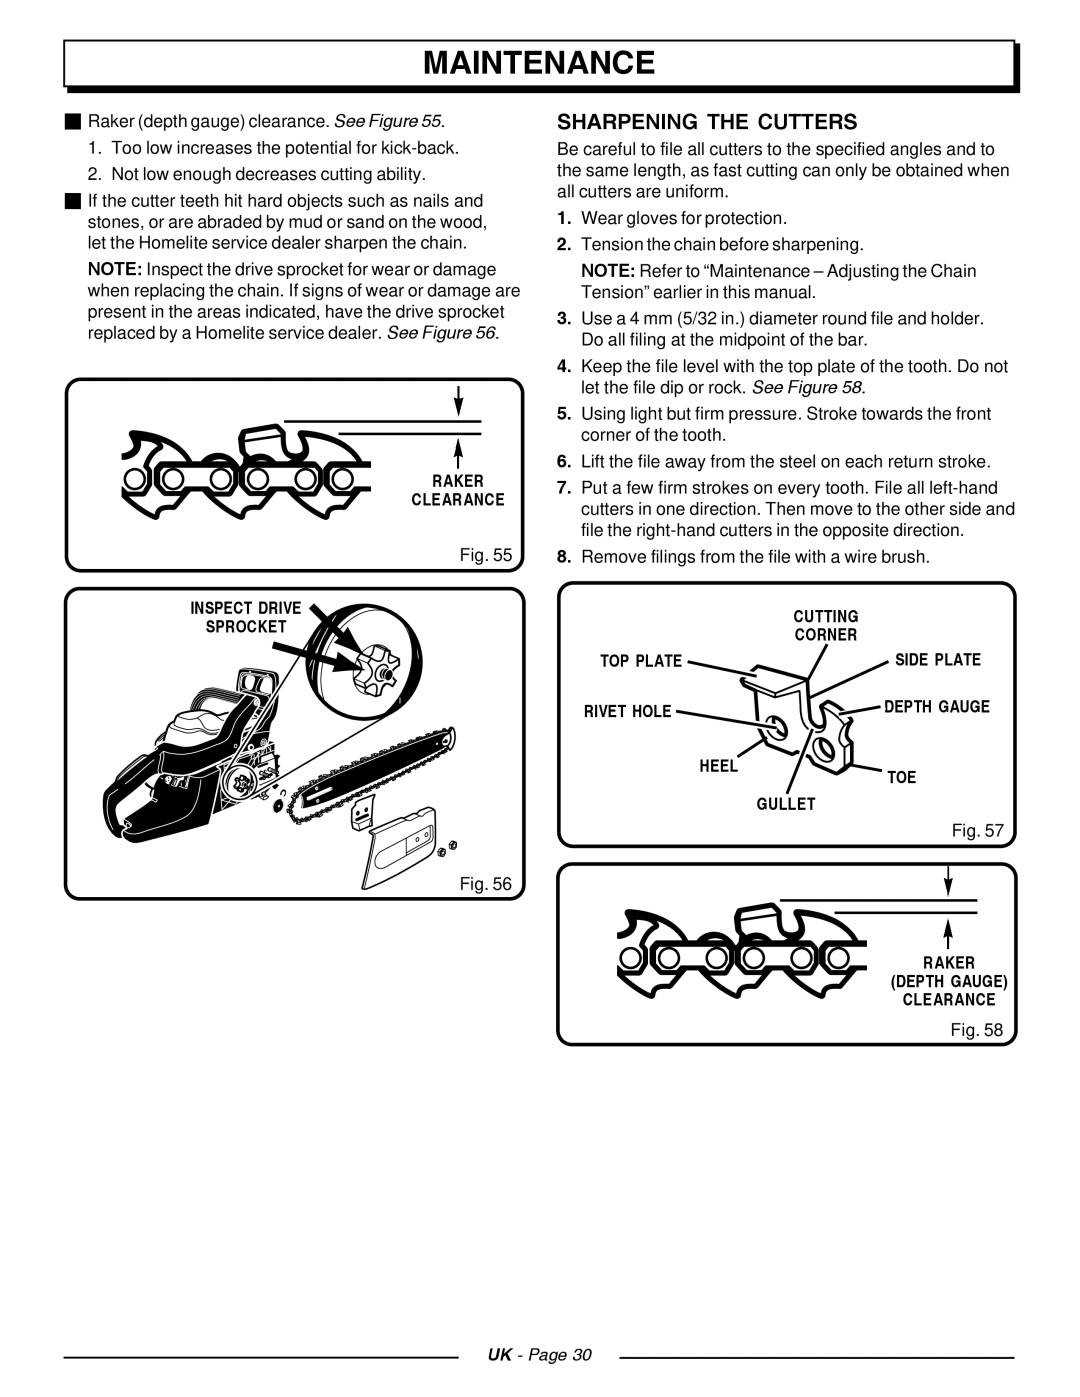
Raker (depth gauge) clearance. See Figure 55.
1.Too low increases the potential for
2.Not low enough decreases cutting ability.
If the cutter teeth hit hard objects such as nails and stones, or are abraded by mud or sand on the wood, let the Homelite service dealer sharpen the chain.
NOTE: Inspect the drive sprocket for wear or damage when replacing the chain. If signs of wear or damage are present in the areas indicated, have the drive sprocket replaced by a Homelite service dealer. See Figure 56.
RAKER
CLEARANCE
Fig. 55
INSPECT DRIVE
SPROCKET
Fig. 56
SHARPENING THE CUTTERS
Be careful to file all cutters to the specified angles and to the same length, as fast cutting can only be obtained when all cutters are uniform.
1.Wear gloves for protection.
2.Tension the chain before sharpening.
NOTE: Refer to “Maintenance – Adjusting the Chain Tension” earlier in this manual.
3.Use a 4 mm (5/32 in.) diameter round file and holder. Do all filing at the midpoint of the bar.
4.Keep the file level with the top plate of the tooth. Do not let the file dip or rock. See Figure 58.
5.Using light but firm pressure. Stroke towards the front corner of the tooth.
6.Lift the file away from the steel on each return stroke.
7.Put a few firm strokes on every tooth. File all
8.Remove filings from the file with a wire brush.
| CUTTING |
| CORNER |
TOP PLATE | SIDE PLATE |
RIVET HOLE | DEPTH GAUGE |
HEELTOE
GULLET
Fig. 57
RAKER
(DEPTH GAUGE)
CLEARANCE
Fig. 58
UK - Page 30