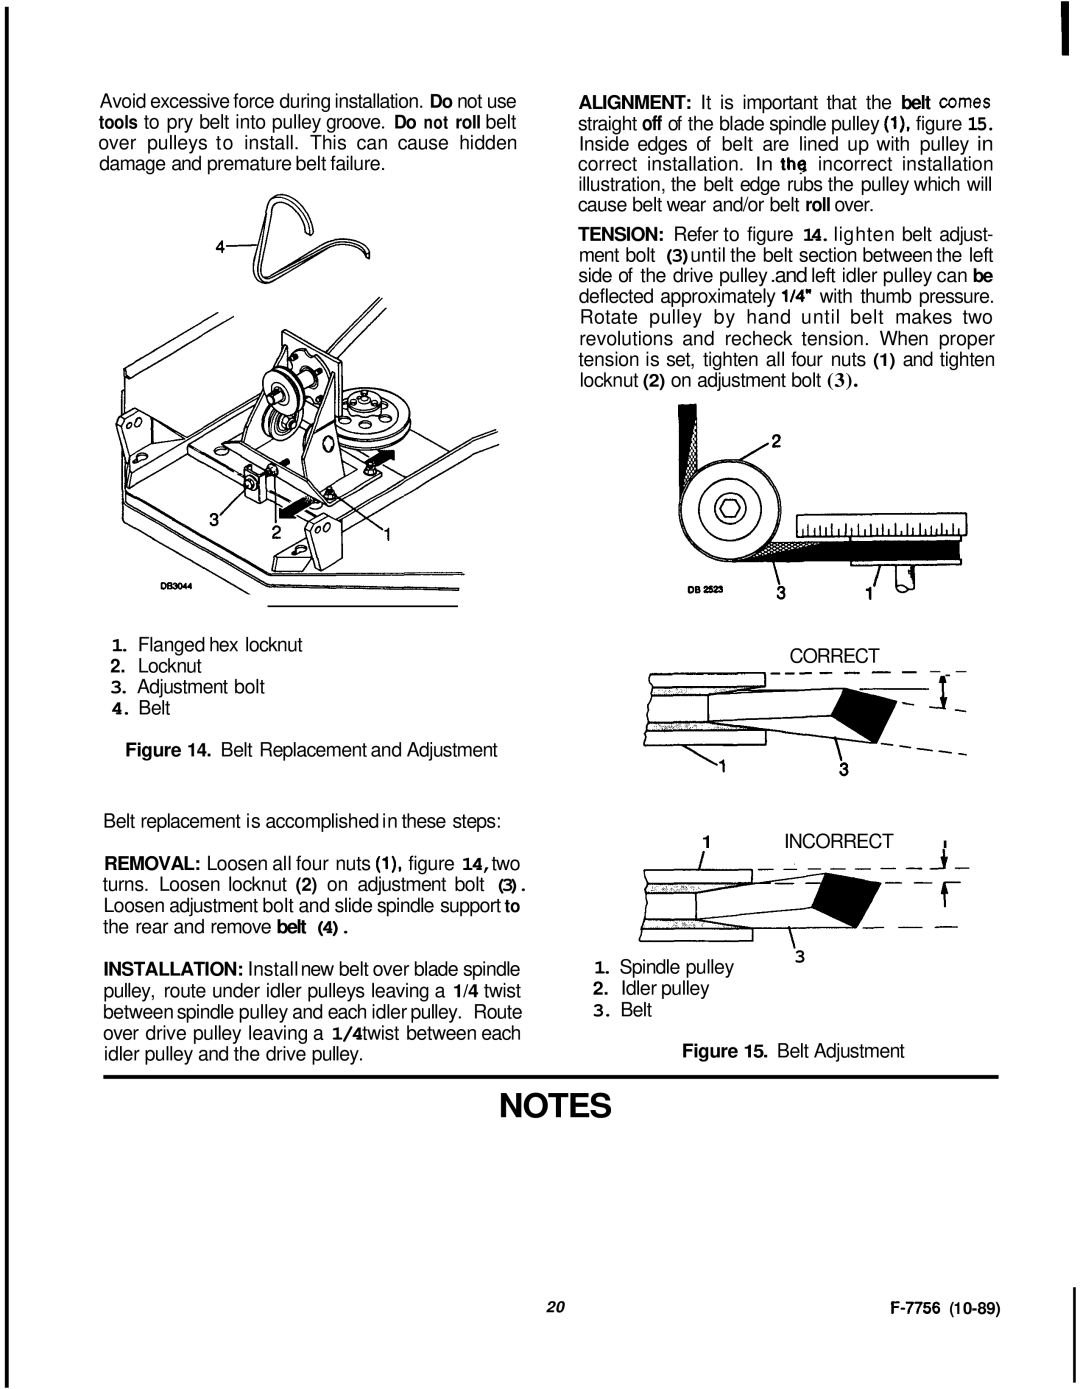
Avoid excessive force during installation. Do not use tools to pry belt into pulley groove. Do not roll belt over pulleys to install. This can cause hidden damage and premature belt failure.
ALIGNMENT: It is important that the belt comes straight off of the blade spindle pulley (l),figure 15. Inside edges of belt are lined up with pulley in correct installation. In the incorrect installation illustration, the belt edge rubs the pulley which will cause belt wear and/or belt roll over.
TENSION: Refer to figure 14.lighten belt adjust- ment bolt (3)until the belt section between the left side of the drive pulley .and left idler pulley can be deflected approximately 1/4"with thumb pressure. Rotate pulley by hand until belt makes two revolutions and recheck tension. When proper tension is set, tighten all four nuts (1) and tighten locknut (2) on adjustment bolt (3).
1.Flanged hex locknut
2.Locknut
3.Adjustment bolt
4.Belt
Figure 14. Belt Replacement and Adjustment
Belt replacement is accomplished in these steps:
REMOVAL: Loosen all four nuts (l), figure 14,two turns. Loosen locknut (2) on adjustment bolt (3). Loosen adjustment bolt and slide spindle support to the rear and remove belt (4).
INSTALLATION: Install new belt over blade spindle pulley, route under idler pulleys leaving a 1/4 twist between spindle pulley and each idler pulley. Route over drive pulley leaving a 1/4twist between each idler pulley and the drive pulley.
CORRECT
1 INCORRECT I
- \ | 3 | |
1. Spindle pulley | ||
|
2.Idler pulley
3.Belt
Figure 15. Belt Adjustment
NOTES
20 |