38
39
A
B![]()
40
C
41
L
A
E | G |
|
H![]()
![]()
I
D | F |
|
K
J
![]()
![]() L
L
The handle must be in the upright position in order to get cleaning solution through the hose.
NOTE: It may be necessary to remove air from the system (prime the pump) so the clean solution will flow to the tool. After attaching the tool to the hose, turn the cleaner ON. Put the tool against your hand to block off the suction. Wait a few sec-
onds, then squeeze the trigger and begin cleaning.
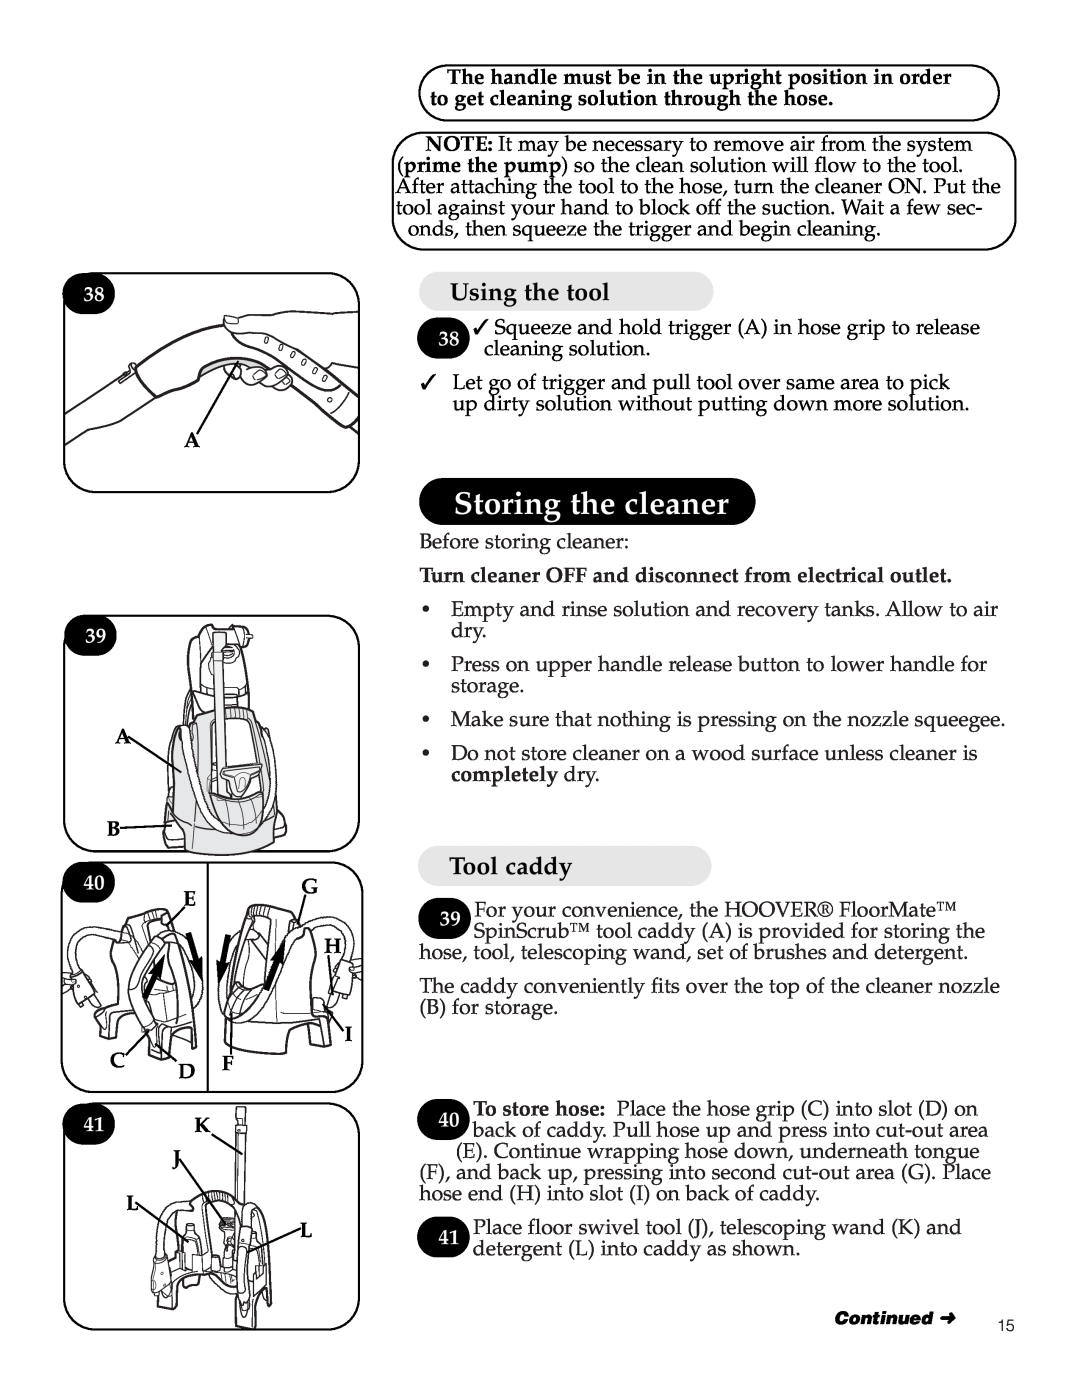
Using the tool
38✓ Squeeze and hold trigger (A) in hose grip to release cleaning solution.
✓Let go of trigger and pull tool over same area to pick up dirty solution without putting down more solution.
Storing the cleaner
Before storing cleaner:
Turn cleaner OFF and disconnect from electrical outlet.
•Empty and rinse solution and recovery tanks. Allow to air dry.
•Press on upper handle release button to lower handle for storage.
•Make sure that nothing is pressing on the nozzle squeegee.
•Do not store cleaner on a wood surface unless cleaner is completely dry.
Tool caddy
39For your convenience, the HOOVER® FloorMate™ SpinScrub™ tool caddy (A) is provided for storing the
hose, tool, telescoping wand, set of brushes and detergent.
The caddy conveniently fits over the top of the cleaner nozzle
(B) for storage.
To store hose: Place the hose grip (C) into slot (D) on
40 back of caddy. Pull hose up and press into
(E). Continue wrapping hose down, underneath tongue (F), and back up, pressing into second
41Place floor swivel tool (J), telescoping wand (K) and detergent (L) into caddy as shown.
Continued ➜ | 15 |
|