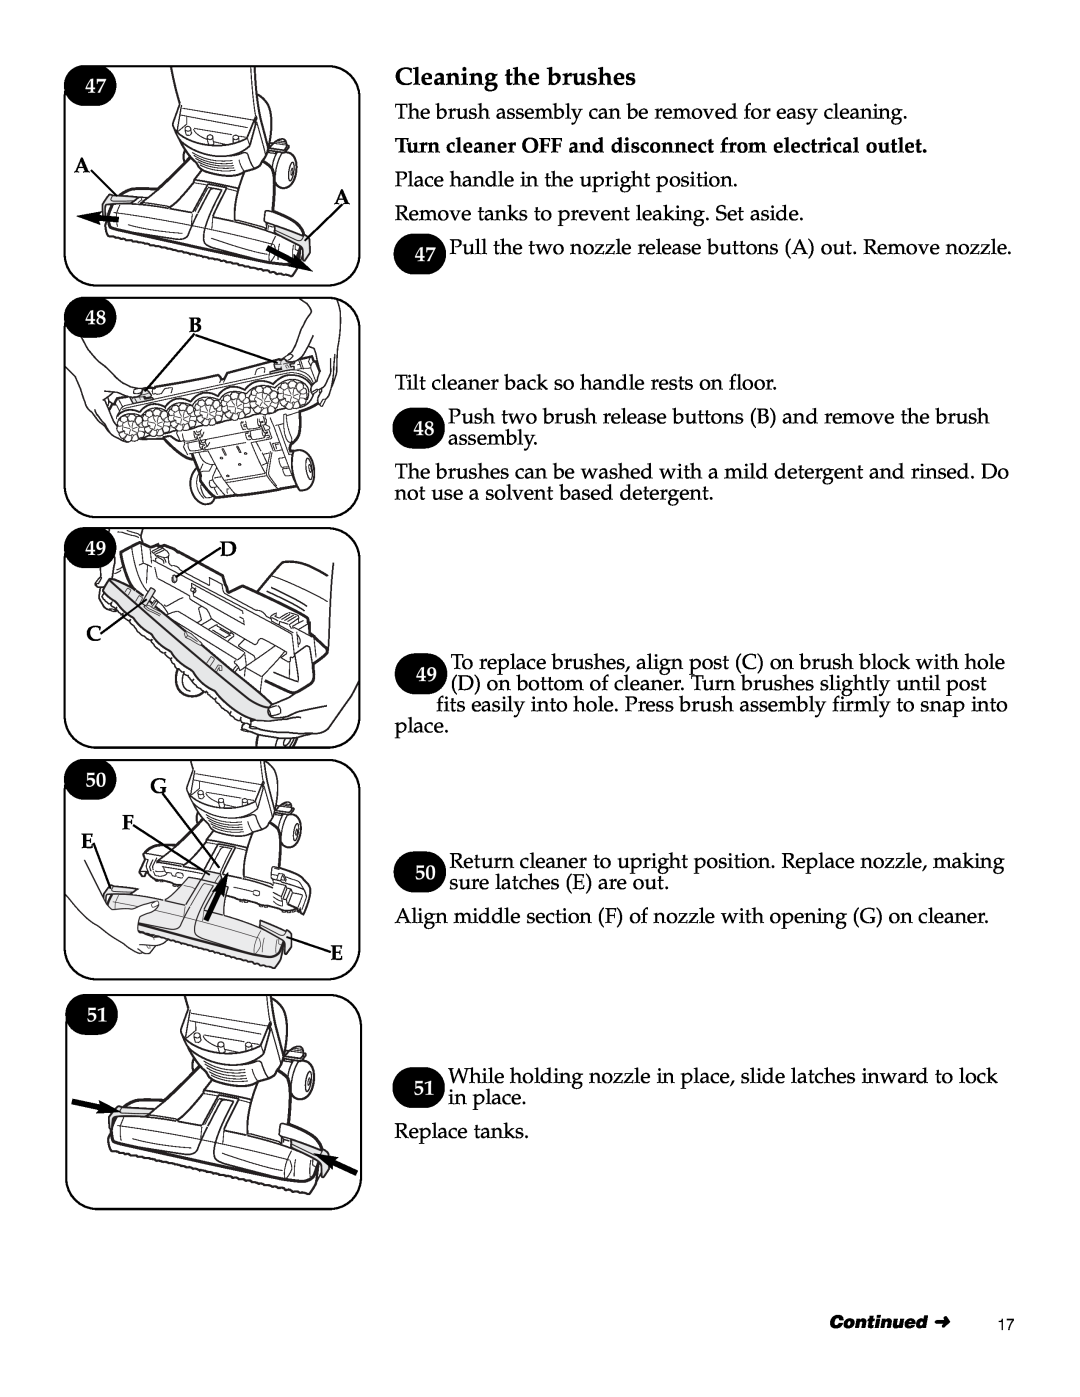
47 | Cleaning the brushes |
|
A
The brush assembly can be removed for easy cleaning.
Turn cleaner OFF and disconnect from electrical outlet.
Place handle in the upright position.
A
Remove tanks to prevent leaking. Set aside.
47 Pull the two nozzle release buttons (A) out. Remove nozzle.
48 B
Tilt cleaner back so handle rests on floor.
Push two brush release buttons (B) and remove the brush
48 assembly.
The brushes can be washed with a mild detergent and rinsed. Do not use a solvent based detergent.
49![]()
![]()
![]()
![]() D
D
C![]()
To replace brushes, align post (C) on brush block with hole
49 (D) on bottom of cleaner. Turn brushes slightly until post fits easily into hole. Press brush assembly firmly to snap into
place.
50 G
F
E
Return cleaner to upright position. Replace nozzle, making
50 sure latches (E) are out.
Align middle section (F) of nozzle with opening (G) on cleaner.
![]()
![]()
![]()
![]() E
E
51
While holding nozzle in place, slide latches inward to lock
51 in place.
Replace tanks.
Continued ➜ | 17 |