12)When the desired check item code is displayed, push the Flush Button one time. The Display Window will show the present check item information.
13)To finish checking, press the Display Button and Flush Button together to show “C 1”, “C 2”... in the Display Window.
14)When the Display Window shows one of those check item codes, keep on pushing the Set Button. Check that the Display Window reads “CHE.”
15)While pushing the Set Button, press the Display Button one time.
16)Check that the Display Window reads “Nor.”, which means the device is in the normal mode.
17)Release the Set Button.
18)This is the end of checking.
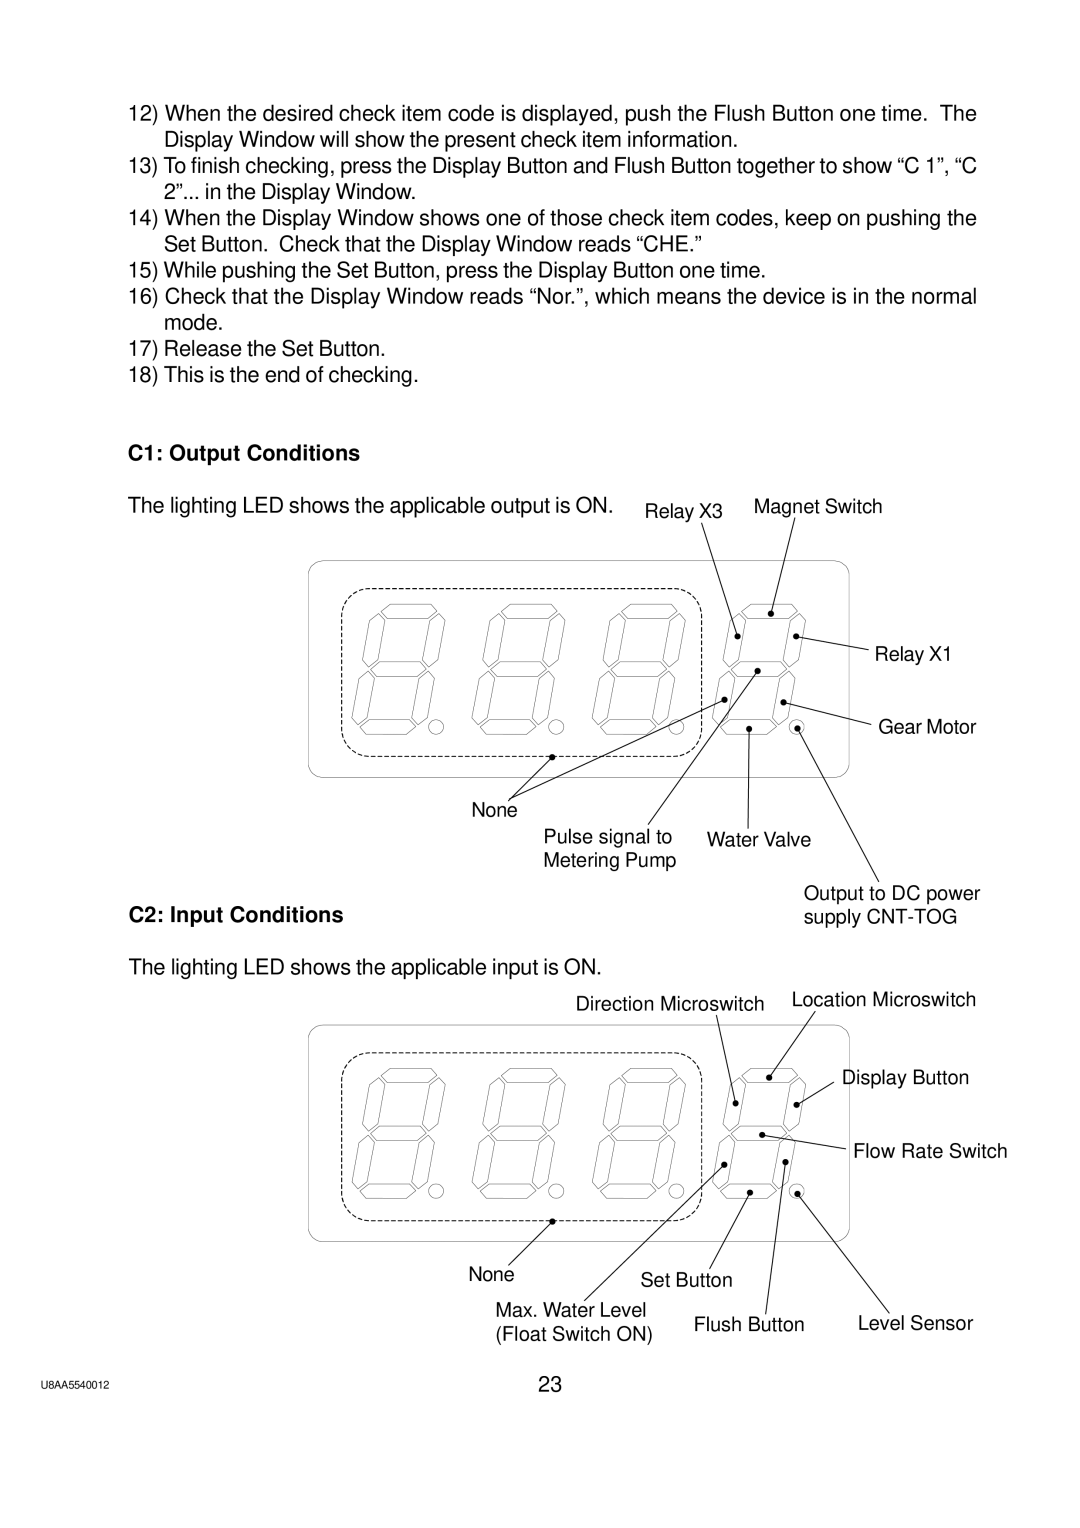
C1: Output Conditions
The lighting LED shows the applicable output is ON. Relay X3 Magnet Switch
| Relay X1 |
| Gear Motor |
None |
|
Pulse signal to | Water Valve |
Metering Pump |
|
C2: Input Conditions | Output to DC power |
supply |
The lighting LED shows the applicable input is ON.
Direction Microswitch Location Microswitch
Display Button
Flow Rate Switch
None | Set Button |
| ||
Max. Water Level | Flush Button | Level Sensor | ||
(Float Switch ON) | ||||
|
| |||
U8AA5540012 | 23 |
