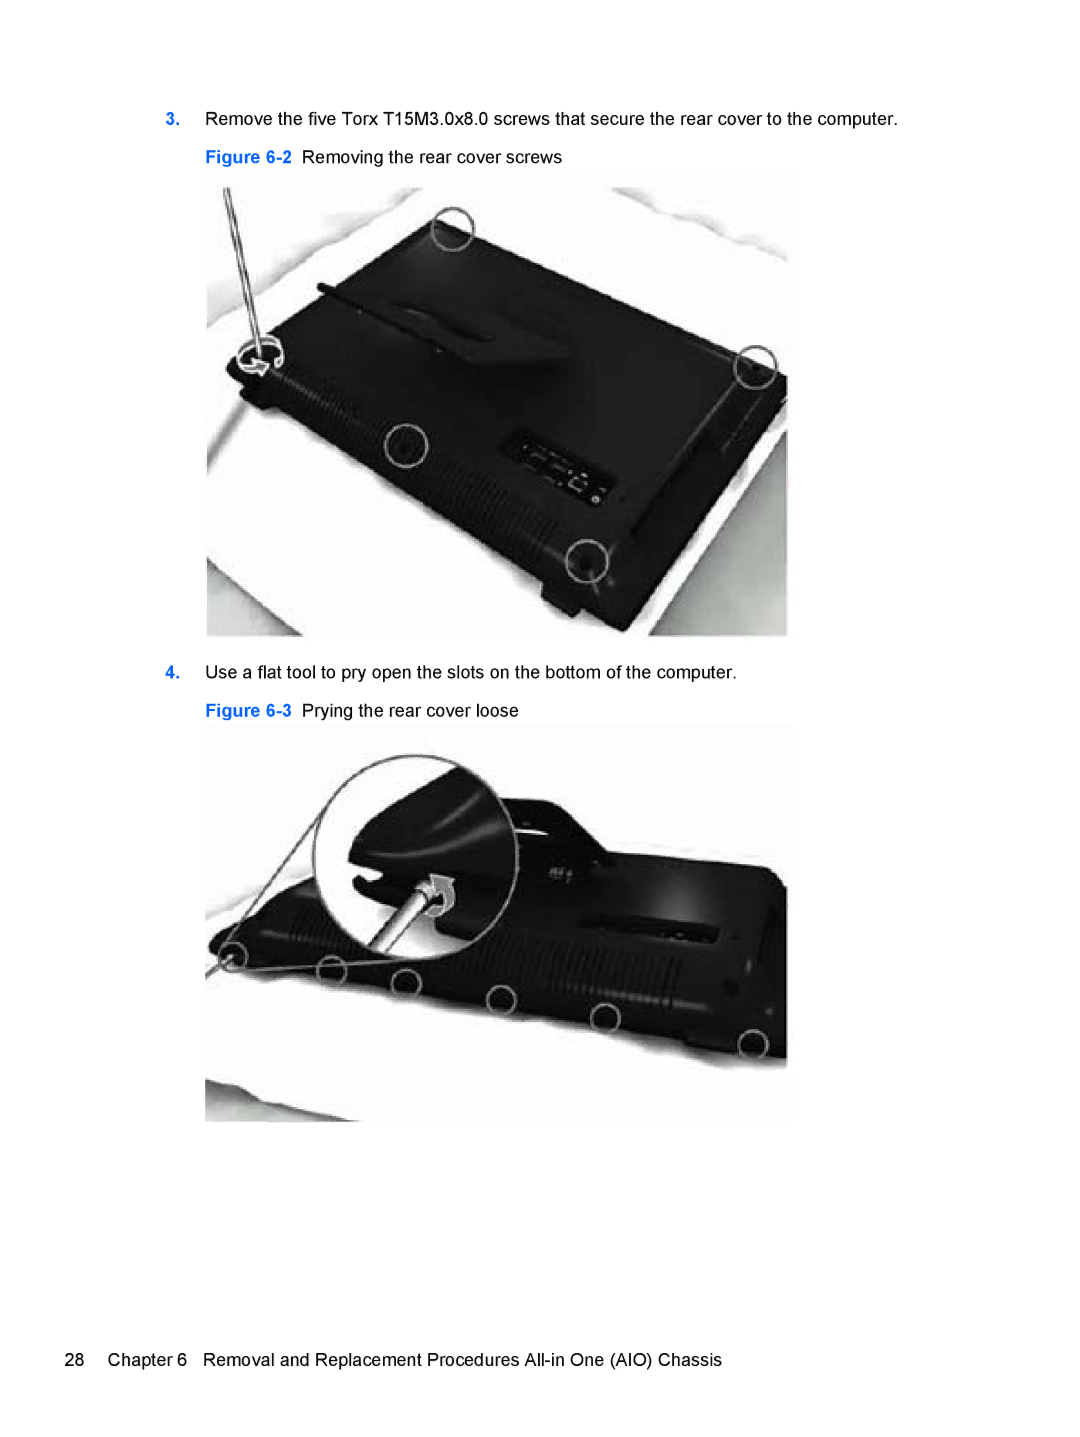
3.Remove the five Torx T15M3.0x8.0 screws that secure the rear cover to the computer. Figure
4.Use a flat tool to pry open the slots on the bottom of the computer. Figure
28 Chapter 6 Removal and Replacement Procedures
3.Remove the five Torx T15M3.0x8.0 screws that secure the rear cover to the computer. Figure
4.Use a flat tool to pry open the slots on the bottom of the computer. Figure
28 Chapter 6 Removal and Replacement Procedures