•A bar may appear in the upper, lower, right or left side of the screen, or parts of the picture may be obscured depending on some signals.This is not the malfunction.
•If the edges of the picture are stretched, readjust the picture position adjustments in the PC of PICTURE menu.
•Depending on the specification of the PC you are playing the
SELECTING THE INPUT SOURCE
•First press SOURCE on the remote control to display the video input source list, then press ▲ or ▼ and OK in order to select the PC input mode ( ![]() page 25).
page 25).
•This function may not be available for some signal or if no signal is received.
•The optimum points of the clock phase and sampling clock adjustments may be incomprehensible according to the input signals.
Adjusting the picture settings
1.Press MENU/EXIT and use ◄ or ► to select PICTURE.
2.Use ▲ and ▼ to select PC and press ► or OK.
3.Use ▲ or ▼ to select an option and press ◄ or ► to adjust the setting as required.
Using the Auto Adjust
Adjust Horizontal Position,Vertical Position, Horizontal Clock, and Clock Phase automatically. Depending on the type of signal, there is a
USING THE OSD MENUS
FOR ATV MODEL
1.Press the MENU/EXIT button to display or close the main menu.
2.Use the Navigation Ring to move around to select, adjust or confirm an item in the OSD (On Screen Display) menu.
Press the MENU/EXIT button to enter the main OSD. Adjust the items including Picture, Sound, Features, and Installation. However, some function items in the menus may only be enabled in the particular source modes.
•• PICTURE MENU Use Smart Picture
1.Press VIDEO.
The Smart picture menu appears.
2.Press ▲ ▼ to select one of the following smart picture settings.
• Personal
• Vivid
• Standard
• Movie
• Game
• Eco
3.Press OK to confirm the choice.
The selected smart picture setting is applied.
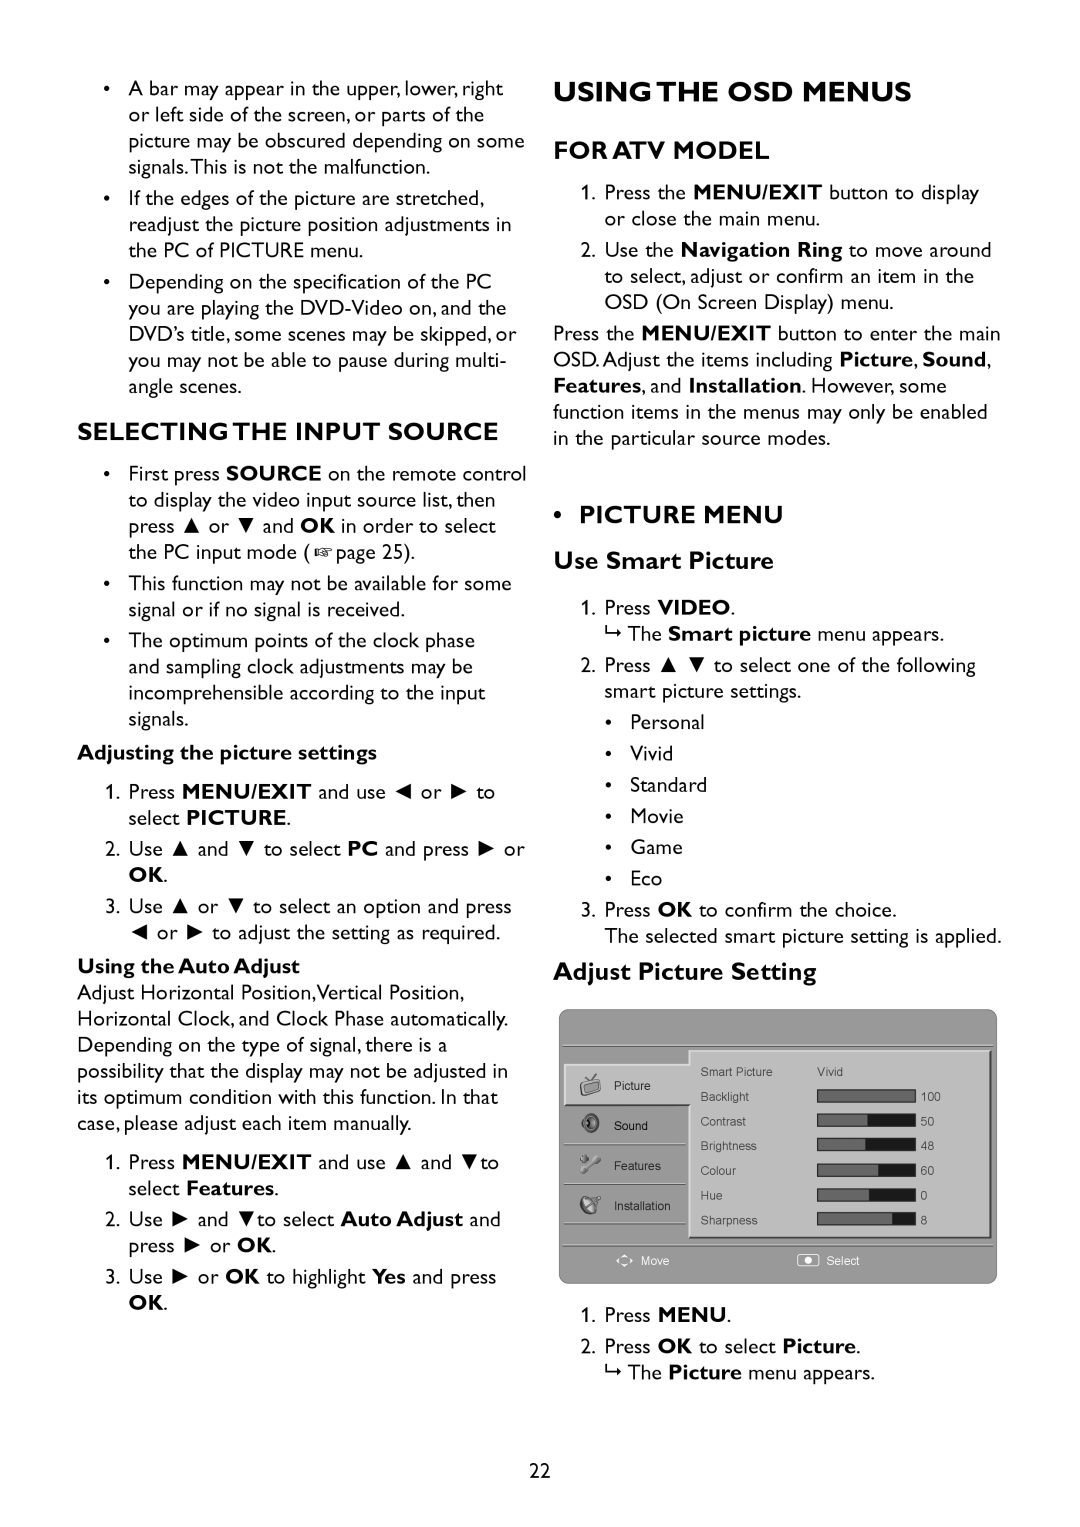
Adjust Picture Setting
possibility that the display may not be adjusted in its optimum condition with this function. In that
Picture
Smart Picture
Backlight
Vivid
100
case, please adjust each item manually.
1. Press MENU/EXIT and use ▲ and ▼to |
select Features. |
Sound Contrast
Brightness
Features Colour
50
48
![]()
![]() 60
60
2. Use ► and ▼to select Auto Adjust and |
press ► or OK. |
Installation
Hue
Sharpness
![]()
![]() 0
0 ![]()
![]() 8
8
3. Use ► or OK to highlight Yes and press |
OK. |
Move | Select |
1.Press MENU.
2.Press OK to select Picture. The Picture menu appears.
22