Installing a slim optical disc drive
1.Remove/disengage any security devices that prohibit opening the computer.
2.Remove all removable media, such as optical discs or USB flash drives, from the computer.
3.Turn off the computer properly through the operating system, then turn off any external devices.
4.Disconnect the power cord from the power outlet and disconnect any external devices.
![]() CAUTION: Regardless of the
CAUTION: Regardless of the
5.Remove the computer access panel.
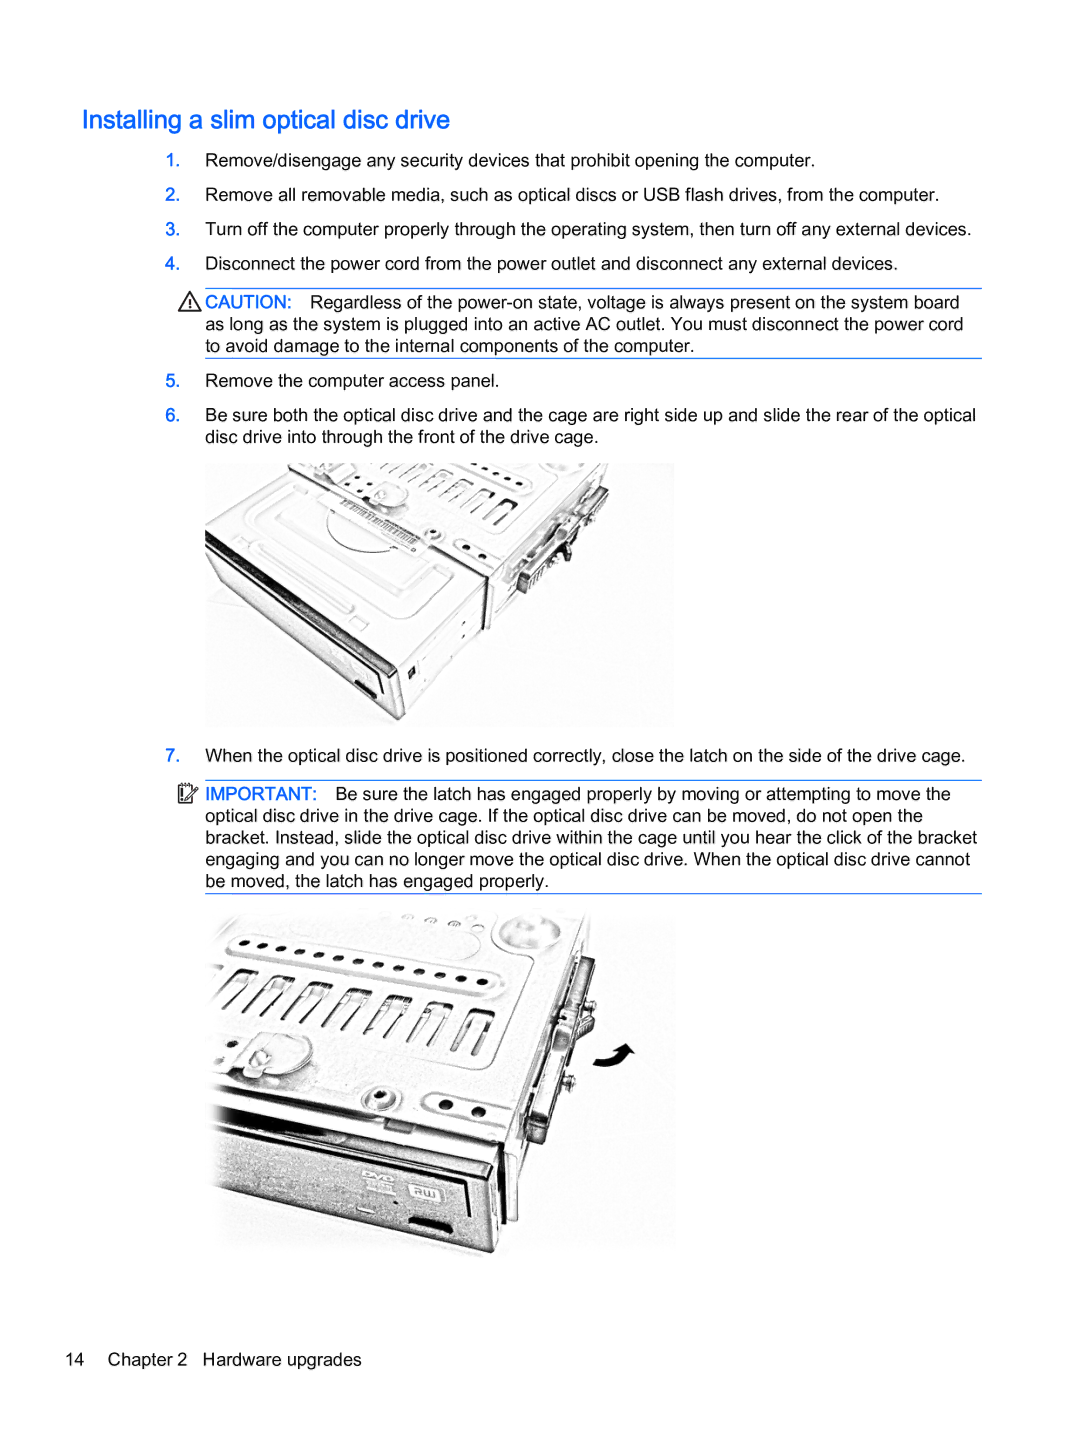
6.Be sure both the optical disc drive and the cage are right side up and slide the rear of the optical disc drive into through the front of the drive cage.
7.When the optical disc drive is positioned correctly, close the latch on the side of the drive cage.
![]()
![]()
![]()
![]() IMPORTANT: Be sure the latch has engaged properly by moving or attempting to move the optical disc drive in the drive cage. If the optical disc drive can be moved, do not open the bracket. Instead, slide the optical disc drive within the cage until you hear the click of the bracket engaging and you can no longer move the optical disc drive. When the optical disc drive cannot be moved, the latch has engaged properly.
IMPORTANT: Be sure the latch has engaged properly by moving or attempting to move the optical disc drive in the drive cage. If the optical disc drive can be moved, do not open the bracket. Instead, slide the optical disc drive within the cage until you hear the click of the bracket engaging and you can no longer move the optical disc drive. When the optical disc drive cannot be moved, the latch has engaged properly.
14 Chapter 2 Hardware upgrades