creating a story label
Let’s create this Story Label.
selecting a template
1.To start the HP Custom Quilt Label Kit, follow the instructions on page 6. If the program is already open, click the New button. ![]()
2.In the next screen, select Story Label portrait and click OK.
You see the selected template in the
work area on the right.
3.Click this box in the upper right corner to maximize your work space. This will make the window larger.
•Windows: ![]()
•Macintosh: ![]()
Or, click and drag the bottom right
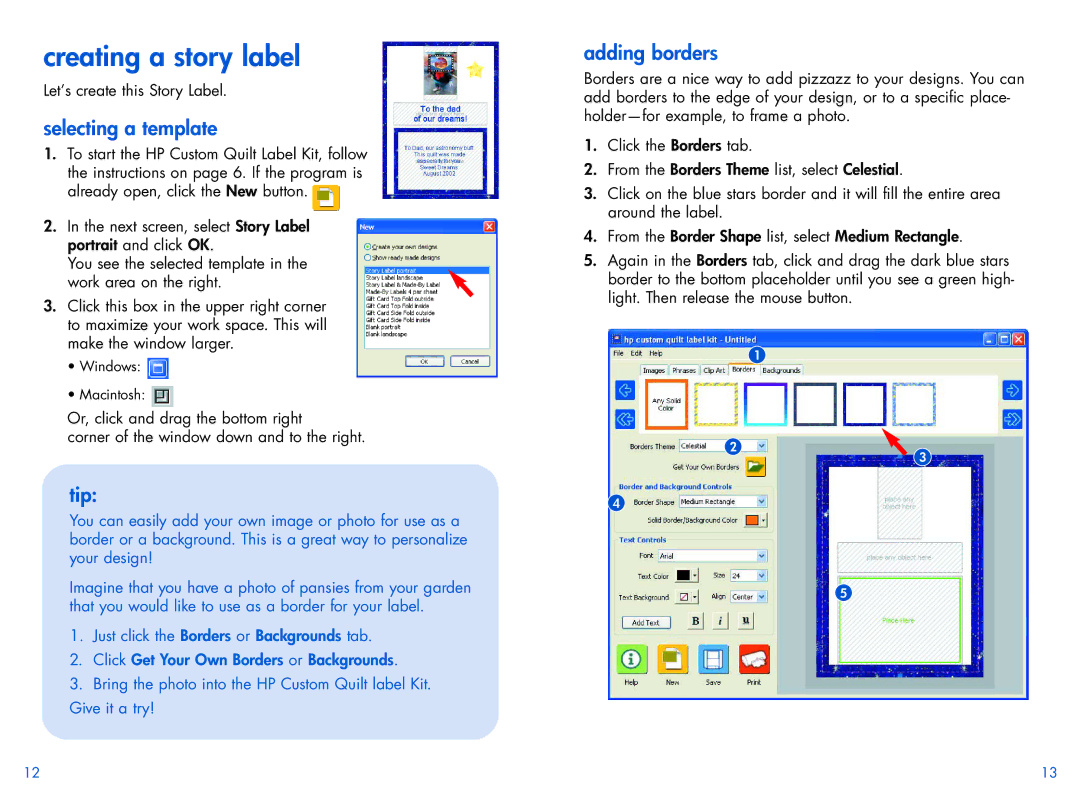
adding borders
Borders are a nice way to add pizzazz to your designs. You can add borders to the edge of your design, or to a specific place-
1.Click the Borders tab.
2.From the Borders Theme list, select Celestial.
3.Click on the blue stars border and it will fill the entire area around the label.
4.From the Border Shape list, select Medium Rectangle.
5.Again in the Borders tab, click and drag the dark blue stars border to the bottom placeholder until you see a green high- light. Then release the mouse button.
1
corner of the window down and to the right.
tip:
You can easily add your own image or photo for use as a border or a background. This is a great way to personalize your design!
2
4
3
Imagine that you have a photo of pansies from your garden that you would like to use as a border for your label.
1.Just click the Borders or Backgrounds tab.
2.Click Get Your Own Borders or Backgrounds.
3.Bring the photo into the HP Custom Quilt label Kit. Give it a try!
5
12 | 13 |