1.Load plain paper into the paper tray of your inkjet printer first to test the results. Then print on fabric sheets when you're ready.
2.Follow these steps:
Windows
a.Click the Print button. ![]()
b.Click the Change Settings button.
c.Click the Properties button.
d.Select the options for Best print quality and Plain Paper. Click OK to begin printing.
3.Now you can cut out your label and sew it onto your quilt.
Macintosh
a.In the File menu, select Page Setup.
b.If given the options, select Best print quality and Plain Paper. Mac OS X users, be sure to select your printer from the Format For list. Click OK.
c.Click the Print button. ![]()
d.Click the Print Now button.
creating a matching gift card
You’ll be creating a
step 1: create the front and back of your gift card
selecting a template
1.To start the HP Custom Quilt Label Kit, follow the instructions on page 6. If the program is already open, click the New button. ![]()
2.In the next screen, select Gift Card Side Fold outside and click OK.
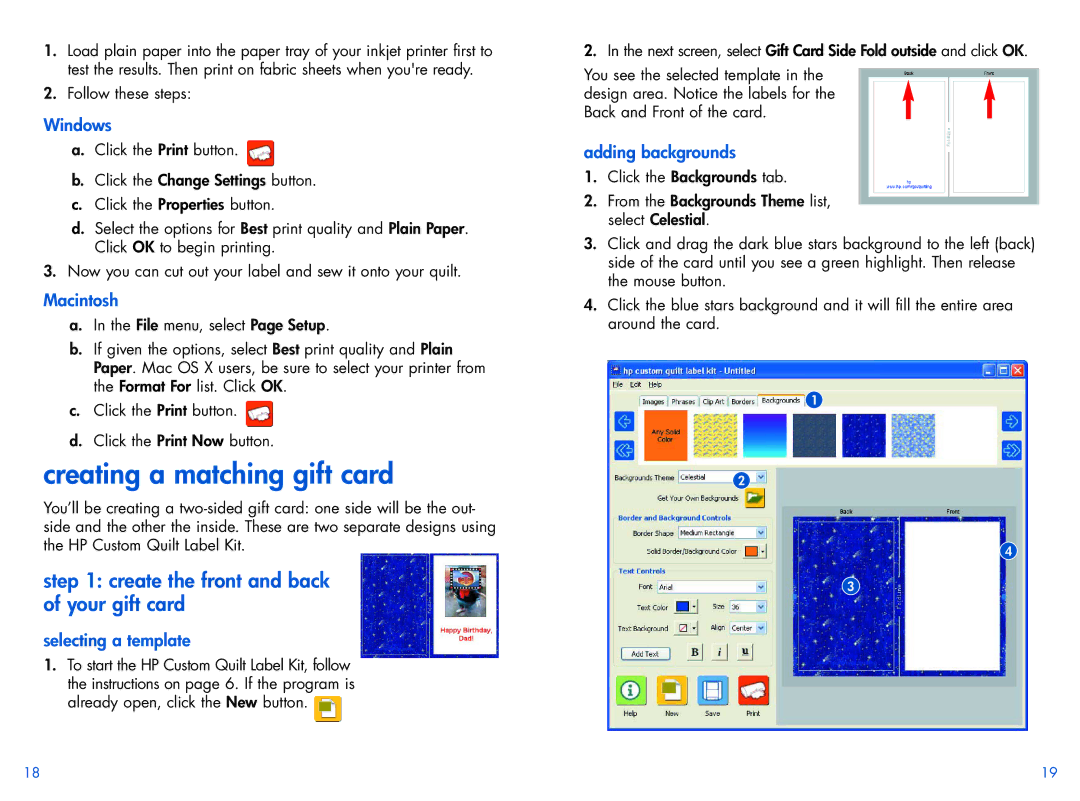
You see the selected template in the design area. Notice the labels for the Back and Front of the card.
adding backgrounds
1.Click the Backgrounds tab.
2.From the Backgrounds Theme list, select Celestial.
3.Click and drag the dark blue stars background to the left (back) side of the card until you see a green highlight. Then release the mouse button.
4.Click the blue stars background and it will fill the entire area around the card.
1
2
4
3
18 | 19 |