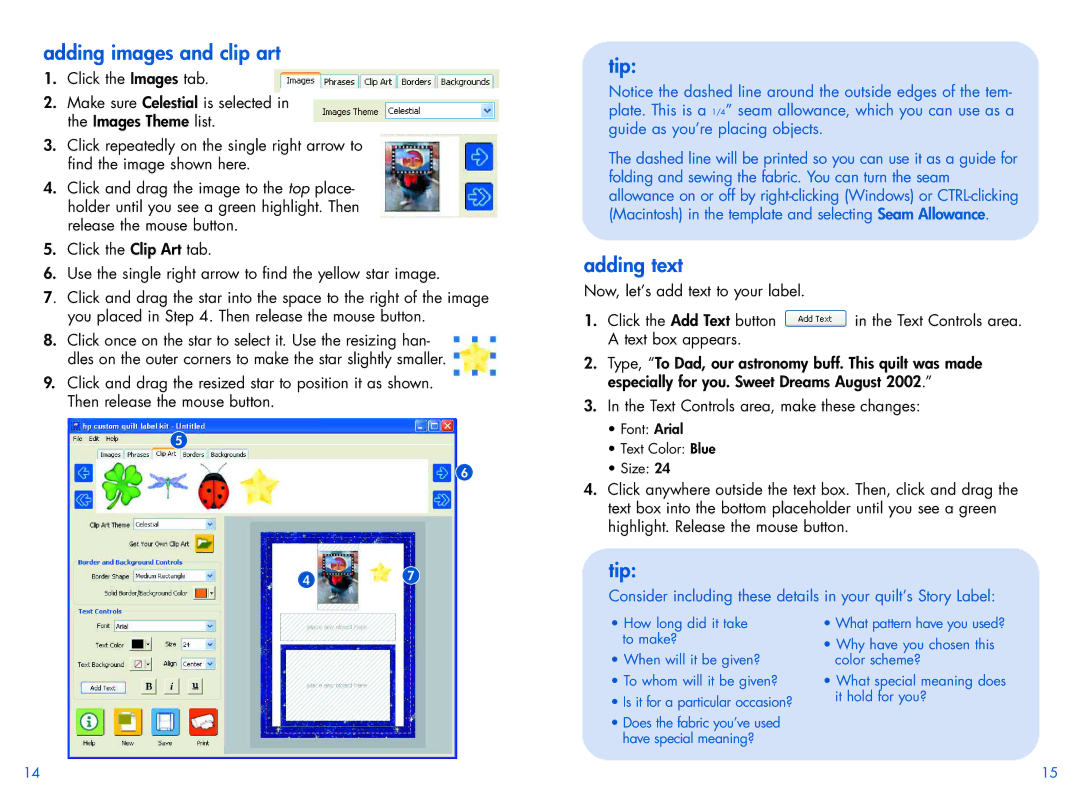
adding images and clip art
1. Click the Images tab.
2.Make sure Celestial is selected in the Images Theme list.
3.Click repeatedly on the single right arrow to find the image shown here.
4.Click and drag the image to the top place- holder until you see a green highlight. Then release the mouse button.
5.Click the Clip Art tab.
6.Use the single right arrow to find the yellow star image.
7. Click and drag the star into the space to the right of the image you placed in Step 4. Then release the mouse button.
8.Click once on the star to select it. Use the resizing han- dles on the outer corners to make the star slightly smaller.
9.Click and drag the resized star to position it as shown. Then release the mouse button.
5
6
47
tip:
Notice the dashed line around the outside edges of the tem- plate. This is a 1/4” seam allowance, which you can use as a guide as you’re placing objects.
The dashed line will be printed so you can use it as a guide for folding and sewing the fabric. You can turn the seam allowance on or off by
adding text
Now, let’s add text to your label.
1.Click the Add Text button ![]() in the Text Controls area. A text box appears.
in the Text Controls area. A text box appears.
2.Type, “To Dad, our astronomy buff. This quilt was made especially for you. Sweet Dreams August 2002.”
3.In the Text Controls area, make these changes:
•Font: Arial
•Text Color: Blue
•Size: 24
4.Click anywhere outside the text box. Then, click and drag the text box into the bottom placeholder until you see a green highlight. Release the mouse button.
tip:
Consider including these details in your quilt’s Story Label:
•How long did it take to make?
•When will it be given?
•To whom will it be given?
•Is it for a particular occasion?
•Does the fabric you’ve used have special meaning?
•What pattern have you used?
•Why have you chosen this color scheme?
•What special meaning does it hold for you?
14
15