1.Load plain paper into the paper tray of your inkjet printer first to test the results. Then print on card stock or other paper for your gift card when you’re ready.
2.Open the design for the outside of your gift card. (The file name for our project is astronomy card outside.soq.)
3.Follow these steps:
Windows
a.Click the Print button. ![]()
b.Click the Change Settings button.
c.Click the Properties button.
d.Select the options for Best print quality and Greeting Card paper, if available. Click OK. Click OK again to begin printing.
Macintosh
a.In the File menu, select Page Setup.
b.If given the options, select Best print quality and and Greeting Card paper, if available. Mac OS X users, be sure to select your printer from the Format For list. Click OK.
c.Click the Print button. ![]()
d.Click the Print Now button.
Note: If the colors aren’t quite right, try experimenting with other print settings until you find the ones that work best with your printer.
4.When you take the paper out of the printer, allow the ink to dry completely before touching it or printing the inside of your card.
step 2: printing the inside of the gift card
1.Open the design for the inside of the gift card. (The file name for our project is astronomy card inside.soq.)
2.Place the printed card in the paper tray. The proper placement in the paper tray depends on your printer. For printers where you load paper in the front, insert the paper with the already printed side up.
3.Repeat the steps above to print the inside of the gift card.
4.Now you can use a pen to sign your gift card.
advanced creativity
Now that you’ve learned all the basics, imagine what more you can do with the HP Custom Quilt Label Kit, your printer, and fabric sheets!
Here are some other ideas for inspiration:
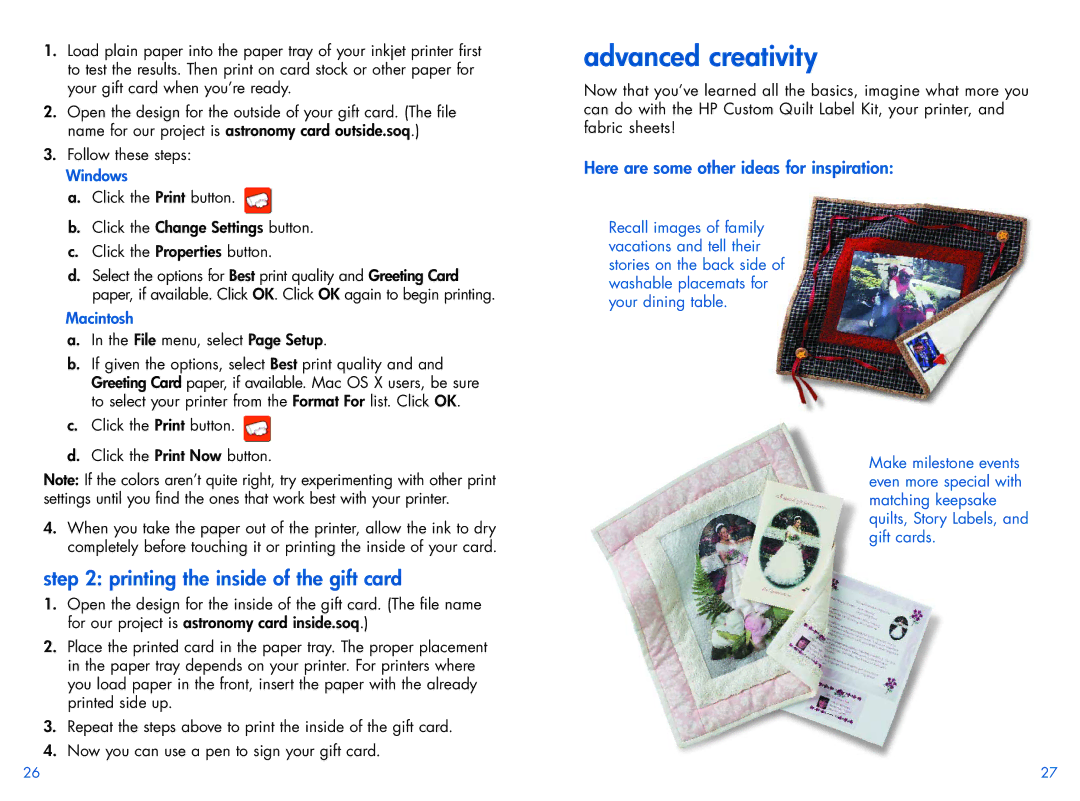
Recall images of family vacations and tell their stories on the back side of washable placemats for your dining table.
Make milestone events even more special with matching keepsake quilts, Story Labels, and gift cards.
26 | 27 |