tip:
Changes you make in the Text Controls area apply to the entire text box. Create separate text boxes to vary the text styles.
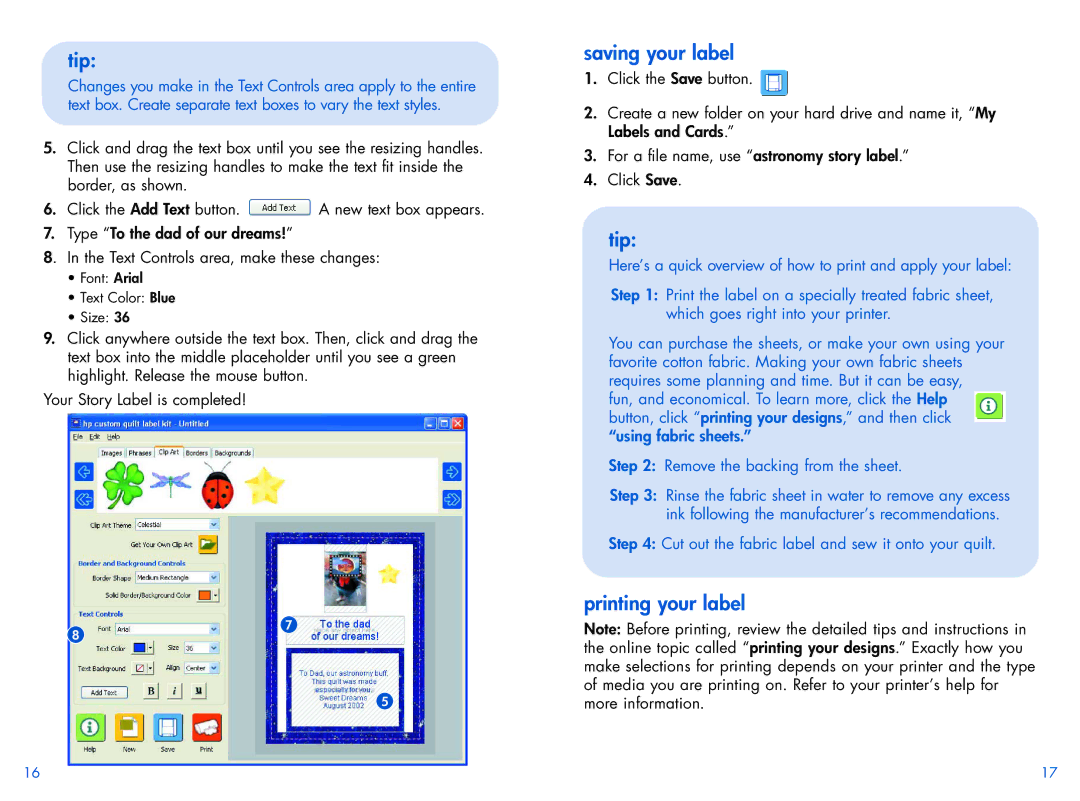
5.Click and drag the text box until you see the resizing handles. Then use the resizing handles to make the text fit inside the border, as shown.
6.Click the Add Text button. ![]() A new text box appears.
A new text box appears.
7.Type “To the dad of our dreams!”
8. In the Text Controls area, make these changes:
•Font: Arial
•Text Color: Blue
•Size: 36
9.Click anywhere outside the text box. Then, click and drag the text box into the middle placeholder until you see a green highlight. Release the mouse button.
Your Story Label is completed!
saving your label
1.Click the Save button. ![]()
2.Create a new folder on your hard drive and name it, “My Labels and Cards.”
3.For a file name, use “astronomy story label.”
4.Click Save.
tip:
Here’s a quick overview of how to print and apply your label:
Step 1: Print the label on a specially treated fabric sheet, which goes right into your printer.
You can purchase the sheets, or make your own using your favorite cotton fabric. Making your own fabric sheets requires some planning and time. But it can be easy,
fun, and economical. To learn more, click the Help button, click “printing your designs,” and then click “using fabric sheets.”
Step 2: Remove the backing from the sheet.
Step 3: Rinse the fabric sheet in water to remove any excess ink following the manufacturer’s recommendations.
Step 4: Cut out the fabric label and sew it onto your quilt.
printing your label
8
7
5
Note: Before printing, review the detailed tips and instructions in the online topic called “printing your designs.” Exactly how you make selections for printing depends on your printer and the type of media you are printing on. Refer to your printer’s help for more information.
16 | 17 |