saving the front and back of your gift card
1.Click the Save button. ![]()
2.Go to the folder you created earlier called “My Labels and Cards.”
3.For a file name, use “astronomy card outside.”
4.Click Save.
tip:
In the future, you can open a saved design in the HP Custom Quilt Label Kit by selecting Open in the File menu, locating your saved design, selecting it, and clicking Open.
step 2: create the inside of your gift card
selecting a template
1.To start the HP Custom Quilt Label Kit,
follow the instructions on page 6. If the program is already open, click the New button.
2.In the next screen, select
Gift Card Side Fold inside and click OK. You see the selected template in the work area on the right.
adding backgrounds
Follow the steps on page 19 to add back- grounds to the inside of your card to look like this:
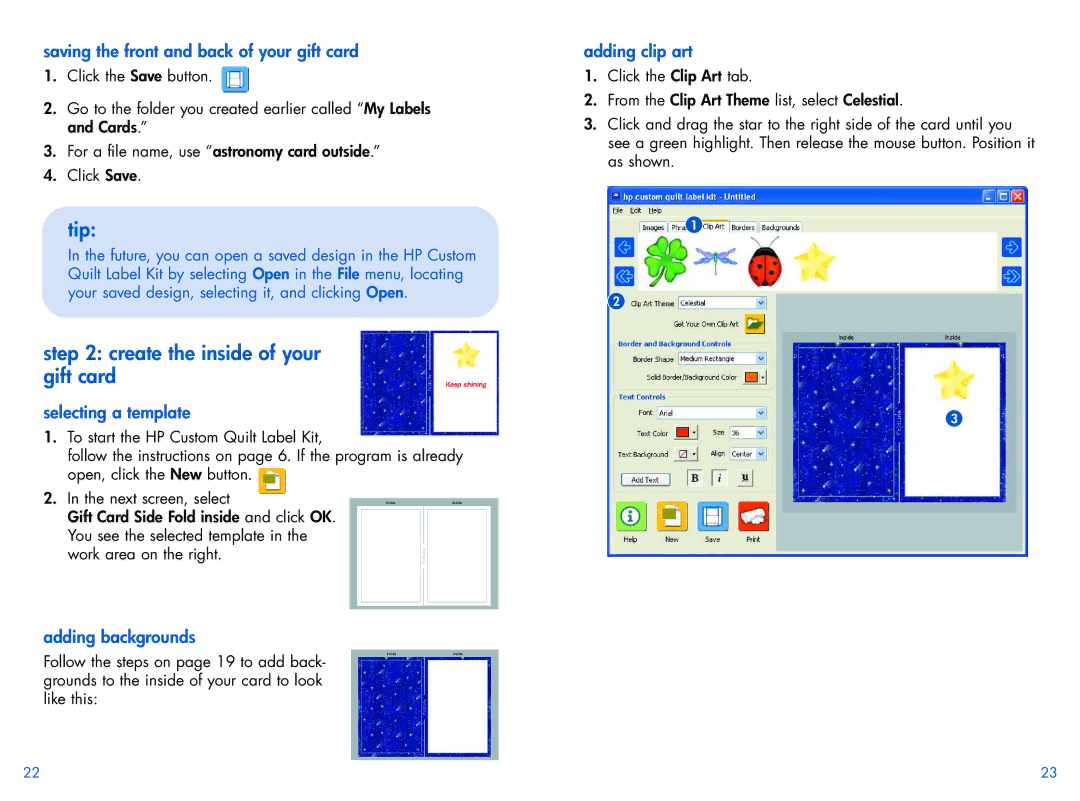
adding clip art
1.Click the Clip Art tab.
2.From the Clip Art Theme list, select Celestial.
3.Click and drag the star to the right side of the card until you see a green highlight. Then release the mouse button. Position it as shown.
1
2
3
22 | 23 |