adding text
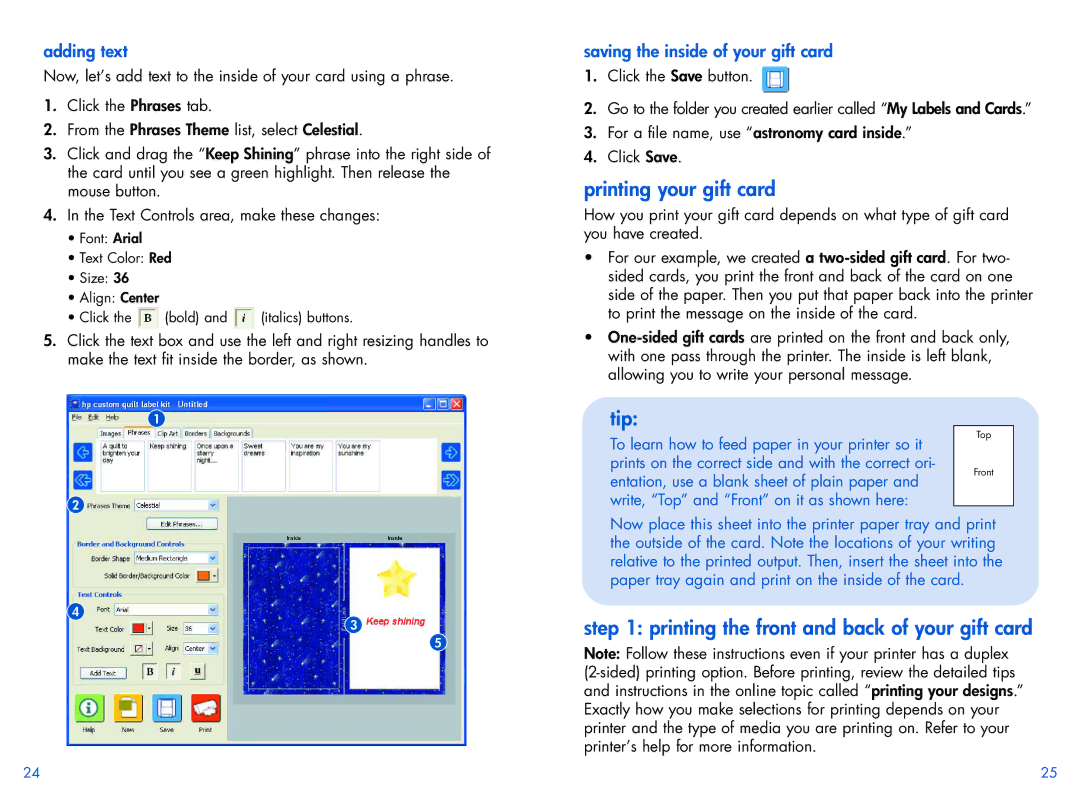
Now, let’s add text to the inside of your card using a phrase.
1.Click the Phrases tab.
2.From the Phrases Theme list, select Celestial.
3.Click and drag the “Keep Shining” phrase into the right side of the card until you see a green highlight. Then release the mouse button.
4.In the Text Controls area, make these changes:
•Font: Arial
•Text Color: Red
•Size: 36
•Align: Center
•Click the ![]() (bold) and
(bold) and ![]() (italics) buttons.
(italics) buttons.
5.Click the text box and use the left and right resizing handles to make the text fit inside the border, as shown.
1
2
4
3
5
saving the inside of your gift card
1.Click the Save button. ![]()
2.Go to the folder you created earlier called “My Labels and Cards.”
3.For a file name, use “astronomy card inside.”
4.Click Save.
printing your gift card
How you print your gift card depends on what type of gift card you have created.
•For our example, we created a
•
tip: |
| |
To learn how to feed paper in your printer so it | Top | |
| ||
prints on the correct side and with the correct ori- | Front | |
entation, use a blank sheet of plain paper and | ||
| ||
write, “Top” and “Front” on it as shown here: |
|
Now place this sheet into the printer paper tray and print the outside of the card. Note the locations of your writing relative to the printed output. Then, insert the sheet into the paper tray again and print on the inside of the card.
step 1: printing the front and back of your gift card
Note: Follow these instructions even if your printer has a duplex
24 | 25 |
