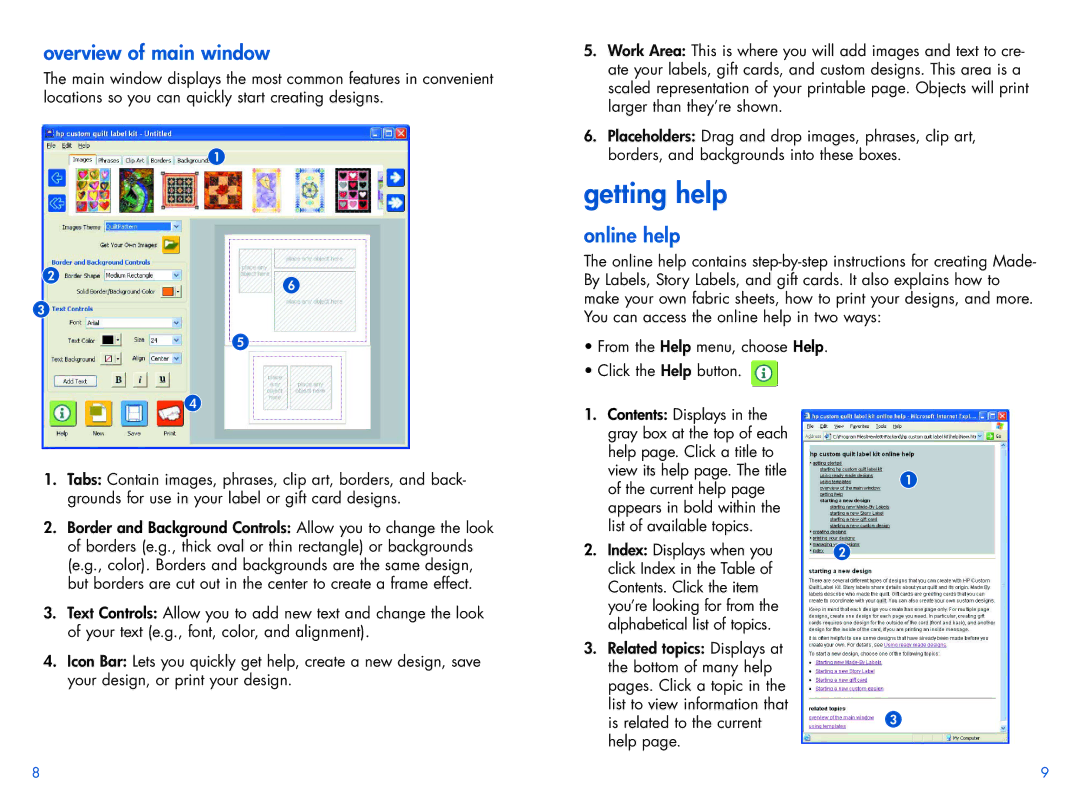
overview of main window
The main window displays the most common features in convenient locations so you can quickly start creating designs.
1
5.Work Area: This is where you will add images and text to cre- ate your labels, gift cards, and custom designs. This area is a scaled representation of your printable page. Objects will print larger than they’re shown.
6.Placeholders: Drag and drop images, phrases, clip art, borders, and backgrounds into these boxes.
getting help
online help
2
3
6
The online help contains
5
4
1.Tabs: Contain images, phrases, clip art, borders, and back- grounds for use in your label or gift card designs.
2.Border and Background Controls: Allow you to change the look of borders (e.g., thick oval or thin rectangle) or backgrounds (e.g., color). Borders and backgrounds are the same design, but borders are cut out in the center to create a frame effect.
3.Text Controls: Allow you to add new text and change the look of your text (e.g., font, color, and alignment).
4.Icon Bar: Lets you quickly get help, create a new design, save your design, or print your design.
•From the Help menu, choose Help.
•Click the Help button. ![]()
1. Contents: Displays in the
gray box at the top of each |
| |
help page. Click a title to |
| |
view its help page. The title | 1 | |
of the current help page | ||
| ||
appears in bold within the |
| |
list of available topics. |
| |
2. Index: Displays when you | 2 | |
click Index in the Table of |
| |
Contents. Click the item |
| |
you’re looking for from the |
| |
alphabetical list of topics. |
| |
3. Related topics: Displays at |
| |
the bottom of many help |
| |
pages. Click a topic in the |
| |
list to view information that | 3 | |
is related to the current | ||
help page. |
|
8 | 9 |