Hickory Industries, Inc.
1.9Changing Gas Orifices
1.9.1Changing the Main Gas Orifice
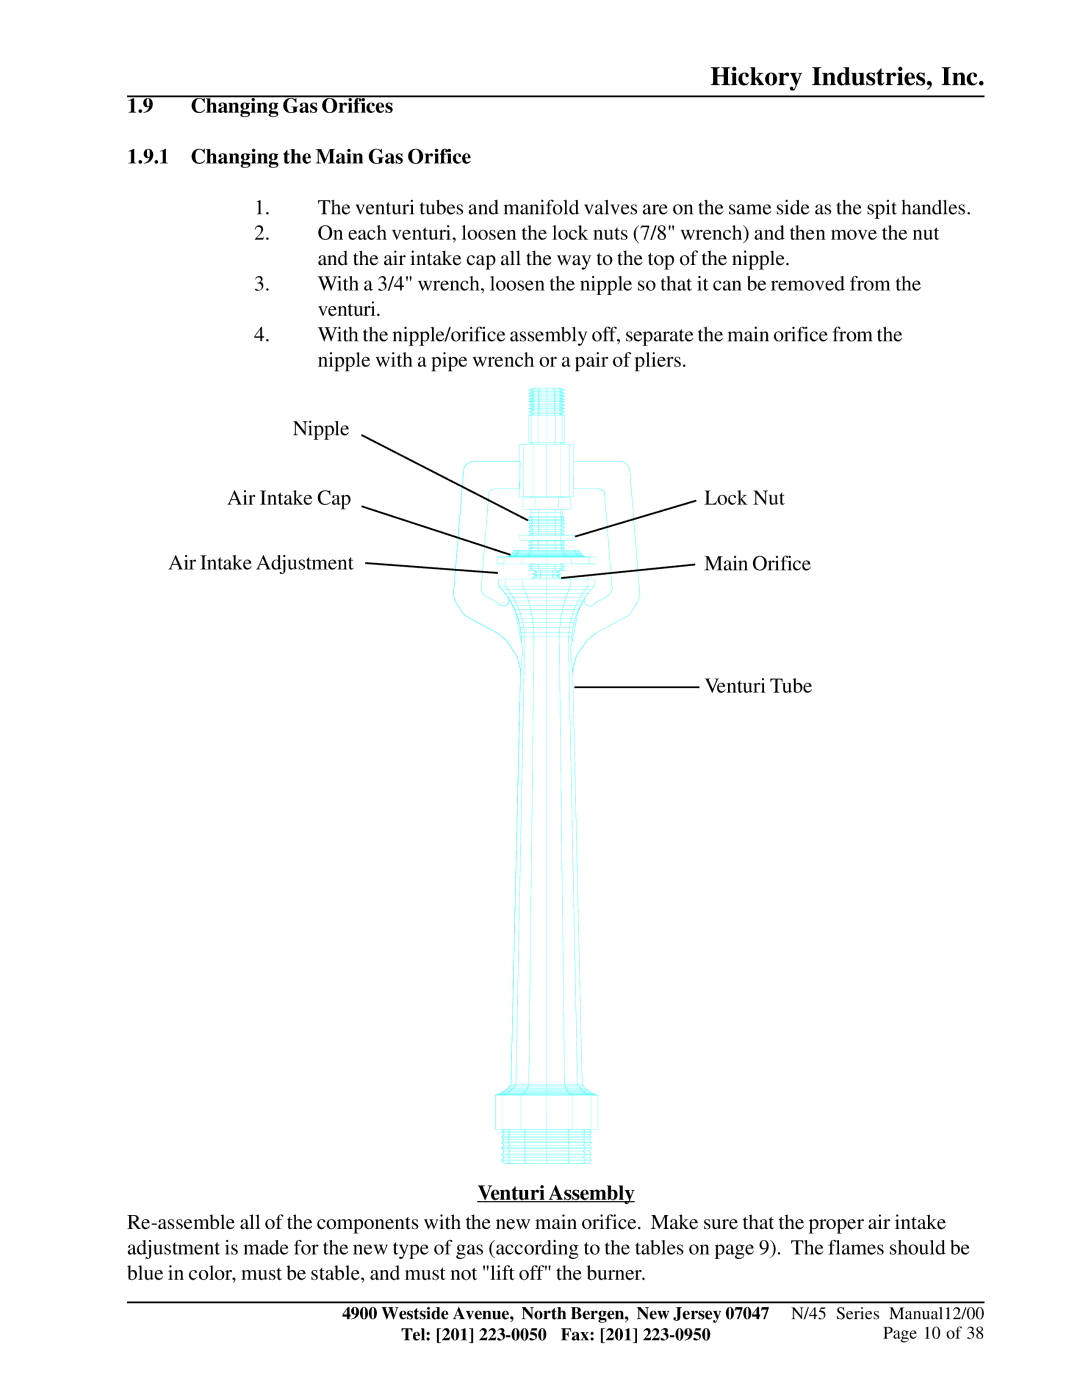
1.The venturi tubes and manifold valves are on the same side as the spit handles.
2.On each venturi, loosen the lock nuts (7/8" wrench) and then move the nut and the air intake cap all the way to the top of the nipple.
3.With a 3/4" wrench, loosen the nipple so that it can be removed from the venturi.
4.With the nipple/orifice assembly off, separate the main orifice from the nipple with a pipe wrench or a pair of pliers.
Nipple
Air Intake Cap
Lock Nut
Air Intake Adjustment
Main Orifice
Venturi Tube
Venturi Assembly
4900 Westside Avenue, North Bergen, New Jersey 07047 | N/45 Series Manual12/00 |
Tel: [201] | Page 10 of 38 |