Setting Up the Monitor
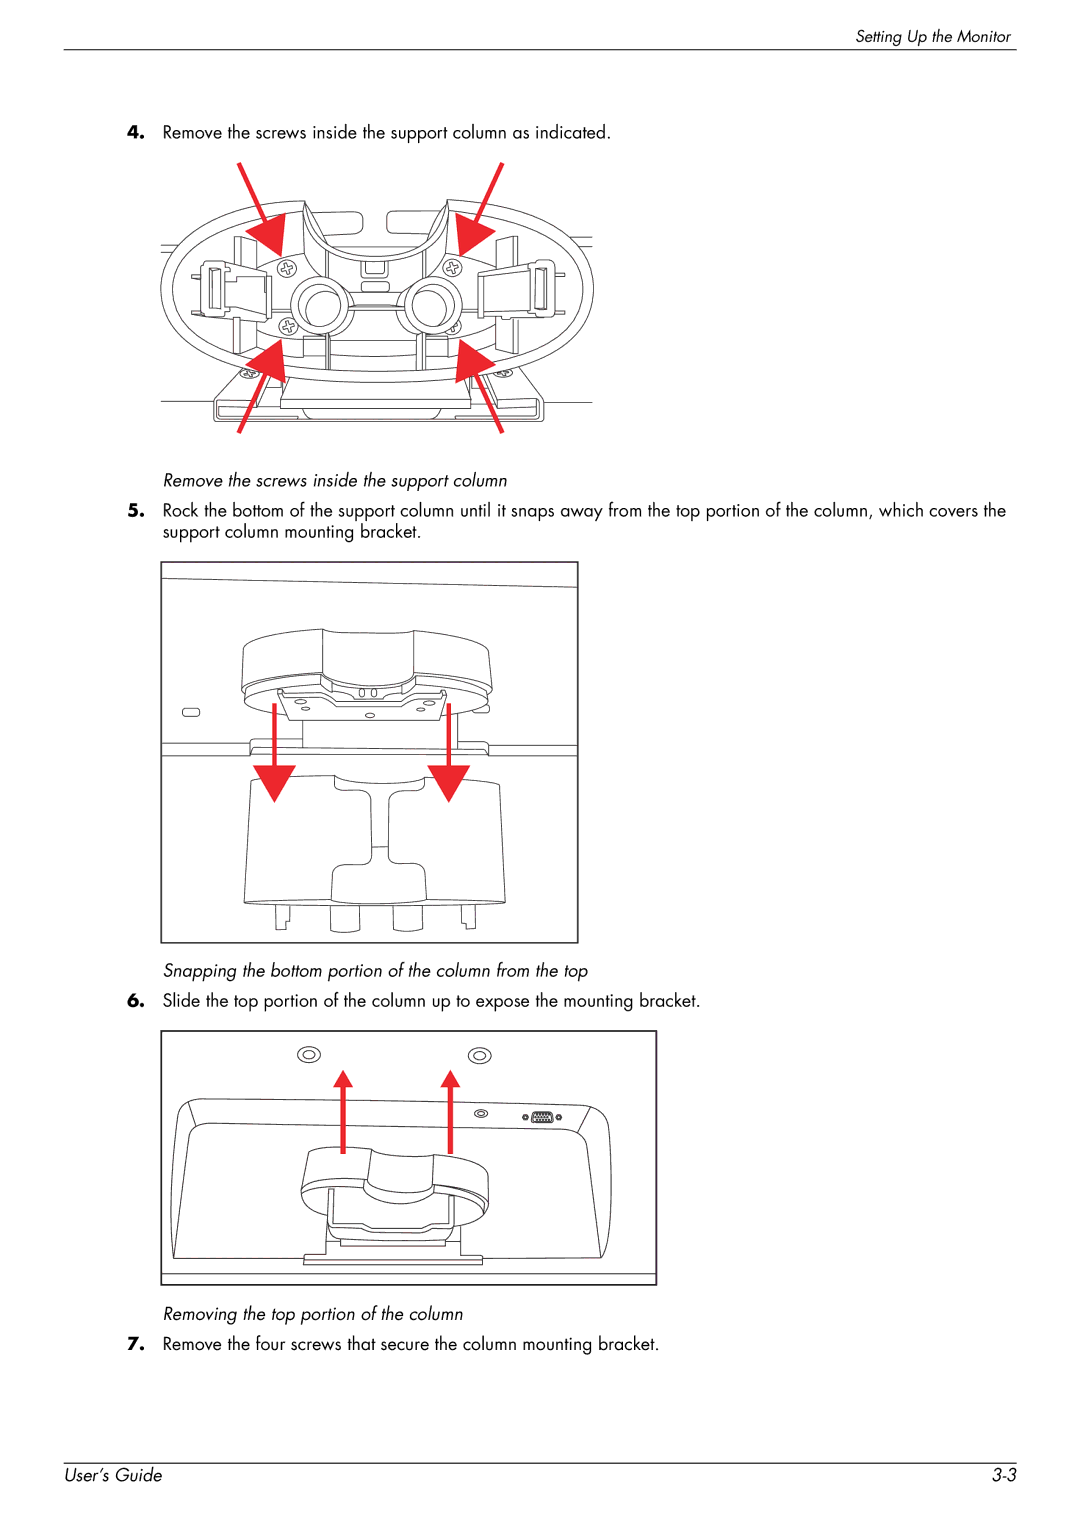
4.Remove the screws inside the support column as indicated.
Remove the screws inside the support column
5.Rock the bottom of the support column until it snaps away from the top portion of the column, which covers the support column mounting bracket.
Snapping the bottom portion of the column from the top
6.Slide the top portion of the column up to expose the mounting bracket.
Removing the top portion of the column
7.Remove the four screws that secure the column mounting bracket.
User’s Guide |
