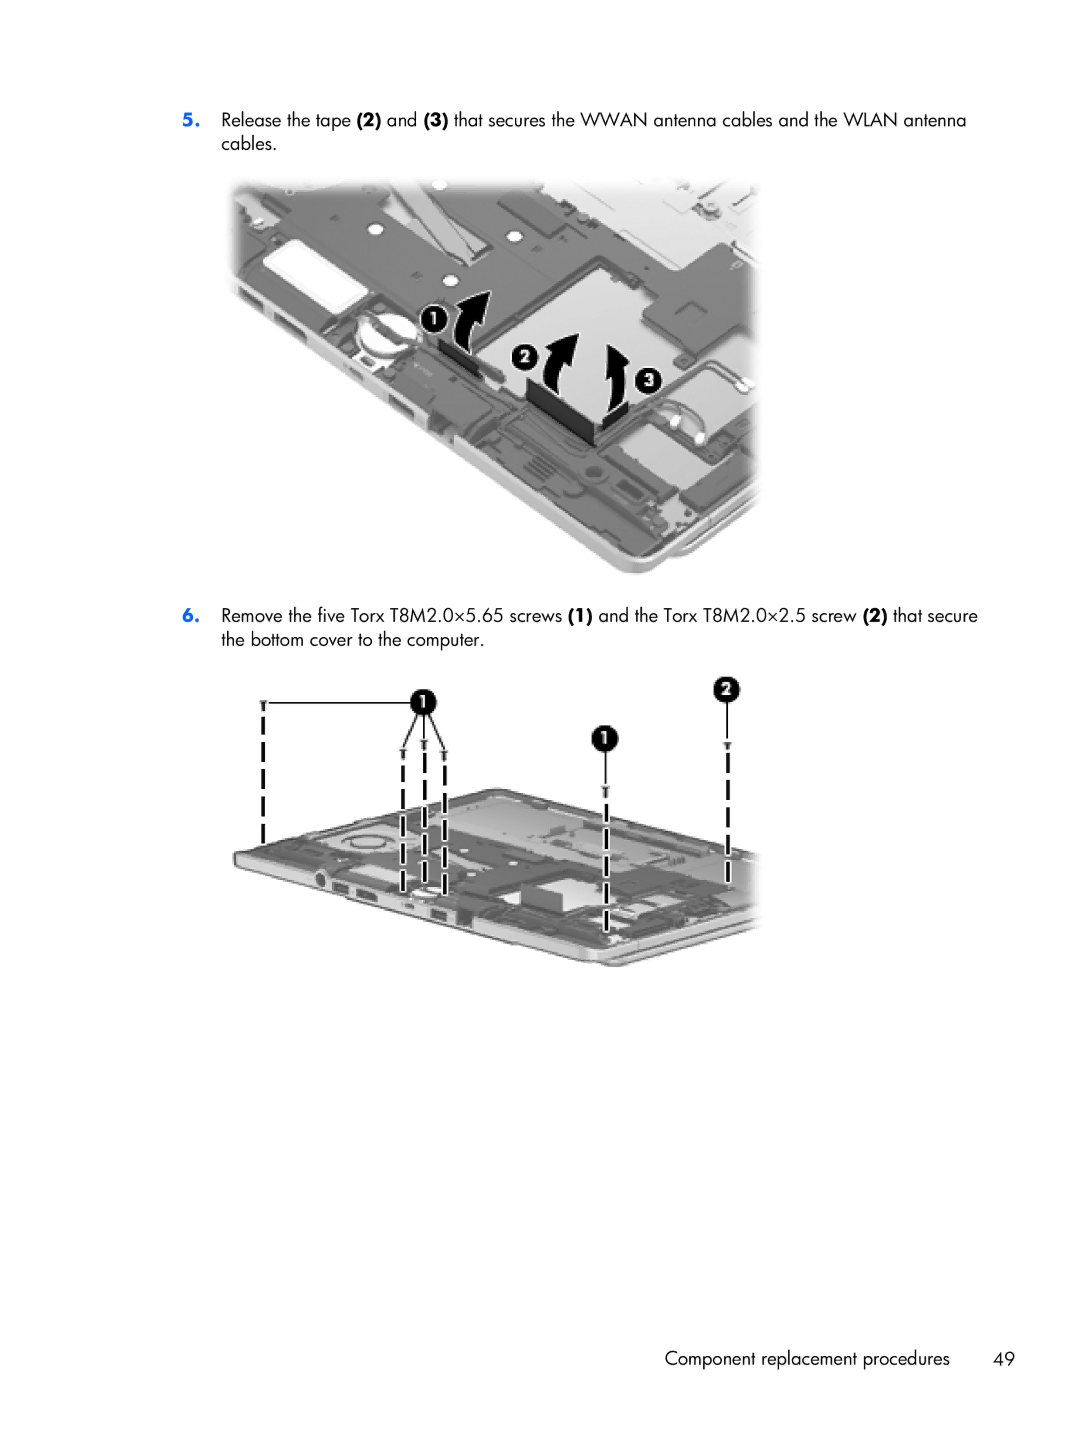
5.Release the tape (2) and (3) that secures the WWAN antenna cables and the WLAN antenna cables.
6.Remove the five Torx T8M2.0×5.65 screws (1) and the Torx T8M2.0×2.5 screw (2) that secure the bottom cover to the computer.
Component replacement procedures | 49 |