Replacing a Memory Module
Upgrade the memory in your computer with memory of the same type and speed as the memory originally installed in your computer.
1Complete the procedure “Removing a Memory Module” on page 17.
2Open both latches of the memory module socket.
WARNING: Handle the memory module with care. Be careful to not touch any memory module contacts. Touching the gold contacts may damage the module. Avoid touching the memory chips.
3Remove the new memory module from the antistatic packaging. Hold it by its edges only.
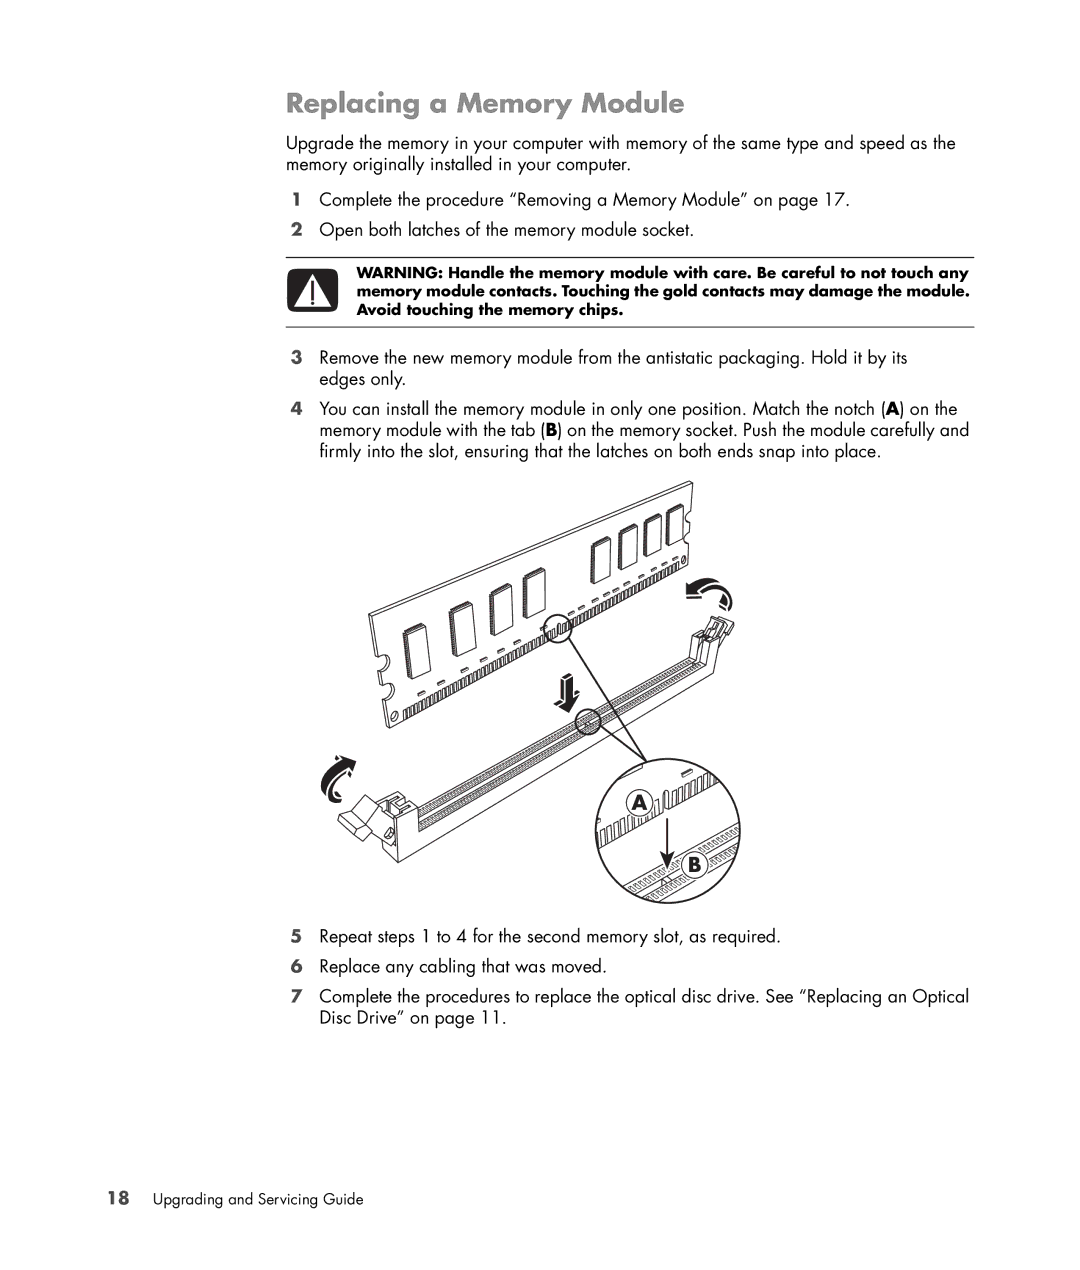
4You can install the memory module in only one position. Match the notch (A) on the memory module with the tab (B) on the memory socket. Push the module carefully and firmly into the slot, ensuring that the latches on both ends snap into place.
A
![]() B
B
5Repeat steps 1 to 4 for the second memory slot, as required.
6Replace any cabling that was moved.
7Complete the procedures to replace the optical disc drive. See “Replacing an Optical Disc Drive” on page 11.
