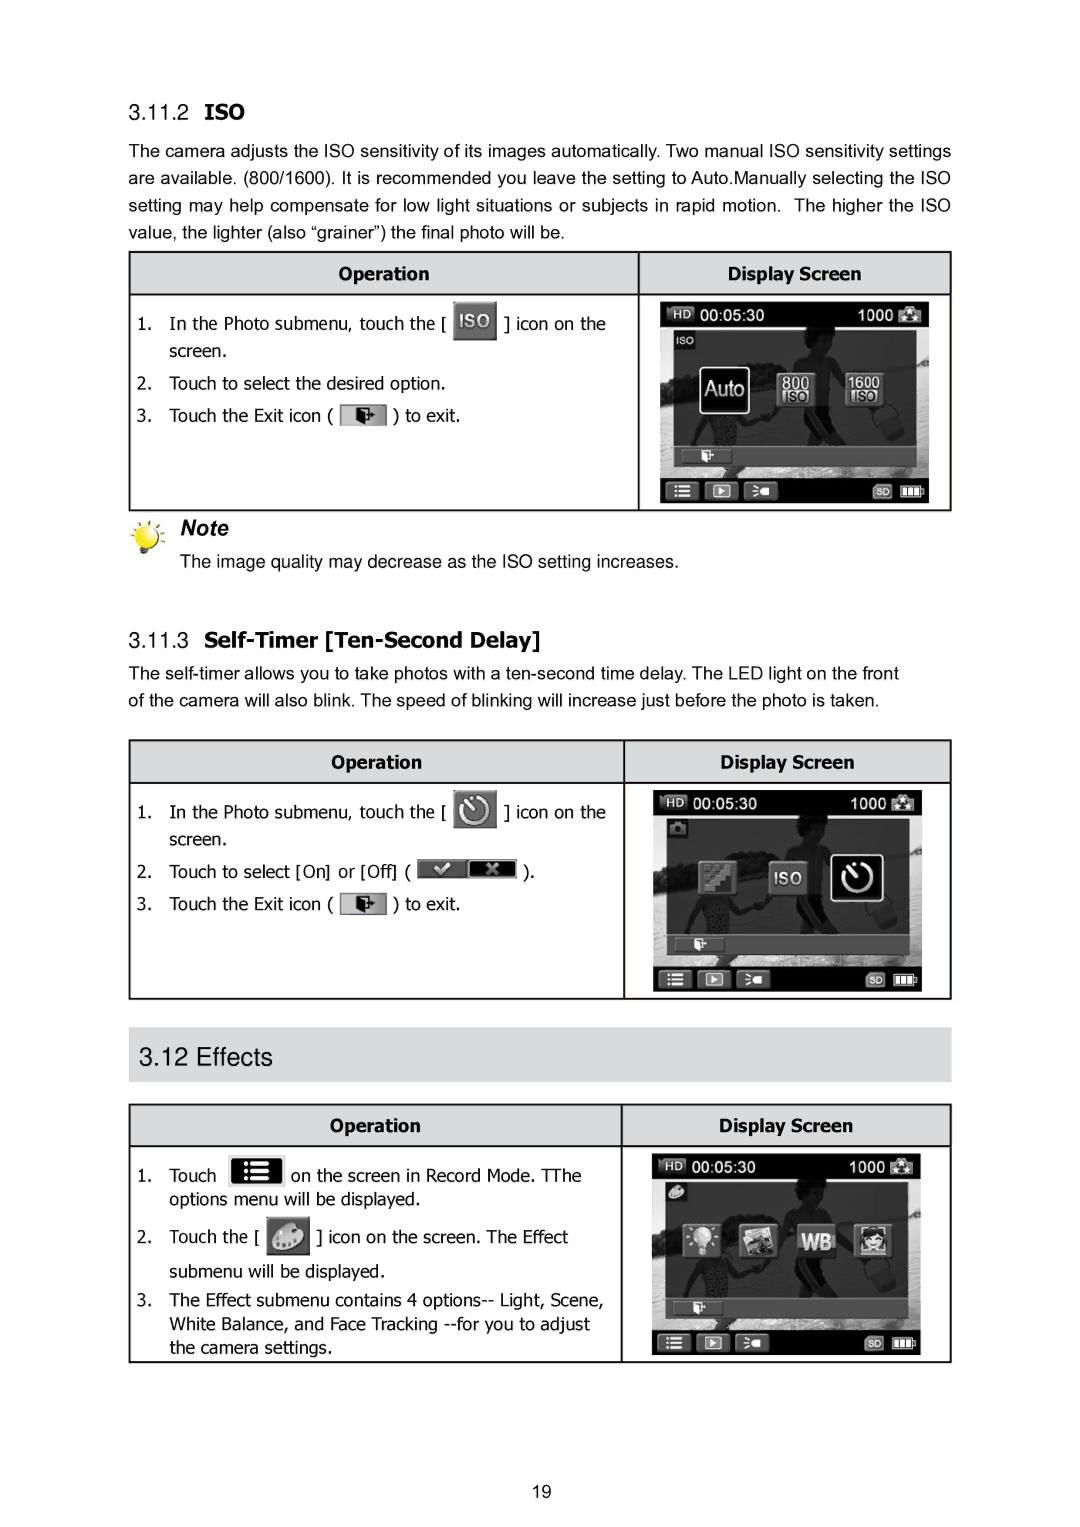
3.11.2ISO
The camera adjusts the ISO sensitivity of its images automatically. Two manual ISO sensitivity settings are available. (800/1600). It is recommended you leave the setting to Auto.Manually selecting the ISO setting may help compensate for low light situations or subjects in rapid motion. The higher the ISO value, the lighter (also “grainer”) the final photo will be.
Operation | Display Screen |
|
|
1. In the Photo submenu, touch the [ | ] icon on the |
screen. |
|
2.Touch to select the desired option.
3.Touch the Exit icon ( ![]() ) to exit.
) to exit.
Note
The image quality may decrease as the ISO setting increases.
3.11.3Self-Timer [Ten-Second Delay]
The
Operation | Display Screen |
1.In the Photo submenu, touch the [ ![]() ] icon on the screen.
] icon on the screen.
2.Touch to select [On] or [Off] ( ![]() ).
).
3.Touch the Exit icon ( ![]() ) to exit.
) to exit.
3.12Effects
Operation | Display Screen |
1.Touch ![]() on the screen in Record Mode. TThe options menu will be displayed.
on the screen in Record Mode. TThe options menu will be displayed.
2.Touch the [ ![]() ] icon on the screen. The Effect submenu will be displayed.
] icon on the screen. The Effect submenu will be displayed.
3.The Effect submenu contains 4
19