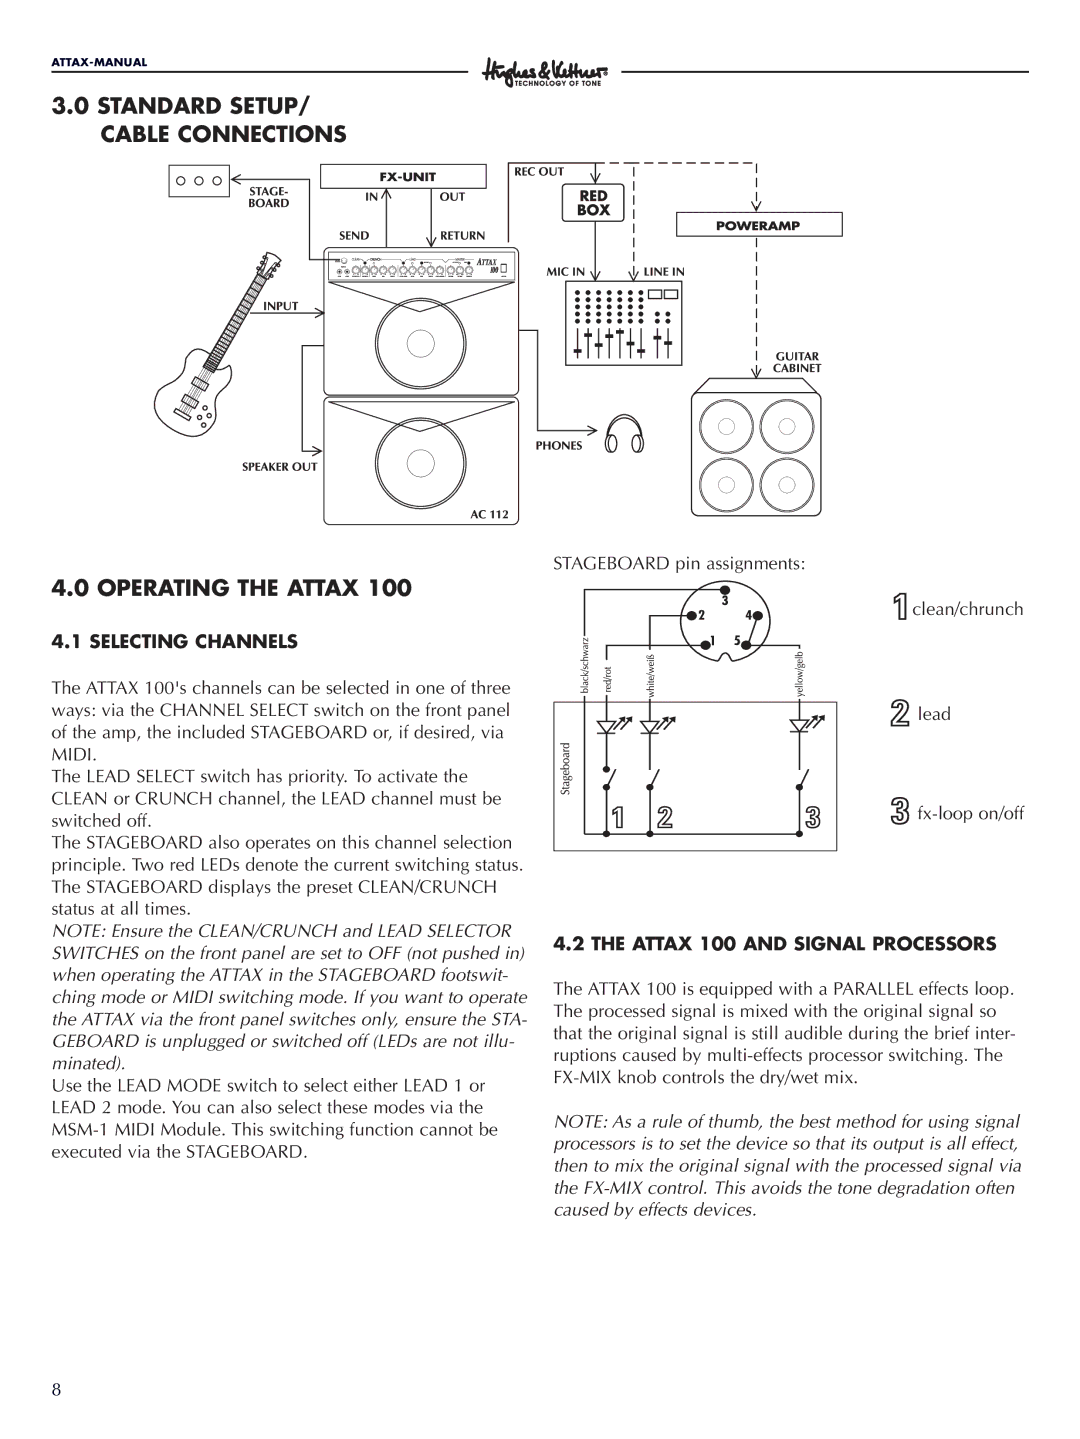
3.0STANDARD SETUP/ CABLE CONNECTIONS
4.0OPERATING THE ATTAX 100
4.1SELECTING CHANNELS
The ATTAX 100's channels can be selected in one of three ways: via the CHANNEL SELECT switch on the front panel of the amp, the included STAGEBOARD or, if desired, via MIDI.
The LEAD SELECT switch has priority. To activate the CLEAN or CRUNCH channel, the LEAD channel must be switched off.
The STAGEBOARD also operates on this channel selection principle. Two red LEDs denote the current switching status. The STAGEBOARD displays the preset CLEAN/CRUNCH status at all times.
NOTE: Ensure the CLEAN/CRUNCH and LEAD SELECTOR SWITCHES on the front panel are set to OFF (not pushed in) when operating the ATTAX in the STAGEBOARD footswit- ching mode or MIDI switching mode. If you want to operate the ATTAX via the front panel switches only, ensure the STA- GEBOARD is unplugged or switched off (LEDs are not illu- minated).
Use the LEAD MODE switch to select either LEAD 1 or LEAD 2 mode. You can also select these modes via the
STAGEBOARD pin assignments:
![]() clean/chrunch
clean/chrunch
![]() lead
lead
![]()
4.2 THE ATTAX 100 AND SIGNAL PROCESSORS
The ATTAX 100 is equipped with a PARALLEL effects loop. The processed signal is mixed with the original signal so that the original signal is still audible during the brief inter- ruptions caused by
NOTE: As a rule of thumb, the best method for using signal processors is to set the device so that its output is all effect, then to mix the original signal with the processed signal via the
8
