3 | Fuel system |
|
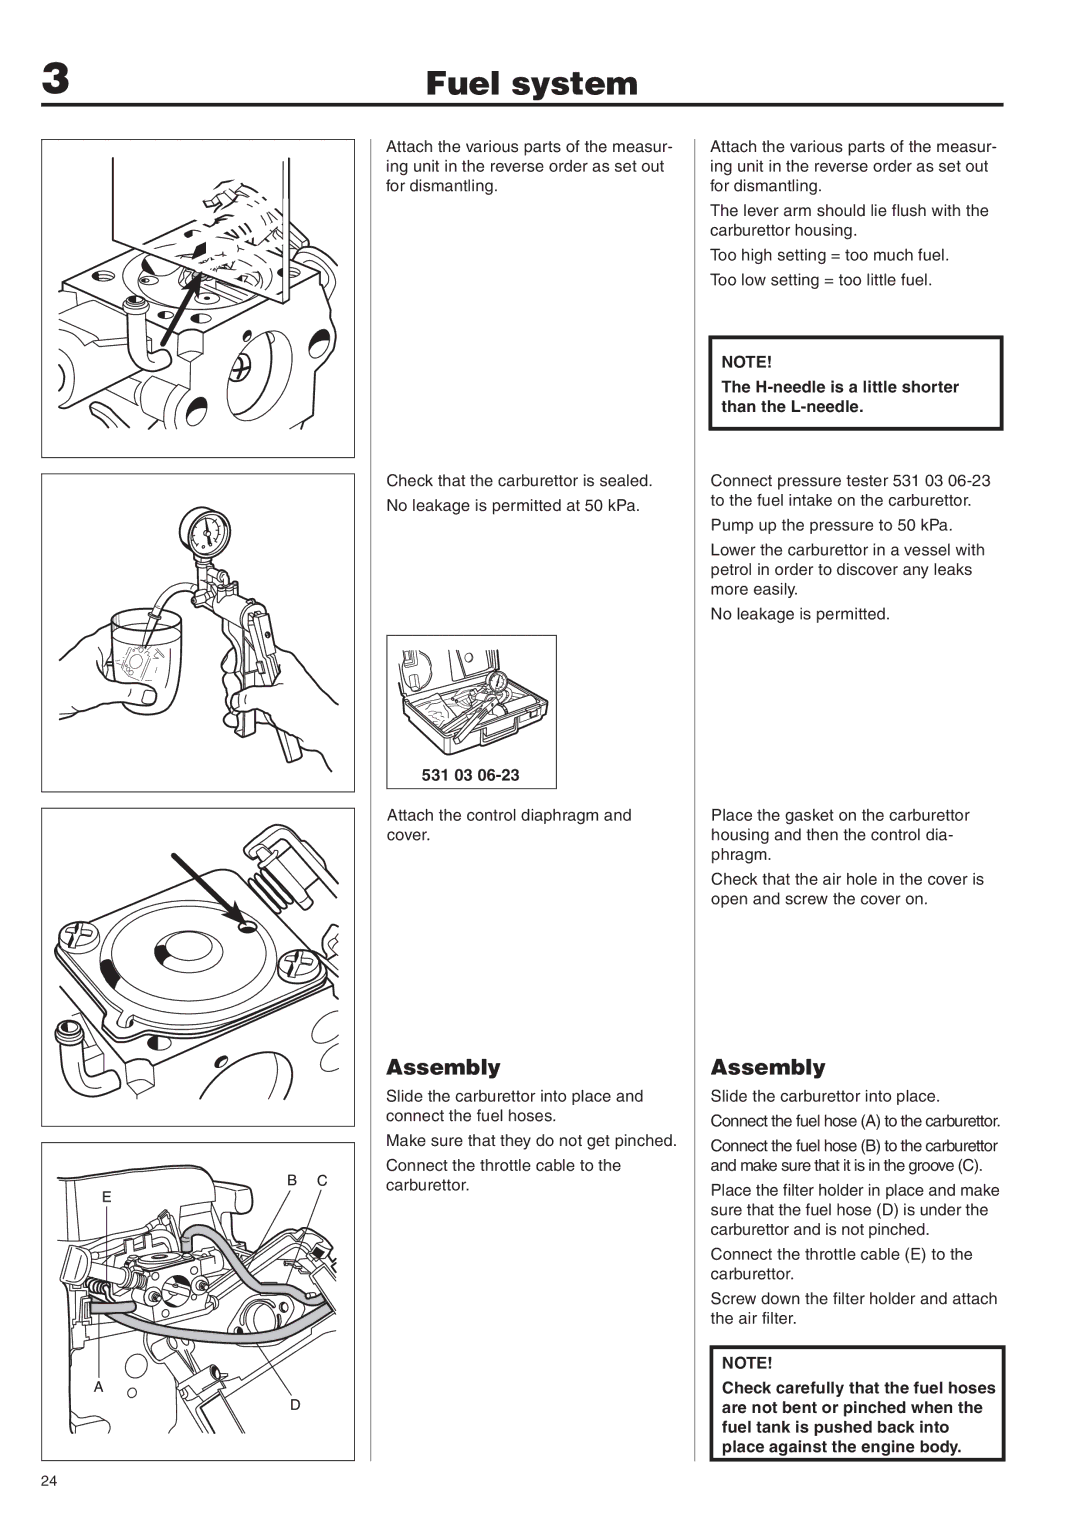
| Attach the various parts of the measur- | Attach the various parts of the measur- |
| ing unit in the reverse order as set out | ing unit in the reverse order as set out |
| for dismantling. | for dismantling. |
|
| The lever arm should lie flush with the |
|
| carburettor housing. |
|
| Too high setting = too much fuel. |
|
| Too low setting = too little fuel. |
|
| NOTE! |
|
| The |
|
| than the |
| Check that the carburettor is sealed. | Connect pressure tester 531 03 |
| No leakage is permitted at 50 kPa. | to the fuel intake on the carburettor. |
|
| |
|
| Pump up the pressure to 50 kPa. |
|
| Lower the carburettor in a vessel with |
|
| petrol in order to discover any leaks |
|
| more easily. |
|
| No leakage is permitted. |
531 03 |
Attach the control diaphragm and | Place the gasket on the carburettor |
cover. | housing and then the control dia- |
| phragm. |
| Check that the air hole in the cover is |
| open and screw the cover on. |
Assembly | Assembly |
Slide the carburettor into place and | Slide the carburettor into place. |
connect the fuel hoses. | Connect the fuel hose (A) to the carburettor. |
|
Make sure that they do not get pinched. | Connect the fuel hose (B) to the carburettor |
| |
Connect the throttle cable to the | and make sure that it is in the groove (C). |
carburettor. | Place the filter holder in place and make |
| |
| sure that the fuel hose (D) is under the |
| carburettor and is not pinched. |
| Connect the throttle cable (E) to the |
| carburettor. |
| Screw down the filter holder and attach |
| the air filter. |
| NOTE! |
| Check carefully that the fuel hoses |
| are not bent or pinched when the |
| fuel tank is pushed back into |
| place against the engine body. |
24 |
|
