Maintenance
Tilt angle
•Place the machine on a flat surface.
•Check the tyre pressures.The tyre pressure should be 1.5 bar/150 kPa/22 PSI for all wheels
The air pressure in the cutting unit pivot wheel must be 150 kPa/1.5 bar/22 psi.
•Measure the distance between the ground and the front and rear edges of the cutting unit hood.
•The rear edge of the cutting unit should be
•Loosen the lock nut and turn the adjusting screw. Extend the brace to raise the rear edge of the cutting unit.
•Lock the nut against the brace.
Replacing the cutting unit belts
WARNING! Protect your hands with gloves
!There is a risk of crush injuries when working with the belt.
On these cutting units with
1Remove the cutting unit.
2Remove the screws holding the belt cover and lift it off.
3Pull the belt off the pulleys. Use a crowbar as necessary to
4Loosen two screws and remove the other three for the bevel gear. Turn the bevel gear so that the belt can be fed under the pulley.
5Check that the belt tensioning equipment is not jammed or binding and replace the spring.
6Insert the new belt in place and replace the bevel gear. The bevel gear is tightened to a torque of 47 Nm.
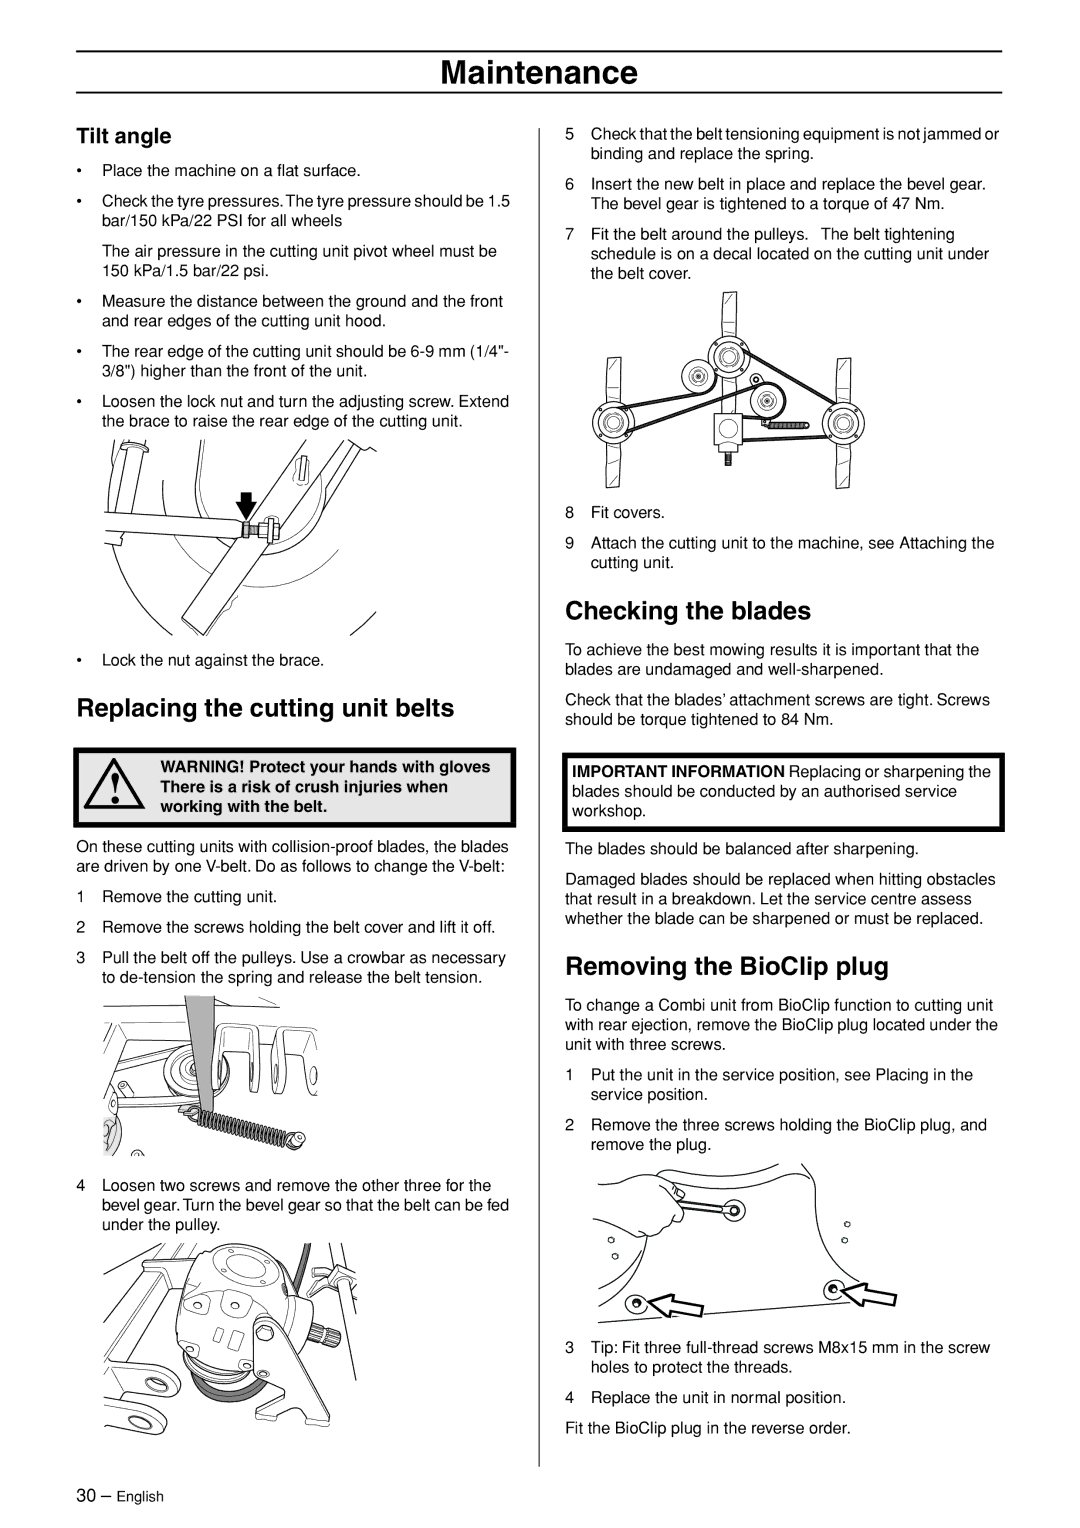
7Fit the belt around the pulleys. The belt tightening schedule is on a decal located on the cutting unit under the belt cover.
8Fit covers.
9Attach the cutting unit to the machine, see Attaching the cutting unit.
Checking the blades
To achieve the best mowing results it is important that the blades are undamaged and
Check that the blades’ attachment screws are tight. Screws should be torque tightened to 84 Nm.
IMPORTANT INFORMATION Replacing or sharpening the blades should be conducted by an authorised service workshop.
The blades should be balanced after sharpening.
Damaged blades should be replaced when hitting obstacles that result in a breakdown. Let the service centre assess whether the blade can be sharpened or must be replaced.
Removing the BioClip plug
To change a Combi unit from BioClip function to cutting unit with rear ejection, remove the BioClip plug located under the unit with three screws.
1Put the unit in the service position, see Placing in the service position.
2Remove the three screws holding the BioClip plug, and remove the plug.
3Tip: Fit three
4Replace the unit in normal position.
Fit the BioClip plug in the reverse order.
30 – English