E

G

F

C

D


D


B


A


Shear bolts

Auger shear bolts

Both right and left-hand augers are secured to the auger shaft with a shoul- der/shear bolt and hex nut. Should a foreign object or ice become lodged in the augers, the shear bolts are designed to break, preventing damage to any other components. If one or both augers do not turn when auger control lever is engaged, check to see if one or both of the bolts have sheared. To replace the shear bolts:

1.Disengage all controls and move throttle control to STOP position (or ON/OFF switch to OFF position). Wait for all moving parts to stop.

2.Remove safety ignition key and disconnect spark plug wire from spark plug. Place wire where it cannot come in contact with spark plug.

3.Align hole in auger hub (A) with hole in auger shaft (B) and install a new 1/4-20 x 2" shoulder/shear bolt (C). Install 1/4-20 lock nut (D) and tighten securely.

CAUTION: Do not substitute. Use only original equipment shear bolts as supplied with your snow thrower.

4.Insert safety ignition key and reconnect spark plug wire to spark plug.

Impeller shear bolts

The impeller is secured to the impeller shaft with two (2) capscrew/shear bolts and hex nuts. Should a foreign object or ice become lodged in the impeller, the capscrews are designed to break, preventing damage to any other components. If impeller does not turn when auger control lever is engaged, check to see if the capscrews have sheared. To replace the capscrew/shear bolts:

1.Disengage all controls and move throttle control to STOP position (or ON/OFF switch to OFF position). Wait for all moving parts to stop.

2.Remove safety ignition key and disconnect spark plug wire from spark plug. Place wire where it cannot come in contact with spark plug.

3.Align holes in impeller hub (E) with holes in impeller shaft (F) and install two (2) new 1/4-20 x 1-5/8" capscrew/shear bolts

(G). Install 1/4-20 lock nuts (D) and tighten securely.

CAUTION: Do not substitute. Use only original equipment capscrew/shear bolts as supplied with your snow thrower.

4.Insert safety ignition key and reconnect spark plug wire to spark plug.

Scherbolzen

Scherbolzen an einzugsschnecken

Beide Einzugsschnecken, zur Linken und zur Rechten, sind mit Ansatz-/Scherbolzen und Sechskantmutter am Einzugsschnecken- Schaft befestigt. Sollte sich ein Fremdkörper oder Eisbrocken in den Einzugsschnecken verfangen, so sind die Scherbolzen so konstruiert, dass sie brechen, um etwaige Schäden an anderen Teilen der Maschine zu vermeiden. Sollten eine oder beide Einzugsschnecken sich nicht drehen, wenn der Bedienungshebel für die Einzugsschnecken betätigt wird, sehen Sie nach, ob ein oder beide Bolzen gebrochen sind. Ersetzen der Scherbolzen:

1.Schalten Sie alle Bedienungshebel aus und stellen Sie den Gashebel auf Position “STOP” (oder stellen Sie dass der AN/ AUS-Schalter auf Position “AUS” steht). Warten Sie, bis alle beweglichen Teile stillstehen.

2.Ziehen Sie den Sicherheitszündschlüssel ab. Entfernen Sie das Zündkabel von der Zündkerze und halten Sie es von der Zündkerze fern.

3.Bringen Sie das Loch in der Einzugsschnecken-Nabe (A) auf eine Linie mit dem Einzugsschnecken-Schaft (B), und bringen Sie einen neuen 1/4-20 x 2" Ansatz-/Scherbolzen (C) an. Bringen Sie eine 1/4-20 Kontermutter (D) an und ziehen Sie sie fest.

VORSICHT: Keine Fremdersatzteile verwenden. Verwenden Sie nur die Originalscherbolzen, die mit Ihrer Schneefräse geliefert wurden.

4.Einsatz Sie den Sicherheitszündschlüssel ab. Verbinden Sie das Zündkabel wieder mit der Zündkerze.

Scherbolzen am antriebsrad

Das Antriebsrad ist mit zwei (2) Sechskantschrauben/Scherbolzen und Sechskantmuttern am Antriebsrad-Schaft angebracht. Sollte sich ein Fremdkörper oder Eisbrocken im Antriebsrad verfangen, so sind die Sechskantschrauben so konstruiert, dass sie brechen, um etwaige Schäden an anderen Teilen der Maschine zu vermeiden. Sollte das Antriebsrad sich nicht drehen, wenn der Bedienungshebel für die Einzugsschnecken betätigt wird, sehen Sie nach, ob die Sechskantschrauben gebrochen sind. Ersetzen der Sechskantschrauben/Scherbolzen:

1.Schalten Sie alle Bedienungshebel aus und stellen Sie den Gashebel auf Position “STOP” (oder stellen Sie dass der AN/ AUS-Schalter auf Position “AUS” steht). Warten Sie, bis alle beweglichen Teile stillstehen.

2.Ziehen Sie den Sicherheitszündschlüssel ab. Entfernen Sie das Zündkabel von der Zündkerze und halten Sie es von der Zündkerze fern.

3.Bringen Sie die Löcher in der Antriebsradnabe (E) auf gleiche Linie mit den Löchern im Antriebsrad-Schaft (F) und bringen Sie zwei (2) neue 1/4 –20 x 1-5/8" Sechskantschrauben/Scherbolzen (G) an. Bringen Sie die 1/4-20 Kontermuttern (D) an und ziehen Sie sie fest.

VORSICHT: Keine Fremdersatzteile verwenden. Verwenden Sie nur die Originalsechskantschrauben/-scherbolzen, die mit Ihrer Schneefräse geliefert wurden.

4.Einsatz Sie den Sicherheitszündschlüssel ab. Verbinden Sie das Zündkabel wieder mit der Zündkerze.

48

Page 48
Image 48
Husqvarna ST 268EP instruction manual Shear bolts, Scherbolzen

ST 268EP specifications

The Husqvarna ST 268EP is a versatile and powerful snow blower designed for homeowners and professionals alike, offering exceptional performance in tackling heavy snowfall and maintaining clear pathways. This machine combines cutting-edge technology with robust construction to deliver reliability and efficiency during winter tasks.

One of the standout features of the ST 268EP is its powerful engine. Equipped with a reliable 269cc Husqvarna engine, it provides ample power to clear large amounts of snow quickly and effortlessly. The engine is not only designed for optimal performance but also incorporates advanced air injection technology, which ensures a steady airflow for flawless engine operation, even in the coldest conditions.

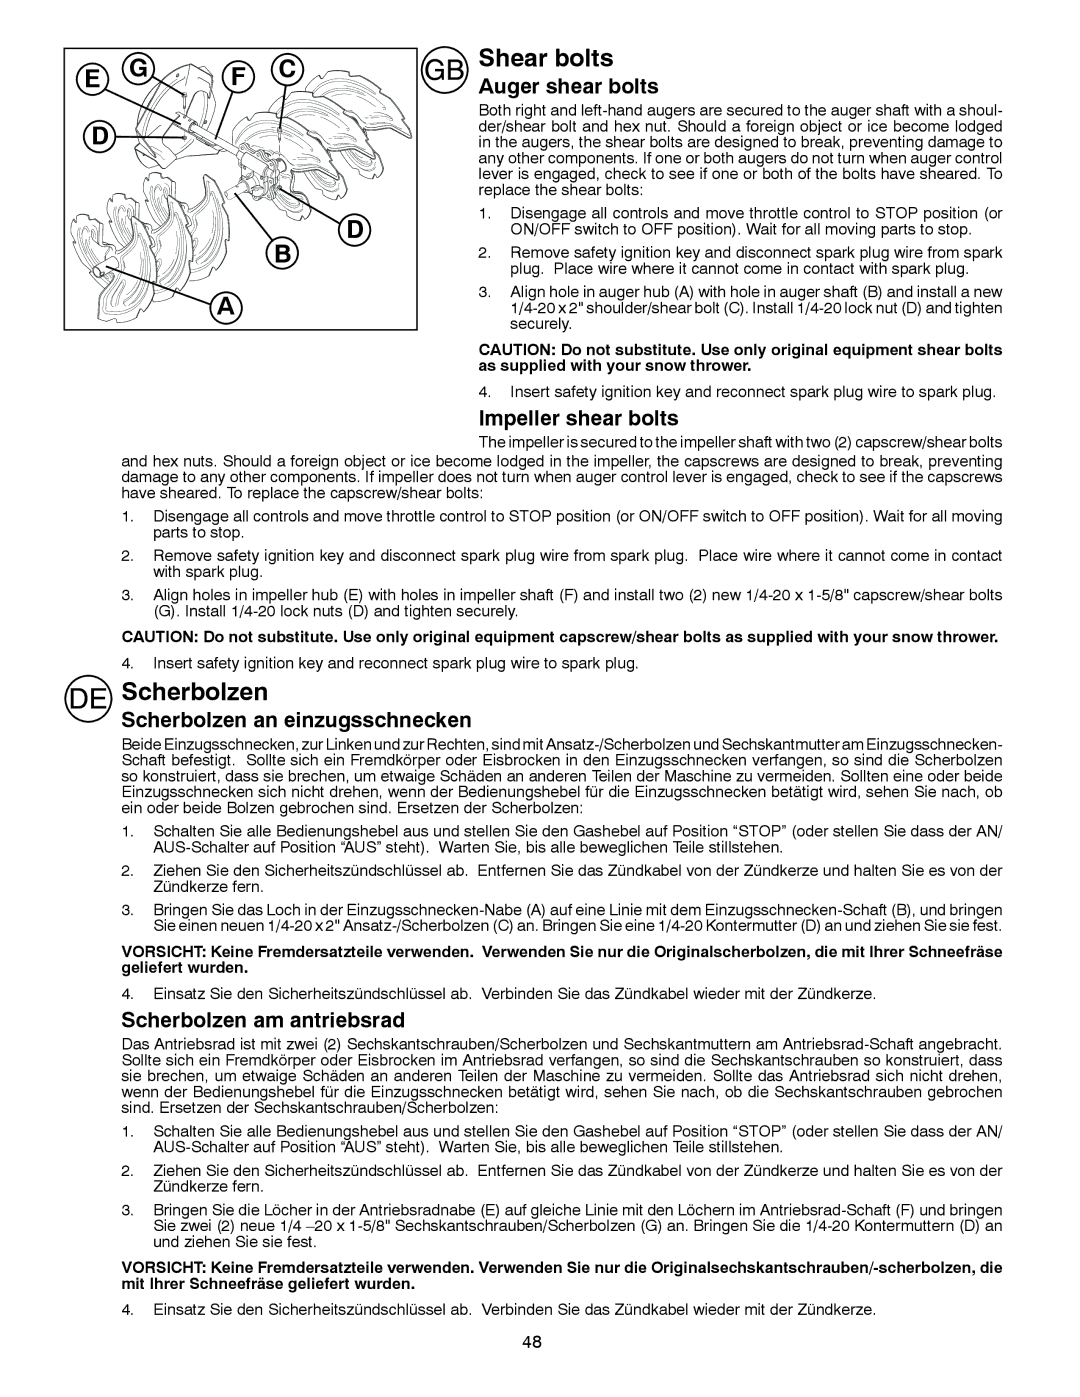
The ST 268EP offers a 26-inch clearing width and a 23-inch intake height, making it capable of handling both light and heavy snowfalls. The auger system features a robust design that efficiently handles varied snow types, including wet or heavy snow. Additionally, the machine's high-performance impeller allows for impressive throwing distance, helping to clear snow piles effectively from your driveway or walkway.

One of the innovative technologies integrated into the Husqvarna ST 268EP is the two-stage snow throwing system. This system works by first collecting snow through the auger and then discharging it through the chute, which is adjustable to direct snow in the desired direction. The chute can rotate 200 degrees, offering superior control over where the snow is thrown, which is particularly useful in confined spaces.

User convenience is a key consideration in the design of the ST 268EP. The snow blower features electric start capability, making it easy to start with the push of a button, eliminating the hassle of pull cords, especially in frigid temperatures. Ergonomically designed handles provide comfort during operation, while the hand warmers keep the operator's hands warm during extended use.

With its durable construction, including heavy-duty steel and a reinforced housing, the Husqvarna ST 268EP is built to withstand rigorous winter conditions. The adjustable skid shoes allow users to customize the clearance height, preventing damage to surfaces while ensuring efficient snow removal.

In summary, the Husqvarna ST 268EP is a powerful, efficient, and user-friendly snow blower equipped with advanced features and reliable technology. Its durable build, combined with innovative systems, makes it an ideal choice for anyone looking to manage winter snowfall effectively. Whether for residential or commercial use, the ST 268EP proves to be a valuable asset during the winter season.