2.2 ThinkPad
Before installing Linux, we installed all our ThinkPad options: additional memory, internal Ethernet port, the
We started the system and selected F1 for BIOS setup. Working with BIOS functions, we verified that we had 512 MB of memory and that the internal Ethernet adapter was recognized. We set the time and date. In the Startup section, we verified that the Boot device List F12 Option was enabled; this lets us temporarily select the
After exiting the BIOS setup function and performing
2.3 Linux installation
We purchased a Red Hat Linux 7.1 standard package in a local store. (They also had a Deluxe version and a Server version; we selected the basic version.) This consists of four
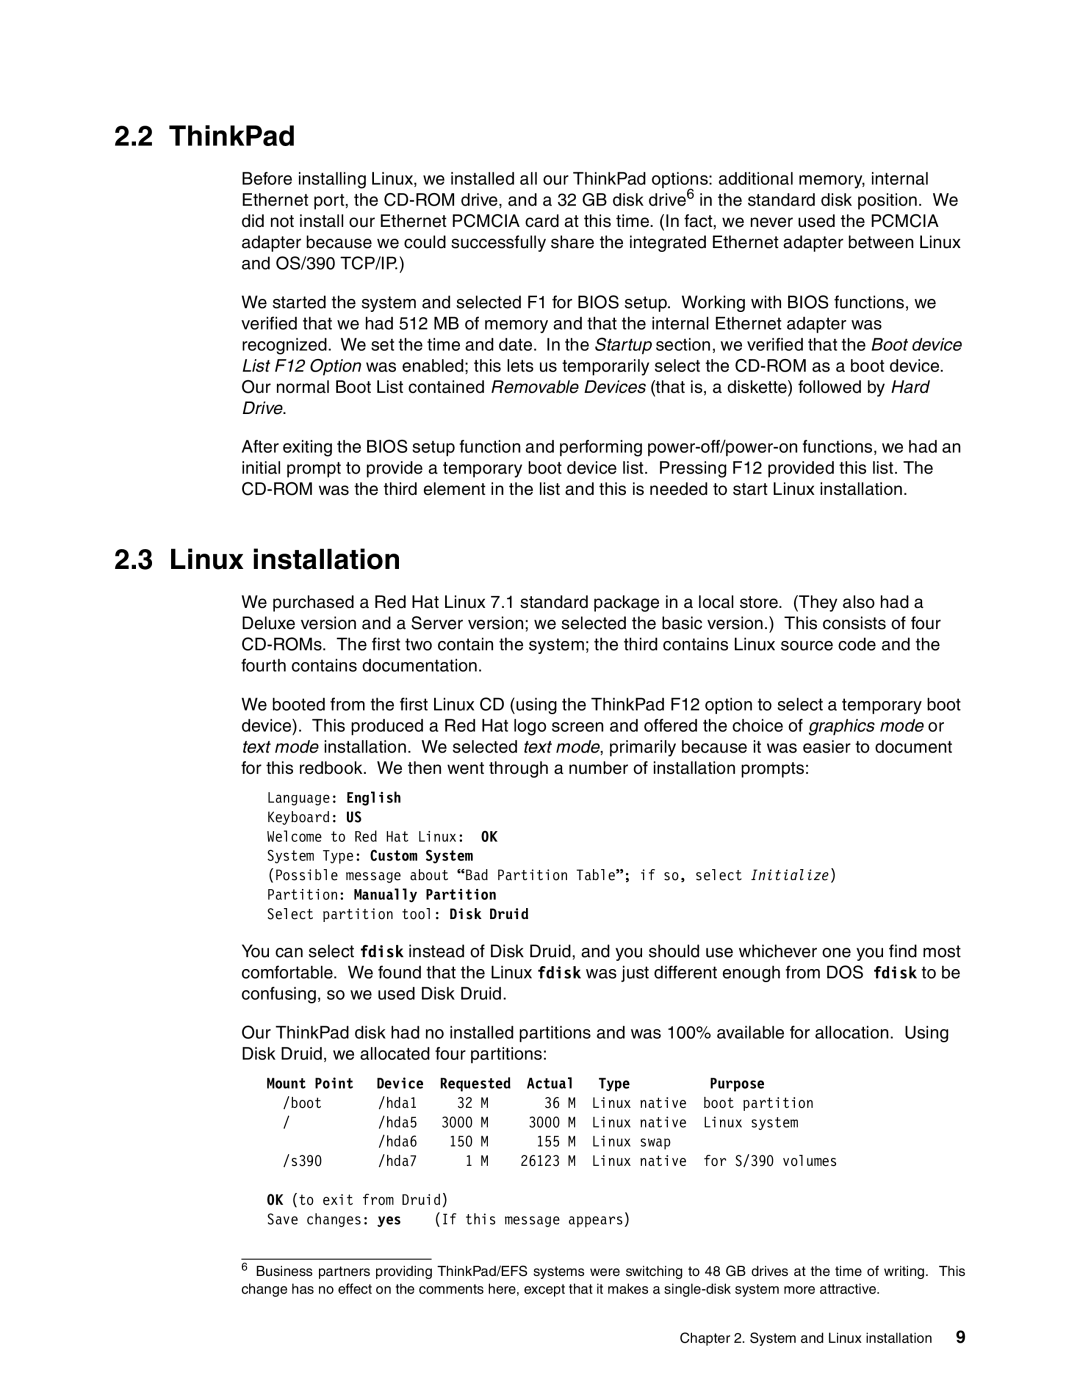
We booted from the first Linux CD (using the ThinkPad F12 option to select a temporary boot device). This produced a Red Hat logo screen and offered the choice of graphics mode or text mode installation. We selected text mode, primarily because it was easier to document for this redbook. We then went through a number of installation prompts:
Language: English
Keyboard: US
Welcome to Red Hat Linux: OK
System Type: Custom System
(Possible message about “Bad Partition Table”; if so, select Initialize)
Partition: Manually Partition
Select partition tool: Disk Druid
You can select fdisk instead of Disk Druid, and you should use whichever one you find most comfortable. We found that the Linux fdisk was just different enough from DOS fdisk to be confusing, so we used Disk Druid.
Our ThinkPad disk had no installed partitions and was 100% available for allocation. Using Disk Druid, we allocated four partitions:
Mount Point | Device | Requested | Actual | Type |
| Purpose | ||
/boot | /hda1 | 32 | M | 36 | M | Linux | native | boot partition |
/ | /hda5 | 3000 | M | 3000 | M | Linux | native | Linux system |
| /hda6 | 150 | M | 155 | M | Linux | swap |
|
/s390 | /hda7 | 1 | M | 26123 | M | Linux | native | for S/390 volumes |
OK (to exit from Druid) |
|
|
|
|
|
| ||
Save changes: yes | (If this message appears) |
|
| |||||
6Business partners providing ThinkPad/EFS systems were switching to 48 GB drives at the time of writing. This change has no effect on the comments here, except that it makes a
Chapter 2. System and Linux installation | 9 |