Installation Instructions | |
|
|
Projector Installation
WARNING: Exceeding the weight capacity can result in serious personal injury or damage to equipment! It is the installer’s responsibility to make sure the weight of the projector does not exceed 25 lbs (11.3 kg).
1.Insert and slightly tighten two M4 x 8mm Phillips pan head screws (HA) into the projector threaded inserts. (See Figure 13)
| (projector example |
| only) |
1 | (HA) x 2 |
| Back of |
| projector |
Figure 13
2.Raise the projector up to the projector arm and slide two screws into slots on the projector arm. (See Figure 14)
3.Add one remaining M4 x 8mm Phillips pan head screw (HA) through the projector arm and into the projector. (See Figure 14)
4.Tighten all three fasteners.
5.Slide projector along short throw projector arm until image is the correct size on screen.
3 | (HA) x 1 |
| Projector |
| 2 |
Figure 14
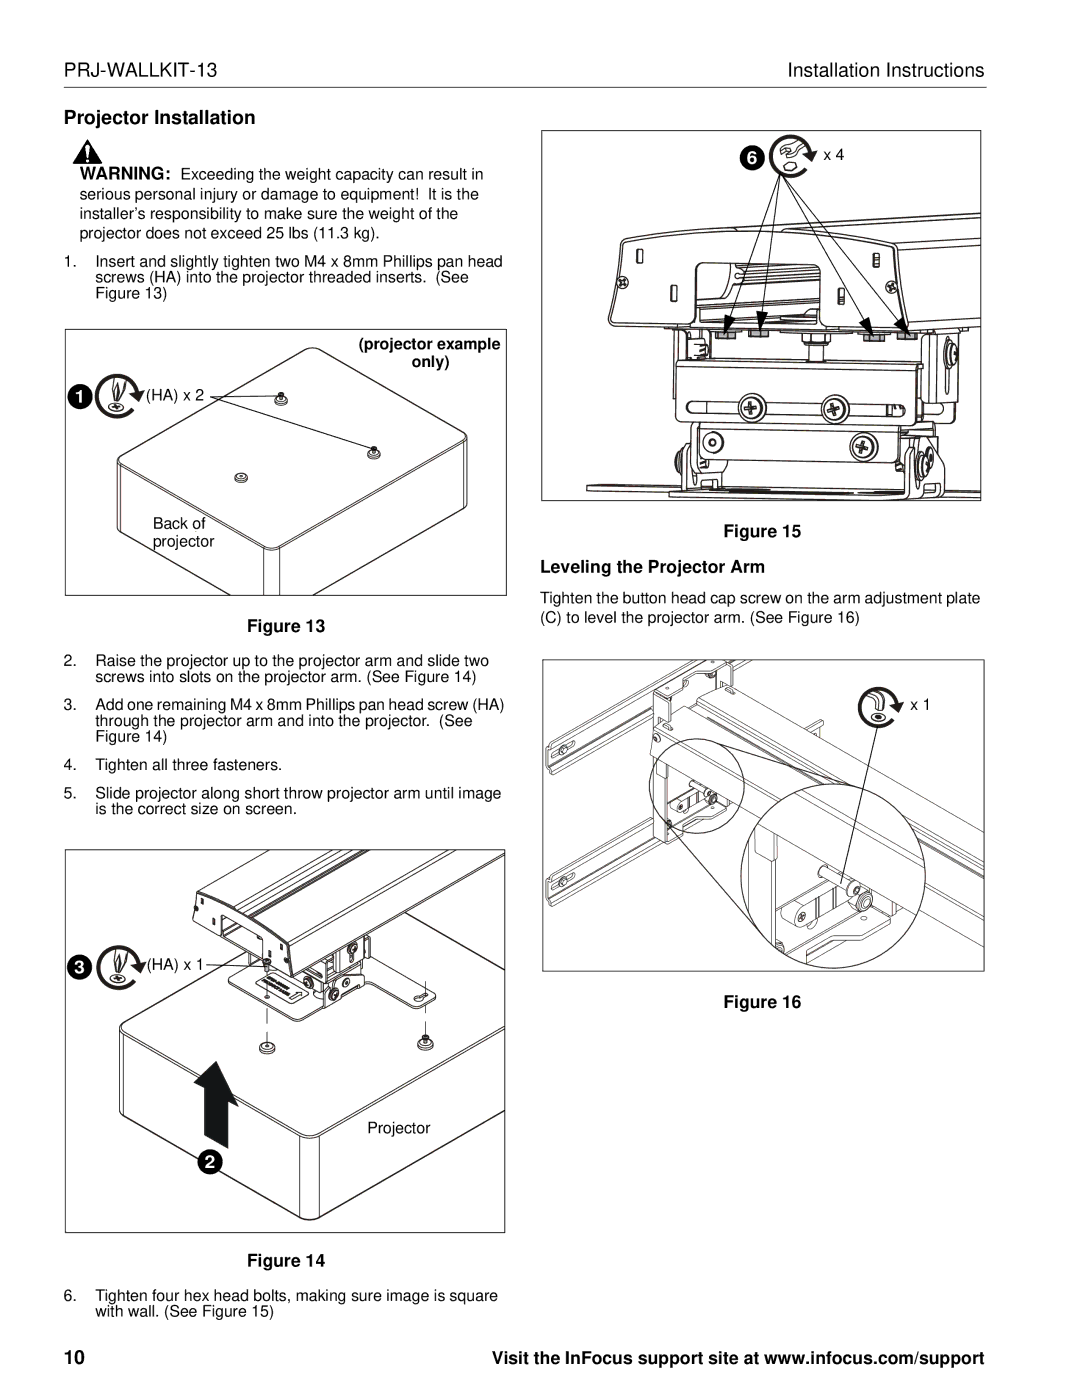
6.Tighten four hex head bolts, making sure image is square with wall. (See Figure 15)
6 | x 4 |
Figure 15
Leveling the Projector Arm
Tighten the button head cap screw on the arm adjustment plate
(C) to level the projector arm. (See Figure 16)
x 1 |
Figure 16
10 | Visit the InFocus support site at www.infocus.com/support |