|
|
| Installation Instructions | ||||
|
|
|
|
|
|
|
|
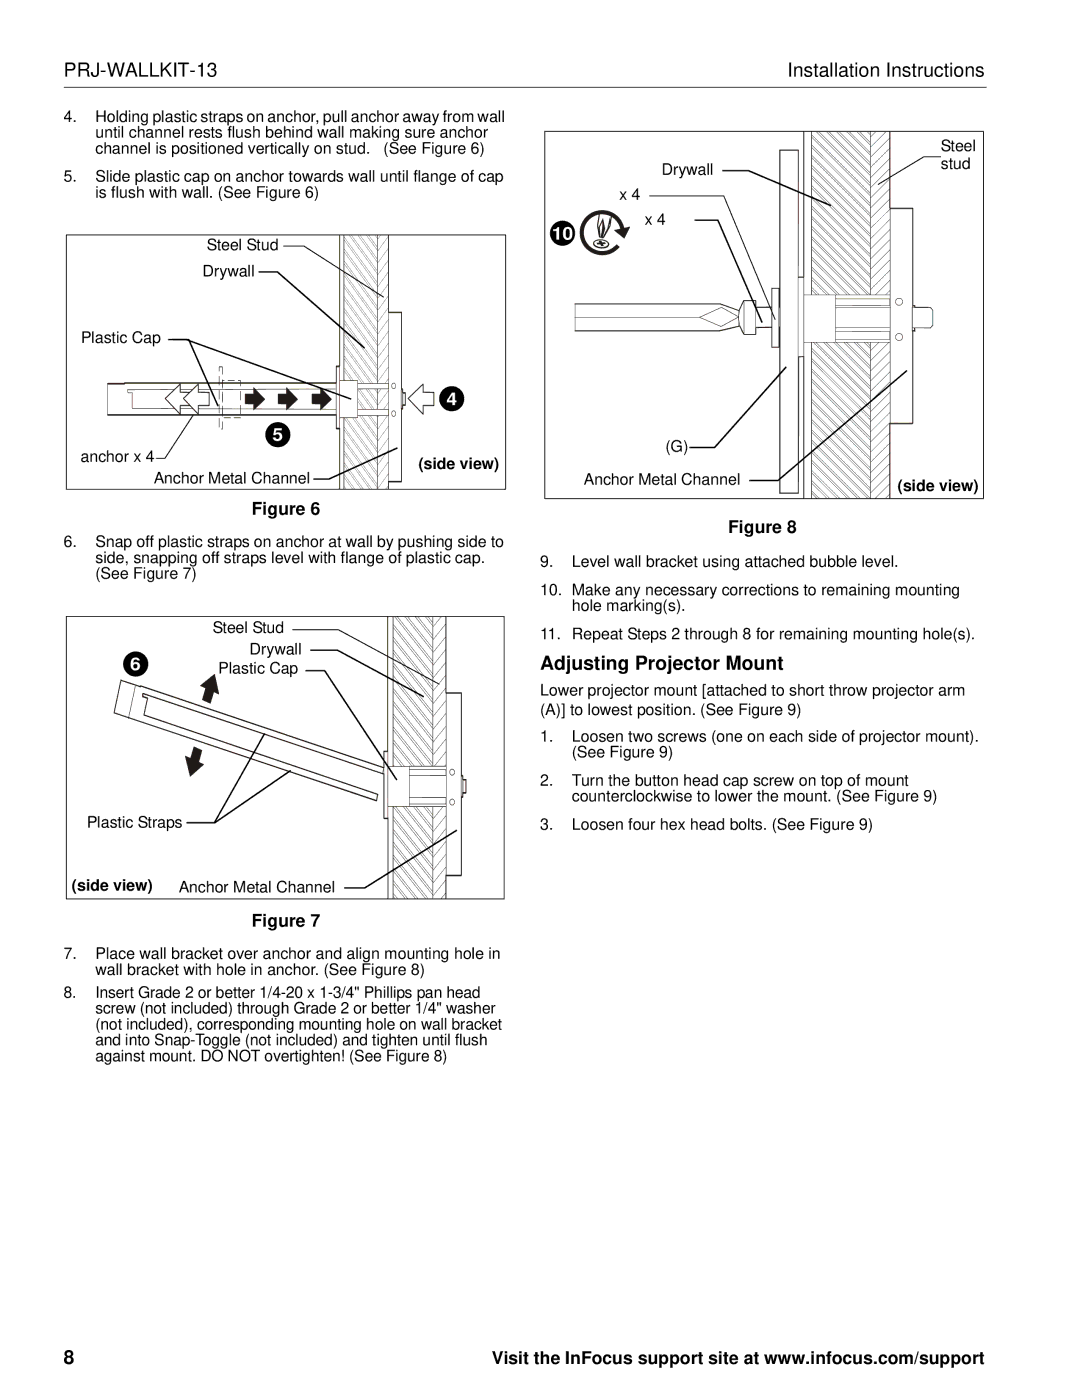
4. | Holding plastic straps on anchor, pull anchor away from wall |
|
|
|
|
|
|
| until channel rests flush behind wall making sure anchor |
|
|
|
|
|
|
|
|
|
|
| Steel | ||
| channel is positioned vertically on stud. (See Figure 6) |
|
|
|
| ||
5. | Slide plastic cap on anchor towards wall until flange of cap |
| Drywall |
| stud | ||
|
|
|
| ||||
| is flush with wall. (See Figure 6) | x 4 |
|
|
|
|
|
|
|
|
|
| |||
|
|
| 10 | x 4 |
| |
|
| Steel Stud |
|
| ||
|
|
|
|
|
| |
|
| Drywall |
|
|
|
|
| Plastic Cap |
|
|
|
|
|
|
| 4 |
|
|
|
|
| anchor x 4 | 5 |
|
| (G) |
|
| (side view) |
|
|
| ||
|
|
|
|
| ||
| Anchor Metal Channel |
|
| Anchor Metal Channel | (side view) | |
|
| Figure 6 |
|
|
| |
|
|
|
| Figure 8 |
| |
6. | Snap off plastic straps on anchor at wall by pushing side to |
|
|
| ||
|
|
|
| |||
| side, snapping off straps level with flange of plastic cap. | 9. | Level wall bracket using attached bubble level. | |||
| (See Figure 7) |
| 10. Make any necessary corrections to remaining mounting | |||
|
|
| ||||
|
|
|
| hole marking(s). |
| |
|
| Steel Stud | 11. Repeat Steps 2 through 8 for remaining mounting hole(s). | |||
|
| Drywall | ||||
| 6 | Adjusting Projector Mount |
| |||
| Plastic Cap |
| ||||
|
|
| Lower projector mount [attached to short throw projector arm | |||
|
|
| (A)] to lowest position. (See Figure 9) |
| ||
|
|
| 1. Loosen two screws (one on each side of projector mount). | |||
|
|
|
| (See Figure 9) |
| |
|
|
| 2. Turn the button head cap screw on top of mount | |||
|
|
|
| counterclockwise to lower the mount. (See Figure 9) | ||
| Plastic Straps |
| 3. | Loosen four hex head bolts. (See Figure 9) |
| |
(side view) Anchor Metal Channel |
|
|
|
| ||
Figure 7
7.Place wall bracket over anchor and align mounting hole in wall bracket with hole in anchor. (See Figure 8)
8.Insert Grade 2 or better
8 | Visit the InFocus support site at www.infocus.com/support |