4. MAINTENANCE
This section describes the simple maintenance procedures you should follow to replace the lamp.
Replacing the Lamp
After your lamp has been operating for 1500 hours (1000 hours in
CAUTION
•DO NOT TOUCH THE LAMP immediately after it has been used. It will be extremely hot. Turn the projector off, wait 90 seconds, and then disconnect the power cable. Allow at least one hour for the lamp to cool before handling.
•DO NOT REMOVE ANY SCREWS except the lamp cover screw and three lamp case screws. You could receive an elec- tric shock.
•The projector will turn off and go into stand by mode after 1600 hours (1100 hours in
To replace the lamp:
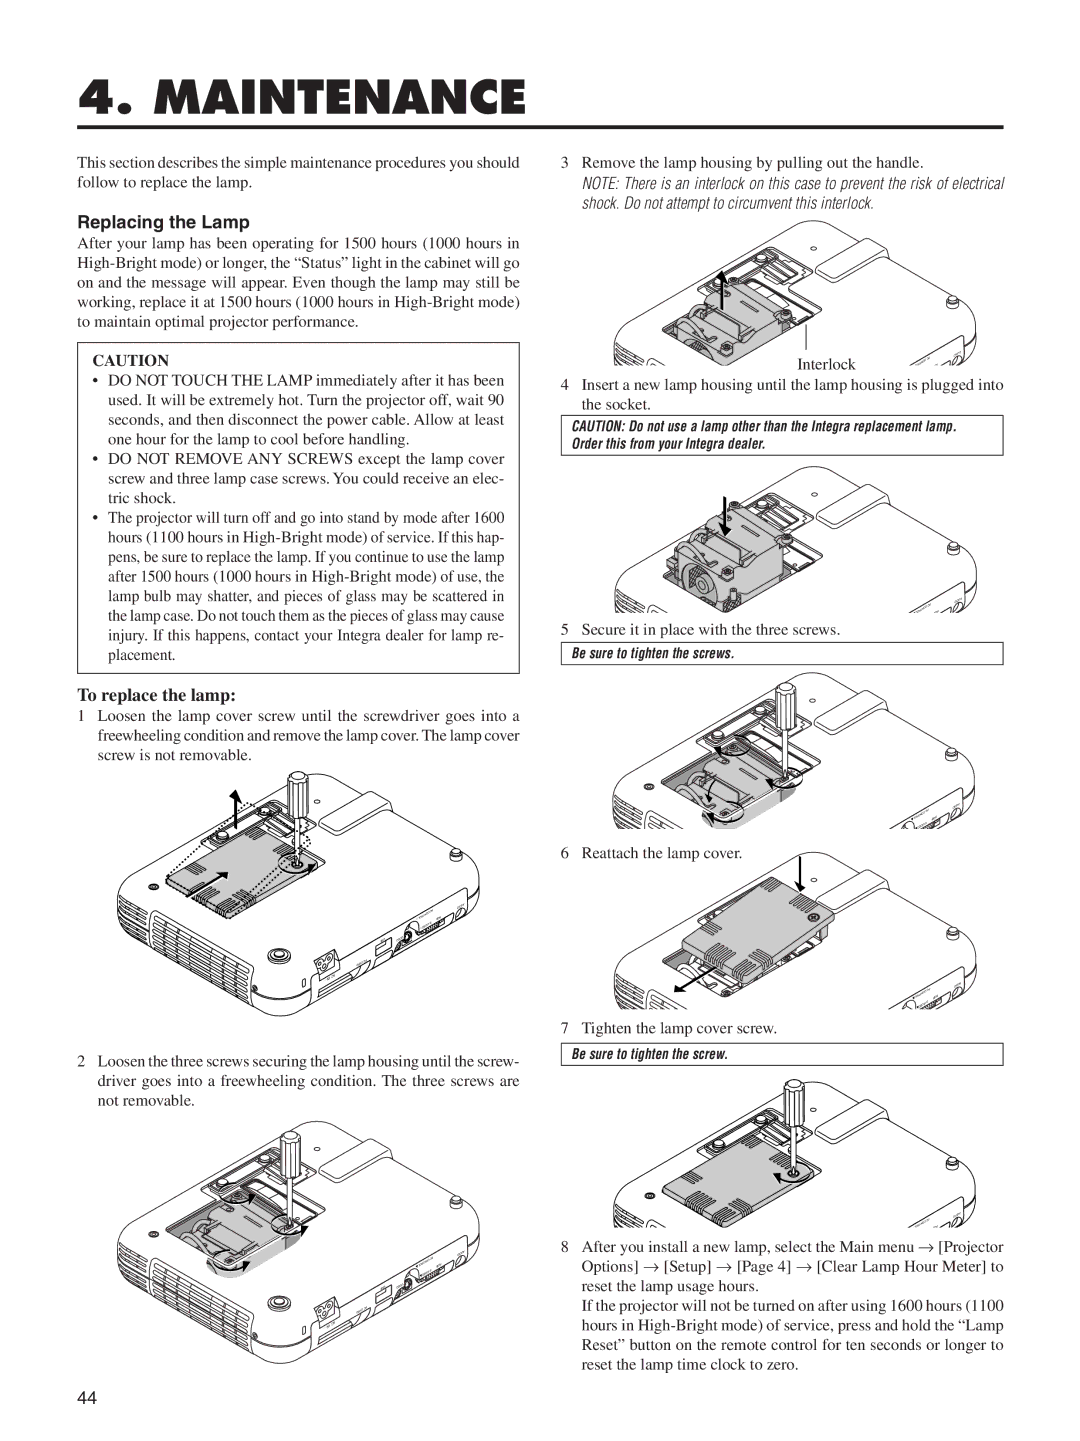
1Loosen the lamp cover screw until the screwdriver goes into a freewheeling condition and remove the lamp cover. The lamp cover screw is not removable.
IODU | A |
|
|
| NOC | C P |
| ORT |
| |
L |
| BGR | |
| OE | IDV- S | |
BSU | OED | IV |
|
DRA | C CP |
|
AC
IN
2Loosen the three screws securing the lamp housing until the screw- driver goes into a freewheeling condition. The three screws are not removable.
IOD | UA |
|
| NOC | C P |
|
| ORT |
| R | |
L |
|
| BG |
|
IDV- | S |
OE |
|
B S | U | OE | IDV |
DRA | C CP |
|
AC
IN
3Remove the lamp housing by pulling out the handle.
NOTE: There is an interlock on this case to prevent the risk of electrical shock. Do not attempt to circumvent this interlock.
AUDIO
Interlock |
| PC |
ROL | CONT | |
| RG |
4Insert a new lamp housing until the lamp housing is plugged into the socket.
CAUTION: Do not use a lamp other than the Integra replacement lamp. Order this from your Integra dealer.
AUDIO
| PC |
CONTR | RGB |
OL |
5 Secure it in place with the three screws.
Be sure to tighten the screws.
IODU | A |
|
| NOC | C P |
| OR T |
| |
L |
| BGR | |
|
| IDV- | S |
| OE |
|
|
6 Reattach the lamp cover.
IOD | U A |
|
|
| OC | CP |
|
| OR | TN |
|
| R |
L |
|
|
| BG |
|
|
| IDV- | S |
| |
|
| OE |
|
|
|
7 Tighten the lamp cover screw.
Be sure to tighten the screw.
AUDIO
| PC |
CONTR | RGB |
OL |
8After you install a new lamp, select the Main menu → [Projector Options] → [Setup] → [Page 4] → [Clear Lamp Hour Meter] to reset the lamp usage hours.
If the projector will not be turned on after using 1600 hours (1100 hours in
44